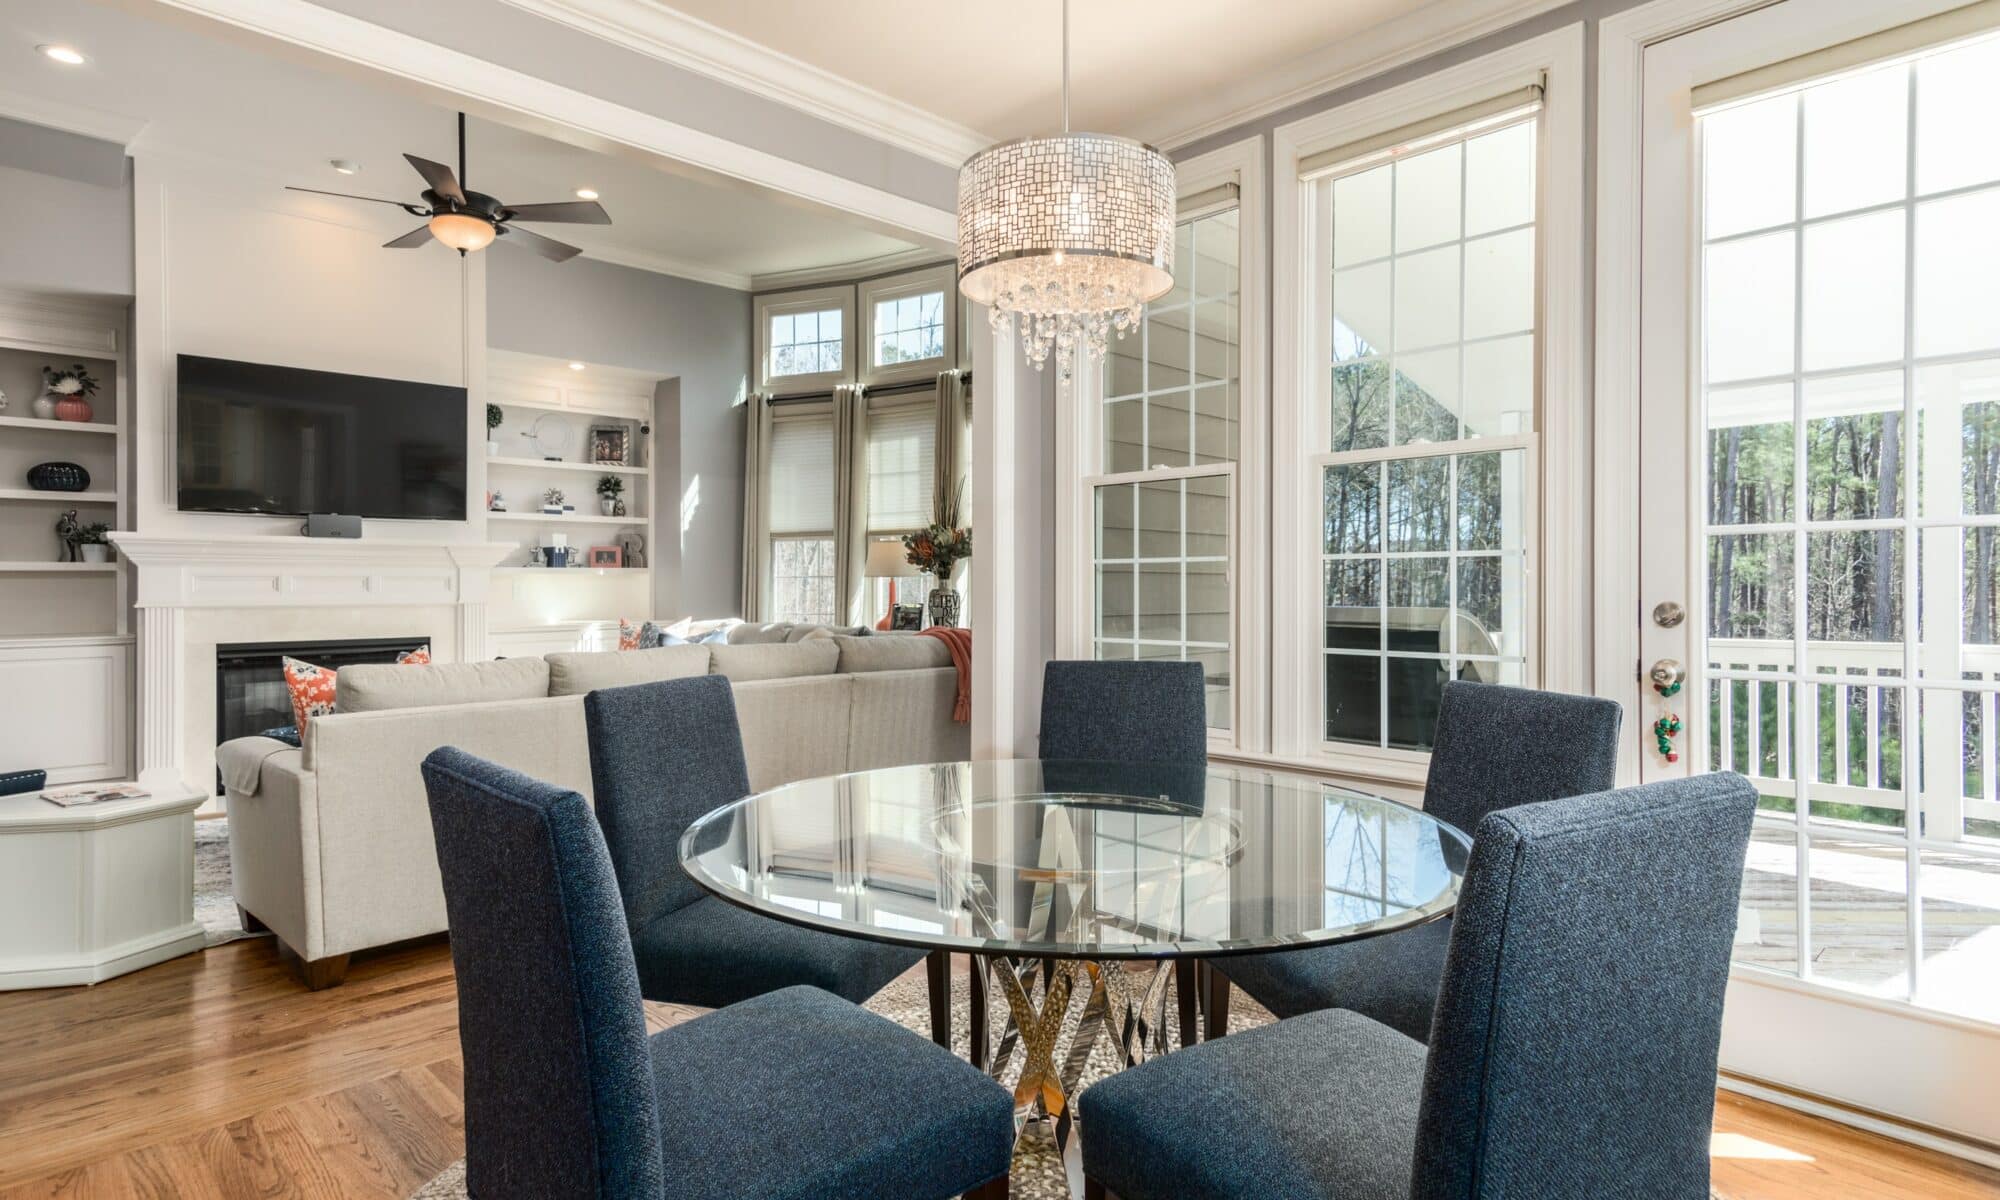
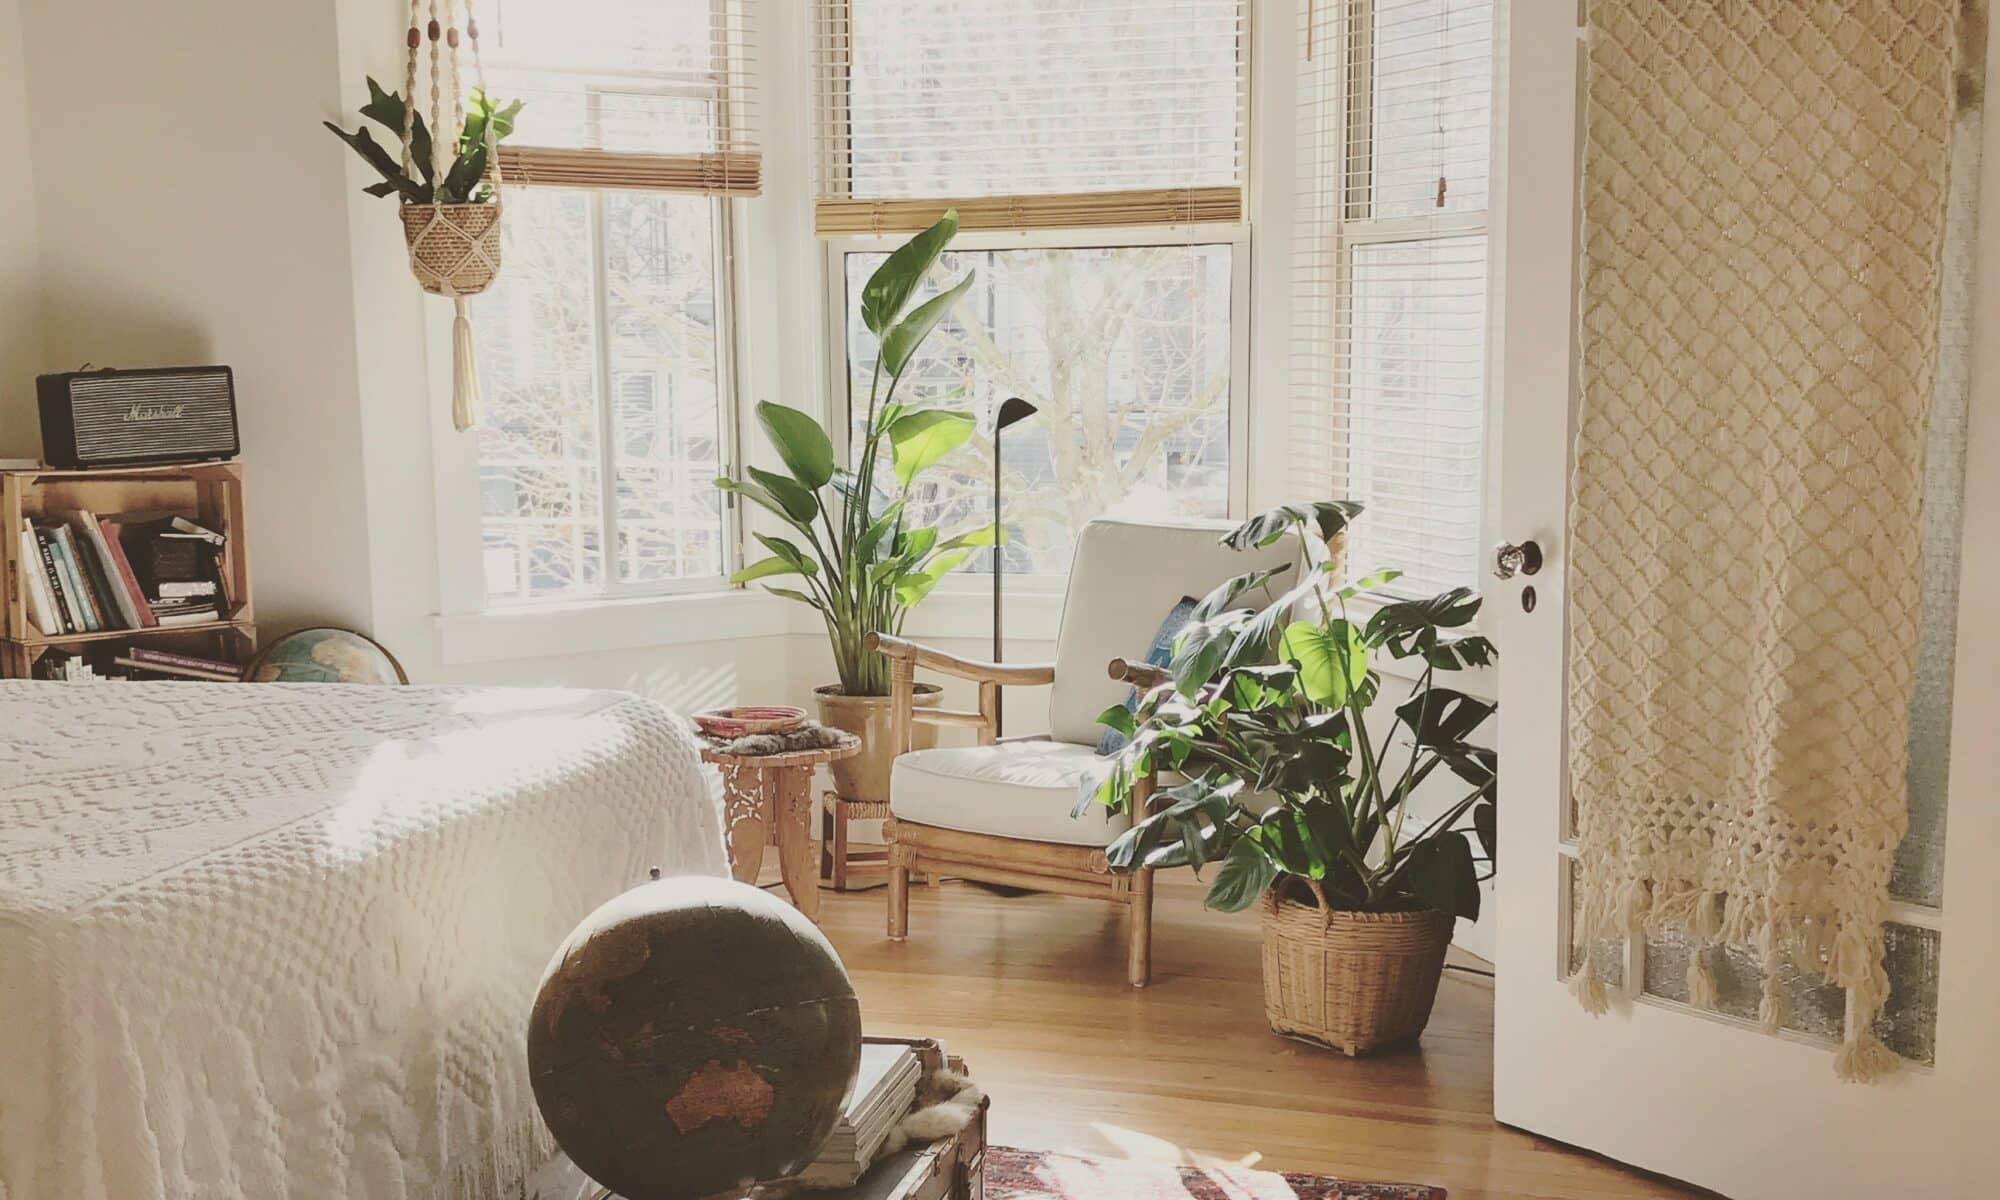
Enhance Your Propertys Appeal: Professional Painting Solutions in Dublin

Introduction to Professional Painting in Dublin

Dublin’s vibrant cityscape is continually evolving, and the appearance of its residential and commercial properties plays a significant role in this dynamic progression. Professional painting services are a cornerstone in maintaining and enhancing the visual and structural integrity of properties in Ireland’s capital.

The Importance of Professional Painting for Properties

Professional painting is more than just a cosmetic upgrade; it’s an investment in the upkeep and preservation of a property. Property owners who choose professional painting solutions benefit from the expertise and precision that come with seasoned painters. These services contribute to safeguarding the property against weathering, decay, and other environmental factors that can affect the Dublin area.

A fresh coat of paint applied by professionals can also assist in the early detection of potential issues, such as moisture damage or insect infestations, that might otherwise go unnoticed. For insights into maximizing property value through painting, readers can explore the article on maximizing property value with Dublin’s professional painters.

The Impact of Painting on Property Appeal

The aesthetic appeal of a property is significantly influenced by its exterior and interior paint job. A professionally painted property stands out with a finish that reflects quality and attention to detail, making it attractive to potential buyers, renters, and customers. For commercial entities, the right paint job can enhance brand identity and create a welcoming atmosphere for clients.

Residential property owners looking to renovate their spaces can find valuable information in top professional painters in Dublin for home renovations. Similarly, commercial property owners can discover how to transform their spaces with Dublin’s premier professional painting services for businesses.

The choice to engage professional painters is a pivotal decision for any property owner in Dublin. It ensures that the property not only looks its best but is also protected and preserved for the future. Whether the goal is to refresh a home, revitalize a commercial space, or prepare a property for the market, professional painting solutions offer a blend of aesthetic and functional benefits that can cater to the diverse needs of Dublin’s properties.

Scope of Professional Painting Solutions in Dublin

Dublin’s property market caters to diverse needs, from quaint residential homes to sprawling commercial complexes and robust industrial facilities. Professional painting services in Dublin are well-equipped to enhance the aesthetic appeal and value of properties across these varied sectors.

Residential Painting Services

Professional painting services for residential properties in Dublin provide homeowners with a range of options to transform their living spaces. Expert painters cater to interior and exterior painting needs, ensuring that each home reflects the owner’s style and sophistication. Services typically include:

  • Interior painting, including walls, ceilings, and trim
  • Exterior painting, including facade, doors, and window frames
  • Deck and fence painting or staining

To understand how these services can maximize property value, consider reading maximizing property value with Dublin’s professional painters. Homeowners looking to renovate can find valuable insights at top professional painters in Dublin for home renovations. Those aiming for a complete transformation of their residence might explore transform your home with Dublin’s best professional painters.

Commercial Painting Services

Dublin’s commercial properties, including office buildings, retail spaces, and hospitality venues, require painting solutions that align with their brand image and customer expectations. Professional painters offer services that cover:

  • Interior commercial spaces tailored to business branding
  • Exterior commercial painting for facades and signage
  • Specialty coatings for durability in high-traffic areas

Business owners and property managers seeking to understand the benefits of professional services can refer to discover Dublin’s premier professional painting services for businesses. For insights on the effect of painting on real estate, professional painters in Dublin: making real estate shine is an excellent resource.

Industrial Painting Services

Industrial painting services in Dublin address the unique demands of factories, warehouses, and other large-scale facilities. These services focus on protective and functional coatings that are essential for maintaining the integrity of industrial properties. Offerings include:

  • Epoxy and polyurethane floor coatings
  • Machinery and equipment painting
  • Structural steel and metalwork painting

Managers of industrial properties can benefit from the expertise highlighted in professional painters in Dublin: expertise for every project. Additionally, professional painters in Dublin: quality services for property managers provides guidance tailored to the needs of property management professionals.

The breadth of painting solutions available in Dublin ensures that every property, no matter its use, can be enhanced to meet aesthetic goals and functional requirements. With a focus on quality, durability, and attention to detail, Dublin’s professional painters are equipped to handle the diverse needs of the city’s vibrant property landscape.

Benefits of Hiring Professional Painters for Dublin Properties

Enlisting the services of skilled painters can transform the aesthetic appeal and functionality of properties in Dublin. This section outlines the advantages of hiring professional painters, providing insights for homeowners, real estate developers, and commercial property owners.

Quality and Expertise

Professional painters bring a level of quality and expertise that is difficult to match with DIY efforts. These experts possess the necessary skills and knowledge to handle various painting projects, ensuring that each job is completed to the highest standard. They are adept at surface preparation, choosing the right paint types, and applying them with precision.

Time Efficiency

One of the most significant benefits of hiring professional painters is their ability to complete projects within a set timeframe. They have the experience to estimate the duration of a project accurately and work diligently to meet deadlines. This time efficiency is particularly beneficial for commercial property owners who need to minimize disruptions to their operations.

Longevity and Durability

When it comes to professional painting solutions, longevity and durability are key considerations. Expert painters use high-quality paints and materials that are designed to withstand Dublin’s weather conditions, providing a long-lasting finish that maintains its appearance over time. This durability translates into cost savings, as the need for frequent touch-ups or repaints is reduced.

Customization and Personalization

Professional painters offer a level of customization and personalization that allows property owners to achieve the exact look they desire. Whether it’s selecting a unique color palette or incorporating specific design elements, skilled painters can bring a client’s vision to life. This bespoke approach enhances the property’s appeal and can reflect the owner’s personal style or brand identity.

By choosing professional painting services, Dublin property owners can reap the benefits of impeccable quality, time efficiency, lasting durability, and tailored designs. Moreover, these services can significantly contribute to maximizing property value and making real estate shine. For those considering a renovation or upgrade, exploring Dublin’s best professional painters can be a step towards achieving an enhanced, sophisticated property.

Preparing for Professional Painting Services

Before the arrival of professional painters in Dublin, property owners should take the necessary steps to ensure a smooth and successful painting experience. This preparation can help to maximize efficiency and minimize disruptions during the painting process.

Assessing Your Property’s Needs

The first step is to evaluate the condition of your property and its painting requirements. Consider factors such as the age of your current paint job, visible wear and tear, and whether you’re looking for a fresh new look or simply a touch-up. This assessment will guide you in discussing with the painters the scope of the project, from selecting appropriate colors to choosing durable paint options that can withstand Dublin’s weather.

To make the most of your investment, you could also seek advice on maximizing property value with Dublin’s professional painters. They can recommend styles and color schemes that enhance curb appeal and potentially increase the property’s market value.

Planning and Scheduling the Painting Process

Once you’ve identified your property’s painting needs, the next step is to plan and schedule the service. Professional painters will work with you to establish a timeline that minimizes interference with your daily activities. For commercial properties, it may be essential to schedule work after business hours or during weekends to prevent disruptions to operations.

Contact top professional painters in Dublin for home renovations to discuss the best time for your project and ensure that the work is completed within the agreed timeframe.

Preparing Your Space for Painters

Preparation is key to a successful paint job. Before the professional team arrives, clear the area of furniture and personal items to create a clean workspace. For interior projects, this might mean relocating furniture to the center of the room and covering it with drop cloths. For exterior projects, ensure that any landscaping is trimmed back and that outdoor furniture is moved away from the walls.

Preparation Task Description
Furniture Relocation Move to the center or another room
Wall Hangings Remove paintings, mirrors, and decor
Outlet Covers Remove covers for a cleaner paint line
Cleaning Dust and wash surfaces to be painted

By taking these steps, you can help ensure that the painters can begin work promptly and that your belongings are protected from paint splatters. For more guidance on preparing your home for painting, check out transform your home with Dublin’s best professional painters.

Proper preparation is crucial for a seamless painting experience. By assessing your needs, planning the project, and preparing your space, you can work effectively with professional painters to enhance the appeal of your property in Dublin.

The Process of Professional Painting

Professional painting is much more than just applying a fresh coat of paint; it’s an intricate process that demands meticulous preparation and expertise. The process ensures not only an aesthetically pleasing result but also a durable finish that can withstand Dublin’s unique weather conditions.

Surface Preparation

The initial and most crucial step in the painting process is surface preparation. A surface that is well-prepared will ensure maximum adhesion of the paint, which is essential for a long-lasting finish. Professional painters will first assess the condition of the surfaces to identify any repairs needed, such as filling holes or fixing cracks. Surfaces are then thoroughly cleaned to remove any dirt, grease, or existing loose paint. Sanding may be necessary to create a smooth base for painting.

Task Description
Cleaning Removal of surface contaminants
Repairing Filling holes and cracks
Sanding Smoothing the surface

Choosing the Right Paints and Materials

Selecting the appropriate paints and materials is paramount for achieving optimal results. The choice will depend on various factors, including the surface material, the desired finish, and the paint’s durability, especially in fluctuating weather conditions. High-quality paints and primers provide better coverage, longevity, and resistance to fading and weathering. The selection process might involve choosing between water-based and oil-based paints, as well as between different sheens, from matte to high gloss.

For insights on how professional painting can boost property appeal and value, consider reading maximizing property value with Dublin’s professional painters.

Application Techniques

Once the surface is prepared and the right materials are chosen, the actual painting can commence. Professional painters employ various application techniques to ensure a uniform and smooth finish. Brushing and rolling are the most common methods for interior walls, while spraying might be used for larger, exterior surfaces or for achieving a finer finish.

Professionals also understand the importance of applying the correct number of coats and allowing sufficient drying time between each coat. It’s this attention to detail that differentiates professional work from DIY attempts.

For more information on what sets professional painters apart, have a look at why Dublin homeowners prefer our professional painting services.

The process of professional painting, when done correctly, not only enhances the appeal of a property but also protects it from environmental elements and contributes to its longevity. Whether for residential, commercial, or industrial properties, professional painting solutions provide quality and durability that cannot be overlooked.

Maintaining Your Property’s Paint Job

Maintaining the condition of your property’s paintwork is crucial for preserving its aesthetic appeal and structural integrity. Proper maintenance not only enhances the longevity of the paint job but also ensures that properties in Dublin continue to exude charm and character.

Regular Maintenance Tips

To keep paint looking fresh and extend its lifespan, regular maintenance is key. Here are some tips to preserve the quality of your paint job:

  • Cleaning: Gently wash walls annually with a soft cloth and mild detergent to remove dust, dirt, and grime.
  • Inspections: Regularly inspect for signs of peeling, chipping, or cracking. Early detection can prevent more extensive damage.
  • Touch-Ups: Address minor damages promptly with touch-up painting to maintain a uniform appearance.
  • Mold and Mildew: In damp conditions, watch for mold and mildew. Clean affected areas with a specialized solution and repaint if necessary.

By adhering to these maintenance guidelines, homeowners and property managers can ensure the longevity and vibrancy of their paintwork. For more insights on maximizing property value through painting, explore our article on maximizing property value with Dublin’s professional painters.

Addressing Wear and Tear

Over time, paintwork will inevitably experience some wear and tear due to various factors, including weather conditions and daily wear. When you notice the following signs, it’s time to take action:

  • Peeling or Flaking: Indicates that the paint is no longer adhering properly to the surface.
  • Fading: Sun exposure can lead to a loss of vibrancy in the paint’s color.
  • Cracking or Crazing: These could be signs of paint film failure.

If these issues are present, it may be necessary to consult Dublin’s go-to professional painters for exterior and interior projects to assess the extent of the damage and recommend solutions.

When to Consider a Fresh Coat

Repainting your property can bring new life to its appearance and offer protection against the elements. Consider the following table as a guideline for when to repaint:

Surface Repaint Frequency
Wood Siding Every 3-7 years
Aluminum Siding Every 5 years
Stucco Every 5-6 years
New Types of Materials Every 10-15 years

However, the specific timing can vary based on factors such as paint quality, previous surface preparation, and exposure to harsh weather. For personalized advice on repainting, consult with experts who specialize in professional painting solutions for Dublin’s commercial properties.

Maintaining a paint job is an ongoing task that requires attention to detail and proactive care. By following these maintenance tips, addressing wear and tear promptly, and knowing when to apply a fresh coat, property owners can ensure that their investment remains attractive and well-protected for years to come. For assistance with any painting project, consider reaching out to professional painters in Dublin who can provide expertise for every project.

Professional Painting and Dublin’s Weather Conditions

Dublin’s unique weather patterns present specific challenges for painting exteriors. Understanding these conditions and adopting best practices is crucial for achieving durable and long-lasting paintwork on properties.

Weather Considerations for Exterior Painting

In Dublin, the climate is characteristically mild but can be unpredictable, with frequent rainfall and changes in humidity and temperature. These factors can greatly affect paint application and drying times. For exterior painting, it’s imperative to consider:

  • Humidity: High humidity levels can prolong drying times and affect paint adhesion.
  • Temperature: Paint should not be applied in temperatures too low or too high, as it can cause improper drying and lead to cracking or peeling.
  • Rainfall: Scheduling painting during drier periods is crucial to prevent water damage and ensure proper curing of the paint.

Choosing the right time for painting is as important as the choice of paint itself. Here’s a brief overview of Dublin’s weather patterns to guide scheduling:

Month Average High Temp (°C) Average Rainfall (mm) Suggested Painting Period
January 8 70 Not Recommended
April 12 50 Ideal
July 20 50 Ideal
October 14 70 Caution

Best Practices for Durable Results

To ensure that the professional painting solutions for Dublin’s commercial properties withstand the local weather, the following best practices should be adopted:

  1. Proper Timing: Schedule exterior painting projects during warmer and drier months, typically between late spring and early autumn, to avoid the wetter seasons.
  2. Quality Paints: Use high-quality paints formulated to resist the local weather conditions, including moisture and UV radiation.
  3. Expert Surface Preparation: Ensure thorough cleaning and priming of surfaces to enhance paint adhesion and longevity. Learn more about surface preparation from professional painters in Dublin: expertise for every project.
  4. Correct Application: Employ professional painters who understand the importance of the correct application techniques suitable for Dublin’s climate. This includes applying the right number of coats and allowing sufficient drying time between them.
  5. Regular Maintenance: Establish a maintenance routine to keep the paintwork in optimal condition, protecting it from the weather elements. For maintenance tips, check out maintaining your property’s paint job.

By considering Dublin’s weather conditions and adhering to best practices, property owners can ensure that their investment in professional painting yields appealing, durable results. Whether enhancing residential, commercial, or industrial properties, the expertise of professional painters can significantly contribute to maintaining a property’s aesthetic and structural integrity in the face of Dublin’s climate. Discover the benefits of hiring professionals by exploring Dublin’s go-to professional painters for exterior and interior projects.

Enhancing Commercial Properties

Enhancing commercial properties through professional painting solutions can significantly impact the visual appeal, brand representation, and overall ambiance of a business space in Dublin. The choice of color and application techniques play a vital role in creating the right impression and atmosphere for both employees and customers.

The Role of Color in Commercial Spaces

Color psychology is an essential consideration for commercial spaces as different colors can evoke various emotions and behaviors. Professional painting solutions enable businesses to leverage these psychological effects, enhancing the functionality and mood of their commercial environments.

Color Psychological Effect
Blue Productivity and tranquility
Green Balance and growth
Yellow Energy and creativity
Red Urgency and appetite stimulation
Neutral Tones Sophistication and calm

Incorporating brand colors into commercial spaces can also reinforce corporate identity and create memorable experiences for visitors. The strategic use of color can guide customer behavior, highlight architectural features, and even influence perceptions of space and size.

Painting Solutions for Different Types of Commercial Spaces

The diversity of commercial spaces in Dublin calls for tailored painting solutions that cater to the unique needs of each business sector. Professional painters possess the expertise to recommend and apply the correct type of paint and finishes for various commercial settings.

Retail Spaces

Retail spaces require dynamic and inviting colors that enhance the shopping experience and highlight merchandise. Durable paint finishes that can withstand high foot traffic are recommended.

Offices and Corporate Buildings

These spaces benefit from colors that promote focus and efficiency. Low-VOC (volatile organic compounds) paints are often used to ensure better air quality for the well-being of employees.

Restaurants and Hospitality

Ambiance is paramount in these spaces, with color schemes often reflecting the culinary theme or desired dining experience. Easy-to-clean and resistant paint finishes are ideal due to frequent cleaning.

Healthcare Facilities

Hygienic paint solutions with antimicrobial properties are suitable for healthcare settings, with color choices that promote a sense of calm and cleanliness.

Educational Institutions

Bright and stimulating colors are often used in educational facilities to create an environment conducive to learning and engagement.

Professional painting solutions for Dublin’s commercial properties are diverse, and the right choice depends on the specific goals and functions of each commercial space. For more insights on maximizing property value with professional painting, visit our article on maximizing property value with Dublin’s professional painters. Property managers seeking quality services can explore professional painters in Dublin: quality services for property managers.

By working with skilled painters in Dublin, commercial property owners can ensure that their spaces are not only aesthetically pleasing but also aligned with their business objectives. Whether refreshing an existing space or undertaking a new project, professional painters have the know-how to deliver exceptional results that reflect a company’s vision and ethos. Explore the possibilities with Dublin’s go-to professional painters for exterior and interior projects by visiting Dublin’s go-to professional painters for exterior and interior projects.

Master the Art: 7 Essential Tips for Painting Your Homes Wood Siding

7 tips for painting your home’s wood siding exterior

Painting Your Home’s Wood Siding: An Introduction

Hey there, homeowner! Are you looking to give your home a fresh, vibrant look? Then you’re in the right place. This guide presents you with 7 tips for painting your home’s wood siding exterior. But first, let’s understand why exterior paint is so important and why wood siding requires special attention.

Understanding the Importance of Exterior Paint

The exterior paint of your home is more than just about aesthetics. It plays a crucial role in protecting your home against various elements. A good paint job can protect your wood siding from moisture, UV rays, and even insects. Plus, it can significantly enhance your home’s curb appeal and increase its market value. Don’t believe us? Check out our article detailing the top 7 benefits of painting your home’s exterior.

Why Wood Siding Requires Special Attention

Wood siding, though charming and timeless, requires a different approach when it comes to painting. Wood is a porous material, meaning it can absorb moisture, leading to rot and decay over time. This is why a proper paint job is essential for wood siding – it acts as a sealant, preventing moisture from penetrating the wood.

But there’s more to it. Wood siding also tends to expand and contract with changes in temperature and humidity. This can cause the paint to crack and peel, leading to a less-than-ideal appearance. Hence, choosing the right type of paint and applying it correctly is crucial for ensuring the longevity of your paint job on wood siding.

So, are you ready to start your painting project? Great! Keep reading for some expert tips and tricks to help you master the art of painting your home’s wood siding. And remember, if you ever feel overwhelmed, a professional house painter contractor is just a call away. They can provide you with the expertise needed to ensure your home looks its best.

Tip 1: Properly Preparing the Surface

Before you dive into painting your home’s wood siding, it’s crucial to ensure the surface is properly prepared. This is arguably one of the most critical steps in our ‘7 tips for painting your home’s wood siding exterior’. It will ensure a smooth application and a long-lasting finish.

Cleaning the Siding

First things first, you need to get that siding clean. Over time, dust, grime, and mildew can accumulate on your wood siding, and these can prevent your paint from sticking properly. So grab a power washer (or a good old-fashioned bucket and scrub brush) and wash down your siding thoroughly. Use a mild detergent or a specialized siding cleaner to really get rid of any stubborn dirt.

Once you’ve finished washing, give the siding a good rinse and let it dry completely. This may take a day or two, but it’s worth the wait. Painting over damp wood can lead to peeling, bubbling, and an overall uneven finish. Be patient, and make sure the wood is dry before proceeding to the next step. For more details on this, check out our article on 5 steps to prepare your home for exterior painting.

Sanding and Patching

Once the wood is dry, it’s time to sand. Sanding the surface will help to remove any old, flaking paint and create a smooth surface for your new paint to adhere to. Use a coarse-grit sandpaper for any rough areas and a finer grit for the rest of the siding. Remember to always sand in the direction of the wood grain to avoid scratching your siding.

After sanding, inspect the wood for any holes, cracks, or gouges. If you find any, it’s time to patch them. Use a high-quality wood filler to fill in these areas, smoothing it out with a putty knife to ensure a flat surface. Let the filler dry completely, then sand it smooth.

Properly preparing your wood siding may seem like a lot of work, but it’s a crucial step in ensuring a beautiful, durable paint job. It sets the stage for the rest of your painting project, so take your time and do it right. Remember, a little effort now can save you a lot of time and hassle down the line. To avoid common pitfalls, have a look at our guide on exterior painting mistakes every homeowner should avoid.

Tip 2: Choosing the Right Paint

The second step in the journey of painting your home’s wood siding exterior revolves around selecting the right paint. This is a crucial step as the type of paint you choose will determine the finish, durability, and overall look of your siding.

Selecting the Right Type of Paint

So, what’s the best type of paint for your home’s wood siding? It’s crucial to select paint that’s specially formulated for exterior use. Exterior paint is more durable and resistant to weather elements, which is important for the longevity of your project.

For wood siding, acrylic latex paint is often a top recommendation. This type of paint is water-based and known for its flexibility and resistance to cracking, which is critical for wood surfaces that expand and contract with temperature changes. It also holds up well against UV rays and moisture, offering a longer-lasting finish.

When selecting your paint, it’s also worth considering its sheen. Flat, eggshell, satin, semi-gloss, and gloss are common options. Typically, a satin or semi-gloss paint is recommended for exterior siding as they offer a nice balance between durability and visual appeal. For more on paint types and selections, a house painter contractor can offer professional advice.

Picking the Right Color

The color of your paint can dramatically impact the overall look of your home. When choosing a color, consider the style of your house, the landscape, and the general aesthetic of your neighborhood.

If you’re having trouble deciding, it can help to look at some color schemes online or drive around your local neighborhoods for inspiration. You might want to consider using a color that complements the natural wood of your siding to enhance its natural beauty.

Remember that darker colors tend to absorb more heat, which could lead to quicker fading and more frequent touch-ups. Lighter colors, on the other hand, do a better job at reflecting sunlight and can help keep your home cooler.

Color is a personal choice, so choose a hue that you’ll be happy with for years to come. For a deeper dive into selecting the perfect color, check out our guides on color choices for your interior painting project and 5 rules of painting a room with two colors.

The right paint can make all the difference in your project’s success, so take the time to choose wisely. With the right selection, you’ll be well on your way to a beautifully painted wood siding that you’ll be proud to show off.

Tip 3: Using the Right Tools

Speaking of brushing up on the art of painting your home’s wood siding, the tools you choose can make or break your project. From brushes to sprayers, and even the protective gear you wear, let’s explore what you need to have in your painting toolkit.

Brushes, Rollers and Sprayers

When painting wood siding, you’ll likely need a combination of brushes, rollers, and sprayers. Brushes are perfect for detailed work and hard-to-reach areas. They allow for precise control and are essential for painting areas like corners and trim.

Rollers, on the other hand, make painting large, flat areas a breeze. They can cover a lot of ground quickly, saving you time and energy. Just make sure to choose a roller with a nap that’s appropriate for your siding’s texture.

Sprayers can also be a great tool for painting siding if you’re comfortable using them. They can provide an even, smooth finish and can be particularly useful when painting large areas or multiple stories. However, they do require more preparation and cleanup, so keep that in mind!

Remember, the quality of your tools can significantly impact the final result. High-quality brushes, rollers, and sprayers can deliver a more professional-looking finish and make the painting process more efficient.

Protective Gear

Painting can get a bit messy, so it’s crucial to have the right protective gear. This includes items like gloves, safety glasses, and coveralls to protect your skin and clothes from paint splashes. And don’t forget about a hat or a bandana to keep paint out of your hair!

If you’re using a sprayer or working with oil-based paints, you should also consider wearing a respirator to protect your lungs from paint fumes.

Lastly, remember to protect your home too! Use drop cloths to cover your landscaping and any outdoor furniture or fixtures near your painting area. Painters tape can also be helpful to protect windows, doors, and trim from accidental paint splatters.

Choosing the right tools and protective gear is a key part of the process when painting your home’s wood siding. With these in hand, you’ll be ready to tackle your painting project like a pro! For more tips on preparing your home for painting, check out our article on 5 steps to prepare your home for exterior painting.

Tip 4: Applying Primer

The fourth tip in our guide for painting your home’s wood siding exterior is all about the primer. This step is crucial in ensuring your paint adheres well and lasts longer.

When to Use Primer

Primer isn’t always necessary, but it’s often a good idea when painting wood siding. If your siding is bare or if the existing paint is worn or peeling, you should apply a coat of primer before painting. This creates a smooth, even surface for the paint to adhere to and can help prevent knots and stains from showing through the paint.

Moreover, if you’re drastically changing the color of your siding—especially if you’re going from a dark color to a light one—a primer can help provide a neutral base that ensures the true color of your paint comes through. For more on choosing colors, check out our articles on color choices for your interior painting project and 5 rules of painting a room with two colors.

Proper Primer Application

Now that you know when to use primer, let’s talk about how to apply it properly. Start by stirring the primer well before use. Then, using a brush or roller, apply the primer evenly over the siding. Be sure to get into all the nooks and crannies, especially on textured or grooved siding.

Allow the primer to dry completely before proceeding with painting. This can take anywhere from a few hours to a full day, depending on the weather and the specific product you’re using. Once the primer is dry, give it a light sanding to ensure a super smooth finish. Then, you’re ready to paint!

Remember, patience is key when it comes to primer. Rushing this step could result in a less-than-ideal paint job. So take your time, do it right, and you’ll be well on your way to a beautifully painted home exterior.

For more tips on painting your home, including how often you should repaint and how to make your paint job last longer, check out our articles on how often do you need to paint the exterior of your house? and 7 tips for making exterior paint jobs last longer.

Tip 5: Painting Techniques

One of the most crucial parts of painting your home’s wood siding is the application technique. The way you apply your paint can have a significant impact on the final look and longevity of your paint job. Let’s dive into the correct methods.

The Correct Way to Paint Siding

When painting siding, always work from top to bottom. This method helps to prevent streaks and ensures that any drips are painted over as you work your way down.

For the best coverage, apply paint in thin, even strokes. This technique helps the paint to adhere better and dries more evenly, preventing unsightly cracks and peels.

Remember, it’s always better to apply multiple thin coats than one thick one. While it might be tempting to slap a lot of paint on at once to get things done quickly, this can lead to drips, streaks, and an uneven finish.

Handling Trim and Details

Trim and detailed areas like window and door frames can be tricky. These parts of your home’s exterior can make or break the overall look of your paint job, so they deserve special attention.

When painting these areas, use a smaller brush for precision. Start with the edges and corners, carefully applying your paint and avoiding any drips or excess.

If you’re painting your trim a different color than your siding, consider using painter’s tape to create sharp, clean lines. But remember to remove the tape before your final coat of paint dries completely to avoid peeling off any paint with it.

Check out our guide on 5 rules of painting a room with two colors for more helpful tips on dealing with different colors.

Mastering the right painting techniques will help ensure your home’s wood siding looks its best. But remember, if you’re ever unsure or overwhelmed, there’s no shame in calling in a professional house painter contractor to get the job done right.

Tip 6: Dealing with Weather Conditions

One of the most overlooked aspects of painting your home’s wood siding is the role of weather conditions. The weather can significantly impact your painting project, and understanding how to handle it is crucial.

The Best Weather for Painting

Ideally, you want to paint your wood siding in mild weather conditions. Aim for a day that’s dry, with temperatures hovering between 50-85 degrees Fahrenheit. This range provides optimal conditions for paint to dry and adhere properly.

Condition Ideal Range
Temperature 50-85°F
Humidity 40-70%
Wind Speed <15 mph

Avoid painting in direct sunlight or on overly hot days as it can cause the paint to dry too quickly, leading to brush marks and uneven application. On the other hand, cold weather can cause the paint to thicken, making it difficult to apply and slow to dry. For more details on the best conditions for painting, check out our house painter contractor article.

Handling Unexpected Weather Changes

Despite our best efforts, the weather can be unpredictable. So, what do you do if the weather changes unexpectedly during your painting project?

If it starts to rain, stop painting immediately. Wet weather can wash off fresh paint and cause it to streak. Cover any fresh paint with a tarp to protect it, and wait for dry weather to resume painting.

Similarly, if the temperature drops or rises too much, it’s best to pause your painting project. Extreme temperatures can affect the drying time and the finish of the paint.

For wind, while a light breeze can help paint to dry, strong winds can cause paint to dry too quickly. If it gets too windy, consider postponing your painting project until the wind dies down.

Remember, patience is key when painting your home’s wood siding. It’s better to wait for the right weather conditions than to rush and compromise the quality of your painting project. If you’re unsure about whether the weather is right for painting, consider seeking advice from a professional house painter contractor.

By carefully considering the weather when planning and carrying out your painting project, you can ensure that you get the best results possible. Take a look at our article on 7 tips for making exterior paint jobs last longer for more helpful advice.

Tip 7: Maintenance and Touch-Ups

The final tip in our list of ‘7 tips for painting your home’s wood siding exterior’ is all about the care and maintenance of your newly painted siding. After all, you’ve invested time and effort into making your home’s exterior look fresh and inviting. Now, it’s all about preserving that beauty.

Caring for Your Painted Siding

The first step in caring for your painted wood siding is regular cleaning. Gentle washing with a mild detergent and a soft brush can remove dirt and grime that accumulate over time. Avoid using a high-pressure washer as it can damage the paint and the wood underneath.

Next, keep an eye out for signs of peeling, cracking, or fading paint. These signs indicate that your siding may need a touch-up or a fresh coat of paint. If your paint seems to fade quickly, check out our article on how to minimize color fading on your home’s exterior for tips on preserving the vibrancy of your paint job.

Lastly, be wary of any signs of damage to the wood itself such as rot or insect infestation. If you spot any of these, it’s time to call in a house painter contractor.

When and How to Touch Up Paint

Touching up paint is a normal part of the maintenance process. But when should you do it? As a general rule, if you notice areas where the paint has peeled, chipped, or faded, it’s probably time for a touch-up.

When touching up, make sure to use the same type and color of paint as your original job for a seamless blend. If the color seems a bit off, you might have to paint the entire panel or section of siding to keep your exterior looking consistent.

To touch up effectively, clean the area first and then lightly sand it to help the new paint adhere. Apply the paint with a brush, feathering out the edges to blend with the existing paint.

Maintaining your home’s exterior doesn’t have to be a chore. By regularly cleaning your siding and touching up paint as needed, you can keep your home looking its best for years to come. For more advice on maintaining your paint job, check out our article on 7 tips for making exterior paint jobs last longer.

Painting with Panache: 5 Essential Rules for Two-Color Room Painting

5 rules of painting a room with two colors

Introduction to Two-Color Room Painting

When it comes to painting a room, color can make all the difference. And if you’re feeling a bit adventurous, why not go for two colors instead of one? But painting a room with two colors is more than just slapping two different paints on the walls. It’s about balance, proportion, and creating a harmonious palette that can transform your space. In this guide, we’re going to lay down the ‘5 rules of painting a room with two colors’ to help you create a room that’s as unique as you are.

The Power of Color in Room Design

Ever walked into a room and instantly felt a certain way? Maybe calm, excited, or even nostalgic? That’s the power of color. Colors can influence our emotions, create illusions of space, and even affect our well-being. For instance, lighter colors can make a room feel larger and brighter, while darker hues can create a cozy, intimate atmosphere.

But with great power comes great responsibility. When you’re choosing colors for your interior painting project, you need to consider the mood and function of the room, the amount of natural light, and even the architecture of your home. And when it comes to two-color painting, the stakes are even higher. You’re not just working with one color – you’re balancing two, and that requires a bit more finesse.

The Art and Science of Two-Color Painting

Painting a room with two colors is both an art and a science. It’s an art because it requires a sense of aesthetics, a feel for color harmony, and an understanding of how colors can work together to create a visually pleasing space. But it’s also a science because there are certain rules and principles that can guide you towards a successful two-color paint job.

And that’s what we’re here for! We’re going to dive into the 5 crucial rules for painting a room with two colors. We’ll talk about choosing your colors wisely, determining your color proportions, deciding on your paint patterns, prepping your room for painting, and applying your paint with care. So, whether you’re a DIY enthusiast or you’re planning to hire a professional house painter contractor, stick with us. We’ve got some color wisdom to share!

Rule #1: Choose Your Colors Wisely

When it comes to creating a stunning two-color room, the first rule is to choose your colors wisely. But how do you decide between an endless array of hues and shades? Let’s break it down.

Understanding Color Theory

Color theory is a crucial starting point when selecting your colors. It’s all about how colors interact with each other and how they can influence our moods and perceptions. For instance, colors that are opposite each other on the color wheel, known as complementary colors, can create a vibrant and high-contrast look. On the other hand, analogous colors, or those that are next to each other on the color wheel, create a more harmonious and calming effect.

For a deeper dive into color theory and how it applies to your painting project, check out our guide on color choices for your interior painting project.

Considering Room Size, Light, and Function

The size of the room, the amount of natural light it gets, and its function should also influence your color choices. Light colors can make a small room feel larger and brighter, while dark colors can add depth and coziness to a large space.

For rooms that get a lot of sunlight, cool colors can help balance the brightness. In contrast, warm colors can add a sense of warmth to a room with little natural light.

The function of the room is another important factor. For example, you might choose calming colors for a bedroom or vibrant hues for a playroom. When you’re planning to paint a room with two colors, it’s essential to consider how these colors will work together in the space and how they’ll impact the overall mood and feel of the room.

Remember, selecting the right colors is a critical step in the painting process. It sets the stage for everything else and can ultimately determine the success of your two-color room painting project. So take your time, do your research, and don’t be afraid to ask for advice from professionals like us, your trusted house painter contractor. After all, we’re here to help bring your vision to life!

Rule #2: Determine Your Color Proportions

Once you’ve chosen your two colors, it’s time to decide how to distribute them in your room. The proportion of color you use can make a big difference in the overall look and feel of the space.

The 60-30-10 Rule

A well-known rule of thumb in interior design is the 60-30-10 rule. This rule suggests that you should use your dominant color for 60% of the room, a secondary color for 30%, and an accent color for the remaining 10% of the space.

For a two-color scheme, you can adapt this rule to suit your needs. You could use your dominant color for 60% of the room, and your secondary color for the remaining 40%. Or, you could split it more evenly, with each color taking up 50% of the room. The choice is yours!

Color Proportion
Dominant Color 60%
Secondary Color 40%

Remember, these are just guidelines, not hard and fast rules. Feel free to play around with the proportions to find a balance that works best for your room. For more insight on color distribution, check out our post on color choices for your interior painting project.

Balancing Light and Dark Colors

If you’re working with a mix of light and dark colors, it’s important to consider how they’ll balance each other out. Typically, it’s a good idea to use the lighter color for a larger portion of the room. This helps keep the room feeling spacious and open. The darker color can then be used as an accent to add depth and interest.

Color Proportion
Lighter Color 60%
Darker Color 40%

Again, these proportions can be adjusted to suit your personal preferences and the specific characteristics of your room. For example, if your room has a lot of natural light, you might be able to get away with using more of the darker color. Check out our guide on interior painting & design: do’s and don’ts for small rooms for more tips on balancing colors in smaller spaces.

By carefully considering your color proportions, you can create a two-color scheme that’s balanced, harmonious, and perfectly suited to your room. So go forth, paint with panache, and watch as your space is transformed!

Rule #3: Decide on Your Paint Patterns

Alright, now that we’ve got our colors picked out, let’s talk patterns. The pattern you choose for your two-color room can drastically change the overall feel of the space. There are a few popular options you can consider: vertical stripes, horizontal stripes, or accent walls.

Vertical Stripes

Vertical stripes can help to visually heighten a room, making it appear taller than it actually is. This can be particularly beneficial in rooms with low ceilings.

When painting vertical stripes, you’ll want to alternate between your two chosen colors. This could mean painting every other stripe with your secondary color, or you could choose to paint one wall with a bold stripe of your secondary color. Remember, the width of your stripes can also affect the overall look of your room. Narrow stripes can create a more subtle, sophisticated look, while wider stripes can make a bold statement.

Horizontal Stripes

Horizontal stripes, on the other hand, can make a room appear wider. This can be especially helpful if you’re working with a narrow space.

Horizontal stripes require a bit more planning than vertical stripes, as you’ll need to measure and mark out your stripes before you start painting. The same rules apply here as with vertical stripes – alternating colors and playing with stripe width can change the overall look and feel of your room.

Accent Walls

If stripes aren’t your thing, consider painting an accent wall. This involves painting one wall in your room a different color than the other walls. This can be a great way to highlight a particular feature in your room, like a fireplace or a large window.

When painting an accent wall, we usually recommend using your secondary color. This gives you the freedom to choose a brighter or darker color without overwhelming the space.

Deciding on a paint pattern is a crucial step in the two-color room painting process. Whether you choose vertical stripes, horizontal stripes, or an accent wall, make sure the pattern aligns with the overall design vision for your room. For more on this, check out our article on color choices for your interior painting project.

Rule #4: Prep Your Room for Painting

Before you can embark on your two-color painting journey, it’s essential to properly prepare your room. This involves gathering the necessary tools and ensuring that your walls and furniture are ready for the transformation.

Essential Tools for a Two-Color Paint Job

Before diving into your paint pots, make sure you’re equipped with the right tools. Here’s a handy list of essentials you’ll need for a two-color paint job:

  1. Paint: Of course, you’ll need your two chosen colors of paint. Make sure you have enough to cover your walls with the desired number of coats.
  2. Paintbrushes: You’ll need brushes of varying sizes for different areas of the room – larger ones for broad strokes and smaller ones for details and edges.
  3. Paint rollers: These are great for covering large areas quickly. A roller tray will also come in handy.
  4. Painter’s tape: This is essential for marking off areas and ensuring clean lines between your two colors.
  5. Drop cloths: To protect your floor and furniture from paint splatters.
  6. Ladder: A sturdy ladder will help you reach higher areas with ease.
  7. Sandpaper: This is useful for smoothing out any rough patches on your walls before painting.
  8. Primer: A good primer can help your paint adhere better and last longer.

Having these tools at your disposal will make your painting process smoother and more efficient.

Prepping Walls and Protecting Furniture

Prepping your walls is a crucial step in the painting process. Start by removing any nails or hooks and cleaning the walls to remove any dust or grime. If there are any cracks or holes, fill them in with a suitable filler and sand the area smooth once it’s dry. If your walls are particularly stained or you’re making a dramatic color change, you might want to apply a coat of primer.

Next, protect your furniture and flooring. Move furniture away from the walls or out of the room if possible. Cover any remaining furniture and the floor with drop cloths to protect them from paint splatters.

Apply painter’s tape along baseboards, trim, and any other areas you don’t want to be painted. This helps ensure clean lines and saves you time on touch-ups later on.

Remember, preparation is key to a successful two-color room painting project. It might seem like a lot of work, but it’s worth it for the end result. For more tips on prepping your home for an exterior painting project, check out our 5 steps to prepare your home for exterior painting article.

Rule #5: Apply Your Paint With Care

The final rule in our ‘5 rules of painting a room with two colors’ is all about the application process. Even the best color choices and patterns can go awry without proper paint application. So, let’s walk you through the process.

Starting With the Lighter Color

We always recommend starting with the lighter of your two chosen colors. The reason is simple – it’s easier to cover a lighter color with a darker one than vice versa. For instance, if you’re working with a soft cream and a bold navy, you’d want to apply the cream first.

Once you’ve applied the first coat of your lighter color, allow it to dry completely. Depending on the paint type and the conditions in your room, this could take a few hours. Patience is key here. Rushing to apply the second color before the first is fully dry can result in blending, streaking, or uneven color.

Adding the Second Color

After the lighter color has dried, it’s time to introduce the second color. Using a fresh roller or brush, apply the darker color according to your predetermined pattern. Whether you’re creating stripes or painting an accent wall, make sure to apply the paint evenly for consistent color.

Remember, the second color is often the one that makes the biggest impact. It’s what will grab people’s attention when they walk into the room, so take your time to ensure it looks just right.

Ensuring Clean Lines and Edges

Clean, sharp lines can make the difference between a professional-looking paint job and a DIY project gone wrong. There are a few ways to ensure your lines are neat and tidy:

  1. Use Painter’s Tape: Apply painter’s tape along the edges where the two colors meet. Press it down firmly to prevent paint from seeping under the tape. Once the paint is dry, carefully remove the tape to reveal clean lines.
  2. Use a Straight Edge: If you’re painting stripes or other patterns, a straight edge can help guide your brush or roller, ensuring straight lines.
  3. Take Your Time: Rushing will only lead to mistakes. Take your time, especially when painting near the edges of your room or around fixtures.

Applying paint with care is essential in two-color room painting. Paying attention to details and staying patient can transform a room and make your color choices pop. For more painting tips and tricks, check out our other articles on house painter contractor tips and advice.

Troubleshooting Common Challenges

Despite the best of efforts, painting can sometimes go awry. But don’t fret! We’re here to show you how to troubleshoot some common challenges you might face when applying our ‘5 rules of painting a room with two colors’.

Dealing with Uneven Lines

Even with careful taping and brushwork, uneven lines can appear. To fix this, the first step is to let the paint dry. Once dry, you can sand down the uneven area lightly using a fine-grit sandpaper. Afterward, you can repaint the area, taking care to follow the edge of the tape more closely this time. It may take a couple of attempts, but with patience, you’ll get those crisp, clean lines you’re after.

Managing Paint Drips

Drips occur when too much paint is applied to the wall at once. To avoid this, always remember to load your brush or roller with the right amount of paint. If drips still occur, gently remove the excess wet paint with a clean cloth. If the paint has already dried, you’ll need to sand the drip down before applying a new coat of paint.

If you’re having consistent issues with paint drips, you might want to consider hiring a professional house painter contractor. They’re equipped with the proper tools and skills to handle any painting job, big or small.

Touching Up Mistakes

Mistakes happen, and that’s okay! The key is to not panic and to know how to correct them. For small touch-ups, dipping a small artist’s brush into your paint can give you more control. If you’re dealing with larger mistakes, let the paint dry first. Then, you can sand the area and apply a new coat of paint. Make sure the new paint is thoroughly mixed so the color matches the rest of the wall.

Remember, practice makes perfect. The more you paint, the more comfortable you’ll become with the process. For more painting tips and tricks, don’t hesitate to check out our other articles like ‘tips to add accent colors into your home interior‘ and ‘interior painting & design: do’s and don’ts for small rooms‘. Happy painting!

Deck Staining 101: 6 Essential Tips for Pro-Level Results

6 essential tips for staining your deck like a pro

Introduction to Deck Staining

As professional house painters, we often get asked about the importance of staining a deck. Many homeowners want to know how it contributes to the overall aesthetics and longevity of their outdoor spaces. Well, we’re here to break it down for you and help you understand the basics of deck staining.

Why is Staining Your Deck Important?

First off, let’s tackle why staining your deck is a crucial aspect of home maintenance. The most apparent reason is aesthetics. A well-stained deck looks clean, vibrant, and inviting, significantly enhancing your home’s curb appeal. But that’s not all. Staining is also a practical step in preserving your deck’s longevity.

When we stain a deck, we’re adding a protective layer to the wood. This layer prevents harmful factors like UV rays, moisture, and even insects from damaging the wood. Without this protection, your deck could suffer from warping, cracking, and other forms of damage. For more on this, you can check our article on 7 signs it’s time to refinish your deck.

Understanding the Basics of Deck Staining

Now that we’ve covered why staining your deck is essential let’s delve into some basics. Deck staining is a process that involves several steps, including cleaning, choosing the right stain, and applying it correctly.

The first step is cleaning your deck thoroughly to remove any dirt, grime, or old stain. This ensures that the new stain adheres properly and lasts longer. The next step is choosing the right stain. The best stain for your deck will depend on factors such as the type of wood, the climate, and your desired look. Lastly, applying the stain correctly is paramount. This involves using the right tools, applying the stain in the right weather conditions, and allowing it to dry fully before using the deck.

We’ll be covering all these steps, plus our ‘6 essential tips for staining your deck like a pro’ in the following sections. So, whether you’re a DIY enthusiast or you’re thinking of hiring a house painter contractor, this guide will provide valuable insights.

Stay tuned as we demystify deck staining and help you transform your deck into a beautiful and long-lasting addition to your home.

Pre-Staining Preparations

Before you dive into staining your deck, it’s crucial to prepare appropriately. Like we always say, “Good preparation is half the job.” It involves cleaning your deck, choosing the right stain, and having the right tools.

Cleaning Your Deck

A clean deck is a happy deck! Before applying any stain, ensure your deck is clean and free from dirt, mildew, and old paint. Use a deck cleaner to thoroughly clean the surface and a pressure washer to rinse it off. Don’t forget to let it dry completely before moving on to the next step. For an in-depth guide on how to clean your deck, check out our article on 7 signs it’s time to refinish your deck.

Choosing the Right Stain

Choosing the right stain can be a bit tricky. You’ll need to consider factors like the type of wood, the climate, and the desired look. Transparent stains offer a natural look but may not provide the best protection. Semi-transparent stains offer a balance between aesthetics and durability. Solid stains offer the best protection but may mask the wood’s natural beauty. It boils down to your personal preferences and the specific needs of your deck.

The Right Tools for the Job

Having the right tools is key to achieving pro-level results. You’ll need a paintbrush or roller for applying the stain, a paint tray, and a deck stain pad. Remember, quality tools mean a quality finish. You may also need a sander to smooth out any rough spots on your deck. For more on the tools you need for a painting job, read our article on 5 steps to prepare your home for exterior painting.

Good preparation is the first of our 6 essential tips for staining your deck like a pro. It sets the stage for a successful staining job, helping you achieve a deck that’s not only beautiful but also durable. So put on your work gloves, roll up your sleeves, and let’s get that deck looking its best!

The Six Essential Tips for Pro-Level Deck Staining

Deck staining is an art as much as it is a science, and to do it like a pro, there are a few key things you need to know. Here are our top 6 essential tips for staining your deck like a pro.

Tip 1: The Best Time for Staining Your Deck

The best time for staining your deck is in the late spring or early fall when temperatures are moderate. Extreme heat can cause the stain to dry too quickly, preventing it from penetrating the wood properly. On the other hand, colder temperatures can slow down the drying process and lead to an uneven finish.

Tip 2: Paying Attention to the Weather

Before you start your deck staining project, always check the weather forecast. Ideally, you want to stain your deck when there is no rain in the forecast for at least 24-48 hours. Rain can wash away the stain before it has a chance to dry, wasting your time and effort.

Tip 3: Applying the Stain Correctly

For an even and professional finish, always apply the stain in the direction of the wood grain. Start with a thin coat and allow it to soak in before applying a second coat. If there are any pools or puddles of stain, smooth them out with your brush to prevent an uneven finish. Our article on how to minimize color fading on your home’s exterior provides more details on proper application techniques.

Tip 4: The Importance of Thorough Drying

Patience is key after you’ve applied the stain. Let the stain dry completely before walking on the deck or placing any furniture on it. This might take anywhere from 24 to 48 hours depending on the weather and humidity levels. Rushing this process can lead to smudges or marks in the finish.

Tip 5: Maintaining Your Stained Deck

Once your deck is beautifully stained, regular maintenance will help keep it looking its best. Sweep it regularly to remove dirt and debris, and clean it with a deck cleaner once or twice a year to prevent mold and mildew buildup. If you notice the stain starting to wear off, it might be time for a touch-up. Check out our article on 7 signs it’s time to refinish your deck for more tips on maintenance.

Tip 6: Knowing When to Call a Professional

While staining a deck is a doable DIY project, there are times when it’s best to call in a professional. If your deck is large, multi-leveled, or needs extensive prep work, hiring a professional house painter contractor can save you time and ensure a high-quality finish.

Remember, the goal of staining your deck is not just to enhance its appearance but also to protect it from the elements. By following these 6 essential tips, you can ensure that your deck is not only beautiful but also long-lasting. Happy staining!

Common Mistakes to Avoid in Deck Staining

While our 6 essential tips for staining your deck like a pro can guide you through the process, avoiding common mistakes is equally critical to achieve a beautiful, long-lasting finish. Let’s delve into some of these errors that can impact the outcome of your deck staining project.

Rushing the Process

We get it, you want your deck to look splendid as soon as possible. But remember, good things take time. The staining process is not something to be rushed. From preparing your deck to applying the stain and letting it dry, each step requires patience and time. Rushing through any of these stages can lead to uneven application, blotchy areas, or a finish that doesn’t last. Make sure you dedicate adequate time to each part of the process for a pro-level finish.

Ignoring the Wood Type

Not all wood is the same. Different types of wood have different characteristics and require different types of stain for the best results. For instance, softwoods like pine or cedar absorb stain differently than hardwoods like oak or mahogany. Using the wrong type of stain can result in an unsatisfactory finish or a deck that needs to be restained sooner than expected. Research your deck’s wood type and choose a stain specifically designed for it. If you are unsure, consult with a professional house painter contractor.

Skipping the Sealant

Staining does provide some level of protection to your deck, but for maximum durability, you should not skip applying a sealant. A sealant provides an additional layer of protection against the elements, helping to keep your deck looking great for longer. Skipping this step can leave your deck vulnerable to moisture, sun damage, and wear and tear. Make sure to apply a high-quality sealant after staining to protect your investment and extend the life of your deck.

Remember, staining your deck is about more than just enhancing its appearance. It’s about protecting your deck from the elements, extending its lifespan, and adding value to your home. By avoiding these common mistakes and following our pro-level tips, you’re well on your way to a beautifully stained deck that you can enjoy for years to come.

FAQ about Deck Staining

In this section, we’ll answer some of the most frequently asked questions about deck staining. This should help clear up any doubts you might have about the process and give you confidence to tackle your deck staining project like a pro.

How often should I stain my deck?

The frequency of staining your deck can depend on several factors, including the type of stain used, the local climate, and the amount of direct sunlight your deck is exposed to. However, as a general guideline, we recommend staining your deck every two to three years. This ensures that your deck stays protected from the elements and maintains its appearance. For more specific guidelines, check out our article on the 7 signs it’s time to refinish your deck.

Can I stain my deck myself?

Absolutely! With the right tools, materials, and a bit of patience, you can definitely stain your deck yourself. Just make sure to follow our 6 essential tips for staining your deck like a pro to ensure you achieve the best results. However, if the task seems too daunting, you can always hire a professional house painter contractor to do it for you.

What’s the difference between staining and painting a deck?

Both staining and painting serve the purpose of protecting your deck from the elements and enhancing its appearance. However, there are some key differences between the two.

Staining penetrates the wood, providing protection from within, and tends to retain the natural look of the wood grain. Paint, on the other hand, sits on the surface of the wood, providing a barrier of protection. It offers a wider range of color options and can cover up imperfections in the wood.

Choosing between staining and painting really comes down to your personal preference and the look you want to achieve for your deck. For more information on the pros and cons of each, you might find our articles on exterior painting mistakes every homeowner should avoid and 7 tips for making exterior paint jobs last longer helpful.

Paint Your World: Exploring Color Choices for Your Interior Painting Project

color choices for your interior painting project

Unleashing the Power of Color

Color, often the first thing one notices about a space, holds a significant power that extends beyond aesthetics. It can influence our emotions, our comfort, and even our productivity. For anyone embarking on an interior painting project, understanding this power can be instrumental in making successful color choices.

The Impact of Color on Mood and Atmosphere

Color has a profound impact on the mood and atmosphere of a room. Bright, vibrant colors like red, orange, or yellow can energize a space, making it perfect for areas like the kitchen or a home office. On the other hand, softer, cooler shades such as blues and greens tend to have a calming effect, ideal for bedrooms or bathrooms.

It’s important to consider the mood you want to evoke in each room when choosing colors for your interior painting project. Our house painter contractor can provide expert guidance on how to use color effectively to create the desired mood and atmosphere.

Understanding Color Theory

At the heart of effective color choices lies color theory, a set of principles that artists and designers use to combine colors in a way that is harmonious and pleasing to the eye. It’s built around the color wheel, which organizes colors based on their relationships to each other.

In color theory, colors are classified into three categories: primary (red, blue, and yellow), secondary (green, orange, and purple), and tertiary (a mix of primary and secondary colors). Understanding these categories can be helpful in choosing a cohesive color scheme for your home.

Furthermore, color theory introduces concepts such as complementary colors (colors opposite each other on the color wheel) and analogous colors (colors next to each other on the color wheel). These concepts can guide you in combining colors in a way that brings balance and harmony to a space.

To delve more into color theory and its practical application in home painting, consider consulting with a professional. Our house painter contractor can provide insightful recommendations on color choices for your interior painting project.

Appreciating the power of color and understanding color theory lays a solid foundation for making informed color choices. As you embark on your interior painting project, remember that color is more than just a visual element. It’s a powerful tool that can transform your space, influence mood, and create a specific atmosphere. With careful consideration and a little creativity, you can use color to create a home that reflects your personal style and meets your functional needs.

Exploring the Color Wheel

Understanding the color wheel can be a game-changer when it comes to choosing the right color for your interior painting project. It’s a simple tool that helps you see the relationship between different colors and can guide you in creating a harmonious color scheme for your home.

Primary, Secondary, and Tertiary Colors

At the core of the color wheel are the primary colors: red, yellow, and blue. These colors cannot be made by mixing other colors together. They are the building blocks of all other colors.

Secondary colors are created by mixing two primary colors together. They are green (blue and yellow), orange (red and yellow), and purple (red and blue).

Tertiary colors, on the other hand, are created by mixing a primary color with a secondary color. These include red-orange, yellow-orange, yellow-green, blue-green, blue-violet, and red-violet.

Understanding these colors and how they relate to each other can make a world of difference in creating a balanced and cohesive color scheme for your interior painting project.

Complementary and Analogous Colors

Complementary colors are colors that are directly opposite each other on the color wheel. They create a vibrant contrast and can add a pop of energy to your space. For instance, blue and orange are complementary colors. Using them together in your interior paint scheme can create a dynamic and lively atmosphere.

Analogous colors, meanwhile, are colors that are next to each other on the color wheel. They tend to have a harmonious relationship, producing a more subtle and calm atmosphere when used together. For example, using shades of blue, blue-green, and green in a room can create a serene and tranquil vibe.

Making use of the color wheel and understanding the relationship between different colors can help guide you in choosing the best color combination for your interior painting project. Whether you choose complementary colors for a bold statement or analogous colors for a comforting and cohesive look, the color wheel is a powerful tool to help you visualize your color choices and create the perfect atmosphere in your home.

Remember, the best color choices for your interior painting project are not only about aesthetics but also about creating a mood and atmosphere that reflects your personality and lifestyle. So, explore the color wheel, experiment with different color combinations, and have fun painting your world! Check out our article on 5 rules of painting a room with two colors for more tips and advice.

Using Color in Your Interior Painting Project

When it comes to interior painting, color selection is a critical step. The hues you choose can dramatically transform the look and feel of your space. Here, we explore how to choose a color scheme and how the size of the room and natural light should be considered in your interior painting project.

Choosing a Color Scheme

Choosing a color scheme for your interior painting project is not as daunting as it might seem. Start by determining the mood you want to create in the room. Do you want a calming and relaxing atmosphere or a vibrant and energetic vibe? The colors you choose can help set the desired mood.

Next, consider the existing elements in the room such as furniture, artwork, and flooring. The colors of these elements can guide your color scheme. For instance, you might choose a shade that complements the dominant color in a piece of artwork or matches your favorite throw pillow.

If you’re struggling to decide, consider using a color wheel to identify complementary, analogous, or monochromatic color schemes. For more information on using different color schemes, read our article on 5 rules of painting a room with two colors.

Lastly, keep in mind that color choices for your interior painting project should also be guided by your personal taste. After all, you’re the one who’ll be living with these colors every day.

Considering Room Size and Natural Light

The size of the room and the amount of natural light it receives can significantly influence how a color looks. As a general rule, lighter colors can make a small room feel larger and brighter, while darker colors can make a large room feel more cozy and intimate. Find more tips on this topic in our article on interior painting & design: do’s and don’ts for small rooms.

Natural light can also affect the appearance of colors. Rooms with plenty of natural light can handle darker colors without feeling gloomy. On the other hand, rooms with limited natural light may benefit from lighter, warmer colors to help brighten the space.

Remember, colors can look different under different lighting conditions. It’s always a good idea to test your color choices in different lighting situations before committing to a final color.

By considering your desired mood, the existing elements in your room, the room’s size, and the amount of natural light, you can make informed color choices for your interior painting project. The result will be a beautifully painted space that reflects your style and serves your needs.

Popular Color Choices for Interior Painting

When it comes to interior painting, the color you choose can significantly influence the mood and atmosphere of the room. The right color can make a room feel cozy, vibrant, serene, or stylish. Here are some popular color choices for your interior painting project.

Warm Colors for Welcoming Spaces

Warm colors such as red, orange, and yellow can help create an inviting and cozy atmosphere. These colors are often associated with warmth, comfort, and energy, making them ideal for living rooms and dining areas where people gather.

Red, the most intense warm color, can stimulate conversation and appetite, making it a popular choice for dining rooms. Orange, a combination of red and yellow, is perfect for areas where you want to encourage interaction and creativity. Yellow, the color of sunshine, can bring a sense of happiness and positivity to any space.

Remember, warm colors can make a room feel smaller, so they are best used in larger spaces. For more tips on how to use warm colors in your home, check out our article on interior painting and design do’s and don’ts for small rooms.

Cool Colors for Calm and Serene Areas

Cool colors like blue, green, and purple tend to create a calm and relaxing atmosphere. They are the perfect color choices for bedrooms, bathrooms, or any other space where you want to promote serenity and relaxation.

Blue, often associated with the sky and sea, can help lower heart rate and blood pressure, promoting a sense of calm. Green, the color of nature, can be soothing and refreshing, perfect for a home office or study. Purple, a blend of blue and red, can add a touch of luxury and creativity to your space.

Keep in mind, lighter shades of cool colors can make a room appear larger and more open. For tips on how to balance different colors in your home, check out our article on 5 rules of painting a room with two colors.

Neutral Colors for Versatility

Neutral colors like white, beige, grey, and brown are versatile and can complement any interior style. They provide a perfect backdrop for any decor and can make a room feel clean, spacious, and modern.

White is a popular choice for its simplicity and ability to reflect light, making a room feel larger and brighter. Beige and brown can add warmth and coziness to a space. Grey is a trendy neutral that can give your room a sleek, modern feel.

Neutral colors also offer flexibility, allowing you to change your furniture or decor without needing to repaint the walls. For ideas on how to incorporate accent colors with neutrals, check out our article on tips to add accent colors into your home interior.

Choosing the right color for your interior painting project is a personal decision that should reflect your style and the mood you want to set in each room. Whether you opt for warm, cool, or neutral colors, remember that the right color can transform your space into something truly special.

Tips to Choose the Right Color for Your Project

Selecting the perfect hue for an interior painting project can be a complex task. Here are a few tips to help you make the right color choices for your interior painting project.

Testing Colors Before Committing

Before you commit to a color, it’s always a good idea to test it out in the space you plan to paint. Paint a small section of the wall and observe it at different times of the day under varying light conditions. This will give you a better idea of how the color will look in your room. You can also use digital tools and apps that allow you to virtually paint your room with different colors, giving you a realistic idea of the end result.

Remember, colors can look drastically different on a paint swatch compared to being on a wall. Testing helps ensure you’re happy with your choice before investing time and resources into painting the entire room.

Balancing Colors in Your Home

When choosing colors for your home, it’s important to consider the overall balance of colors in your space. If you have multiple rooms visible to each other, the colors should create a harmonious flow. This doesn’t mean all rooms should be the same color. Instead, consider using different shades of a color or complementary colors for a cohesive look.

For instance, if one room is painted a light blue, you might choose a deeper blue or a coordinating color, like a soft gray, for the next room. For more tips on how to balance colors in your home, check out our article on 5 rules of painting a room with two colors.

Keeping Your Home’s Style in Mind

The style and architecture of your home should also influence your color choices. Consider the era in which your home was built and the design elements that are present. A Victorian-style home might lend itself to a different color palette than a modern, minimalist home.

In addition to the style of your home, think about the furniture and decor you have. Your wall color should complement these elements rather than clash with them. If you’re planning to change your furniture or decor soon, keep your future design plans in mind when choosing your paint color.

Choosing the right color for your interior painting project can greatly enhance the overall aesthetics of your home. Keep these tips in mind as you explore different color options. And remember, hiring a professional house painter contractor can provide valuable insight and expertise when it comes to making the best color choices for your project.

Rescue Your Deck from Dullness: 7 Signs Its Time to Refinish

7 signs it’s time to refinish your deck

Importance of Deck Maintenance

Decks are a fantastic addition to any home, providing a great space for outdoor gatherings or simply enjoying a warm day. However, to ensure that your deck remains attractive and safe, regular maintenance is crucial.

Why Deck Maintenance Matters

Regular deck maintenance goes beyond just keeping your deck visually appealing. It plays a significant role in maintaining the overall structural integrity of the deck. By neglecting maintenance, minor issues like small cracks or loose boards can escalate into major problems, resulting in costly repairs or even replacement of the entire deck.

Consistent maintenance can also extend the life of your deck, allowing you to enjoy it for many years. By taking care of your deck, you can prevent common issues such as wood rot, mildew, and termite damage, which can seriously compromise the structure of your deck.

Moreover, regular maintenance can enhance the value of your home. A well-maintained deck increases curb appeal and can be a selling point if you ever decide to put your home on the market. To learn more about how exterior maintenance can boost your home’s value, check out our article on the top 7 benefits of painting your home’s exterior.

The Role of Refinishing in Deck Maintenance

Refinishing is a key component of deck maintenance. It involves cleaning the deck, repairing any damage, and applying a new finish to protect the wood. Refinishing can restore the deck’s original color and prevent the wood from graying due to exposure to the sun.

It’s important to note that refinishing is not just about aesthetics. A good finish can protect the wood from moisture, UV rays, and other weather-related damage. It can also prevent mildew and mold, both of which can lead to wood rot.

Recognizing when it’s time to refinish your deck is crucial. Look out for signs like fading color, visible wood damage, and water absorption. We’ll cover these signs and more in the ‘Recognizing the Signs’ section of this article.

For more information on maintaining and refinishing your deck, consider consulting with a professional house painter contractor. They can guide you through the process and ensure you’re using the best techniques and products for your specific deck.

Recognizing the Signs

Identifying when it’s time to refinish your deck is crucial. Here are 7 signs that may indicate your deck needs attention.

Sign 1: Fading Color

A deck’s color may fade due to exposure to sunlight and weather elements. This fading can make your deck appear old and worn. If the deck’s color is noticeably lighter or patchy, it might be time to refinish. To learn more about how to maintain the color of your deck, read our article on how to minimize color fading on your home’s exterior.

Sign 2: Visible Wood Damage

Obvious wood damage, such as cracks, holes, or warping, is a clear sign that your deck needs to be refinished. This kind of damage can make the deck unsafe and unappealing. If you notice any wood damage, it’s time to hire a house painter contractor to refinish your deck.

Sign 3: Water Absorption

If water does not bead up and instead seeps into the deck’s wood, it’s a sign the protective finish has worn off. Without this protective layer, the wood is vulnerable to rot, which can lead to more serious problems down the line.

Sign 4: Mold and Mildew Growth

Mold and mildew can cause your deck to become slippery and unsafe. They are also signs of moisture problems that could lead to wood decay. If you spot mold or mildew, it’s time to consider refinishing your deck.

Sign 5: Splintering Wood

A deck that is safe to walk on should not have splintering wood. If you notice splinters in your deck’s wood, it’s an indication that the deck’s finish has worn off and needs to be reapplied.

Sign 6: Loose or Rusted Hardware

Loose or rusted hardware, such as nails or screws, can make your deck unstable. If you find any loose or rusted hardware during your deck inspection, it’s time to refinish and repair your deck.

Sign 7: It’s Been More Than 2-3 Years

If it’s been more than 2-3 years since your last deck refinishing, it might be time for another. Regular maintenance and refinishing can help extend the life of your deck and keep it looking great. Check out our article 7 tips for making exterior paint jobs last longer for more tips on maintaining your deck.

If you notice any of these signs, don’t wait to refinish your deck. Ignoring these signs can lead to more serious problems in the future. Hire a professional house painter contractor to ensure the job is done right, and your deck can continue to be a safe and enjoyable space for you and your family.

Understanding the Refinishing Process

Restoring the beauty of a deck involves a few crucial steps. It’s not as simple as slapping on a new coat of paint. Proper refinishing requires cleaning and prepping the deck, sanding down any rough spots, and then carefully applying the finish. Let’s look at each step in detail:

Cleaning and Prepping the Deck

The first step in the refinishing process involves a thorough cleaning of the deck. This is important in removing any dirt, grime, or mildew that may have accumulated over time. It also prepares the wood for the sanding and finishing stages, ensuring a smoother and more effective application.

You’ll want to sweep the deck clean, then use a specially formulated deck cleaner to scrub the surface. It’s recommended to use a scrub brush with stiff bristles to really get into the nooks and crannies of the wood. Once you’ve scrubbed the entire surface, rinse the deck thoroughly and let it dry completely.

Sanding the Surface

Once the deck is clean and dry, it’s time to start sanding. This step is crucial in smoothing out any rough patches and removing the old finish. A power sander can be a great tool to speed up the process, but hand-sanding works just as well for those hard-to-reach spots.

When sanding, start with a coarse-grit sandpaper to remove the major imperfections, then move to a finer grit to smooth the surface. Always sand along the grain of the wood to avoid scratches and damage. It’s important to wear protective gear, like goggles and a dust mask, during this process to protect yourself from dust and debris.

Applying the Finish

The last step in the refinishing process is applying the new finish. There are several types of finishes available, including paint, stain, and sealant, each with their own benefits and considerations. For detailed advice on choosing the best type of finish for your deck, you may want to consult a house painter contractor.

Before you start applying the finish, make sure the deck is completely dry and free from dust. Use a brush or roller to apply the finish, working in small sections to ensure an even application. It’s often recommended to apply two coats for the best results, allowing ample drying time between each coat.

Once you’ve finished applying the new finish, let the deck dry completely before replacing any furniture or walking on the surface. This could take anywhere from 24 to 48 hours, depending on the type of finish used and the weather conditions.

Proper deck refinishing can greatly enhance the look and longevity of your outdoor space. By following these steps, you can restore your deck’s beauty and enjoy it for many years to come. For additional tips on deck maintenance and painting, check out our resources on 6 essential tips for staining your deck like a pro.

Hiring a Professional vs. DIY

Once you’ve recognized the 7 signs it’s time to refinish your deck, the next decision is whether to hire a professional or take on the task yourself. This choice largely depends on your skills, available time, and budget.

When to Hire a Professional

Hiring a professional house painter contractor can be the best decision if your deck is large, has intricate details, or requires extensive repairs. Professional painters have the necessary tools, skills, and experience to tackle any project, no matter how complex.

Hiring a pro can also save you time. While DIY projects can be satisfying, they often take longer than expected. A professional team can complete the job in a fraction of the time, allowing you to enjoy your newly refinished deck sooner.

Finally, a professional finish can add value to your home. If you’re considering selling in the future, a well-maintained deck can be a selling point.

The Pros and Cons of DIY Refinishing

Refinishing a deck yourself can be a cost-effective way to improve your outdoor space. It allows you to save on labor costs and gives you the freedom to work at your own pace. It also provides a sense of accomplishment and allows you to control every aspect of the project.

However, DIY refinishing isn’t for everyone. It requires a significant time commitment and the right skills. You’ll need to understand how to properly prepare the deck, apply the finish, and handle any unexpected issues that arise.

DIY deck refinishing also requires investment in tools and materials. While you can rent or borrow some items, others will need to be purchased.

Pros of DIY Cons of DIY
Cost-effective Time-consuming
Sense of accomplishment Requires skill and knowledge
Complete control over the project Initial investment in tools and materials

When deciding between hiring a professional or doing it yourself, consider what makes the most sense for your situation. If you’re confident in your abilities and have the time, DIY could be a great choice. If not, hiring a professional could save you time, stress, and potentially money in the long term.

Whichever route you choose, regular maintenance is key to keeping your deck looking its best. Check out our article on 7 tips for making exterior paint jobs last longer for advice on prolonging the life of your deck finish.

Tips for Protecting Your Deck Post-Refinishing

Once you’ve identified the 7 signs it’s time to refinish your deck and taken the necessary steps, it’s crucial to maintain your deck properly to ensure its longevity and preserve its fresh, rejuvenated look. Here are a few tips to help you protect your deck post-refinishing:

Regular Cleaning and Maintenance

Regular cleaning is key to keeping your deck in top shape. Dirt, leaves, and other debris can trap moisture, leading to wood rot and mildew growth. Aim to sweep your deck weekly, and wash it with a suitable deck cleaner at least twice a year. If you live in an area with harsh weather conditions, you might need to clean your deck more frequently.

Maintain the finish by reapplying the sealant or stain as recommended by the manufacturer or your house painter contractor. Depending on the product and the weather conditions, you may need to reapply the finish every 1-3 years.

Using Furniture Covers and Rugs

Outdoor furniture and grills can scratch the surface of your deck, while food and drink spills can cause stains. Use furniture covers to protect your deck when not in use, and consider placing outdoor rugs in high-traffic areas or under your dining set. However, make sure to choose rugs designed for outdoor use, as they are typically made of materials that resist mold and mildew.

Regular Inspections for Damage

Even with regular cleaning and maintenance, your deck can still suffer from wear and tear. Regularly inspect your deck for signs of damage, such as loose or rusted hardware, splintering wood, or cracked boards. Early detection of these issues allows for timely repairs, preventing further damage and maintaining the integrity of your deck.

Remember, a well-maintained deck not only enhances the beauty of your home but also extends the life of the wood, saving you time and money in the long run. If you’re interested in more home painting and maintenance tips, check out our articles on how to minimize color fading on your home’s exterior and 7 tips for making exterior paint jobs last longer.

Injecting Vibrancy: How to Add Accent Colors to Your Home Interior

tips to add accent colors into your home interior

Understanding Accent Colors

Injecting vibrancy into your home interior doesn’t require a complete overhaul. Instead, you can create a significant impact with a few strategic decisions. One such decision involves the use of accent colors.

What are Accent Colors?

Accent colors are hues used in small but impactful doses to draw attention and add interest to your home interior. They are typically brighter, darker, or bolder than the rest of the color palette. However, it’s not just about choosing a vibrant color; it’s about using it in a way that enhances and complements your existing decor.

Whether you’re working with a professional house painter contractor or doing a DIY paint job, understanding accent colors can significantly influence the outcome.

The Impact of Accent Colors on Home Interiors

The use of accent colors can have several effects on your home’s interior. Firstly, they add depth and dimension to a room, preventing it from appearing flat or monotonous. For example, a vibrant coral accent wall can add a pop of color to an otherwise neutral living room, giving it a lively and exciting feel.

Secondly, accent colors can guide the eye around the room. By placing pops of color strategically, you can highlight certain features or areas of a room. For instance, you might use an accent color to draw attention to a unique piece of furniture or a beautiful piece of artwork.

Lastly, accent colors can influence the mood and atmosphere of a room. Warm colors like reds, oranges, and yellows can create a cozy, inviting feel, while cool colors like blues, greens, and purples can create a calming, relaxing atmosphere.

Choosing the right accent color and knowing how to incorporate it into your space is key to successfully enhancing your home’s interior. For more advice and ideas, check out our article on color choices for your interior painting project.

Choosing Your Accent Colors

When it comes to adding pops of color to your home interior, the first step is choosing the right accent colors. The process can be fun, creative, and allows you to inject your personal taste into your living spaces.

Finding Inspiration

Inspiration can come from anywhere – it could be a piece of artwork you adore, a color from your favorite cushion, or even the hues in the sunset photo you took on your last vacation. Browse through home decor magazines, online interior design blogs, or platforms like Pinterest. You’ll find countless color palette ideas that you can use as a starting point. Remember, your chosen accent color should be something you love and can live with for a while.

If you’re still struggling to find that perfect color, you can always consult a house painter contractor. They can provide professional advice and show you a range of color options that work well as accent colors. They also know how different colors can change the mood and feel of a room, which can be incredibly helpful in your decision-making process.

Considering Your Existing Decor

Before you make a choice, take a look around your home. What color is your furniture? What about your walls, floors, and curtains? Your existing decor plays a big role in choosing accent colors.

If your living room furniture is grey, for example, consider vibrant colors like yellow or blue that can add depth and interest. Conversely, if your furniture is already quite colorful, you may decide to go with more subtle, neutral tones to balance things out.

When choosing accent colors, it’s also important to think about how they will fit into the overall color scheme of your home. If you have an open floor plan, the accent colors should work well with the colors in the adjoining spaces. For more tips on this, check out our article on color choices for your interior painting project.

Remember, adding accent colors to your home interior is not only about aesthetics. It’s about creating a space that reflects your personality and makes you feel comfortable. Whether you choose bold, vibrant colors or prefer more subdued, neutral tones, ensure your choices create a space that you’ll love to come home to.

How to Incorporate Accent Colors into Your Home

Adding accent colors to your home interior can completely transform the look and feel of your space. But how do you incorporate these colors into your home? Let’s explore some effective ways to inject vibrancy and personality into your living space.

Accent Walls

Accent walls are a popular way to introduce an accent color into a room. They create a focal point and can dramatically change the atmosphere of the space. When selecting a wall for this purpose, consider one that is directly visible when entering the room.

When you’re ready to paint, consider hiring a professional house painter contractor to ensure a flawless finish. Remember, the color you choose for your accent wall should complement the other colors in the room. If you’re unsure about what color to pick, check out our article on color choices for your interior painting project for inspiration.

Furniture and Home Accessories

Another effective method to incorporate accent colors is through the use of furniture and home accessories. This could be a vibrant sofa, a bold rug, or even colorful cushions. These pieces can add a pop of color without the commitment of painting a wall.

You can also take this a step further by matching your accent color with small accessories like vases, lamps, or picture frames. This not only ties the room together but also allows you to experiment with different shades and tones.

Artwork and Decorative Pieces

Artwork and decorative pieces are a great way to add accent colors to your home. A painting or a piece of wall art can add a splash of color and serve as an eye-catching focal point. You can also use decorative items like sculptures, ceramics, or even books to bring in your accent color.

Remember, it’s all about balance. No matter which method you choose to incorporate accent colors, ensure it complements your existing interior rather than overpowering it. And always consider the mood and function of the room when adding these vibrant hues. For more tips and advice on successfully using accent colors in your home, keep exploring our articles.

Tips to Successfully Use Accent Colors

Adding accent colors into your home interior can be an exciting experience. However, it can also be a bit daunting if you’re not sure where to start. Here are some tips that will help you confidently introduce accent colors into your home.

Balancing Accent Colors with Neutral Tones

The first tip to remember when adding accent colors to your home is the importance of balance. Accent colors are meant to stand out, but they should never overwhelm the space. You can achieve this balance by using neutral tones as the base of your color scheme.

Neutral hues like whites, grays, and beiges create a calm and inviting background that allows your accent colors to shine. You can use these tones for the majority of your walls, furniture, and decor. Then, introduce your accent colors through smaller elements like throw pillows, artwork, rugs, or one feature wall.

Remember that balance is key. Too much of your accent color can make your space feel overwhelming, while too little can make it seem disjointed. Aim for a 60-30-10 distribution: 60% neutral tones, 30% secondary color, and 10% accent color for a harmonious look.

Using Accent Colors to Highlight Features

The second tip is to use accent colors to highlight architectural features in your home. Do you have a beautiful fireplace or a stunning bay window? Using an accent color in these areas can draw attention to these features and make them stand out.

Or, you can create a feature wall with your accent color. This will serve as a focal point in the room and add a burst of color to your space. You can also use accent colors to highlight artwork or decorative pieces in your home.

Creating a Cohesive Color Scheme

The final tip is to create a cohesive color scheme that flows throughout your home. This doesn’t mean that you need to use the same accent color in every room. Instead, choose a palette of colors that complement each other and use them in different ways in each space.

For example, you might use a bold blue as an accent color in your living room, then use a softer shade of the same color in your kitchen. This creates a sense of continuity and flow from one room to the next.

Also, don’t forget to consider the mood you want to create in each room. Bright, bold colors can add energy and excitement, while softer, muted colors can create a more relaxing and calming atmosphere.

Incorporating accent colors into your home can be a fun and rewarding process. Just remember to balance your colors, use them to highlight features, and create a cohesive scheme that ties your whole home together. Need more advice on color choices for your interior painting project? Check out our article here to learn more.

Mistakes to Avoid When Using Accent Colors

Introducing accent colors into your home interior can be a game changer in the world of decor. However, there are a few common mistakes that can turn your vibrant vision into a disarray. Let’s explore these pitfalls and learn how to avoid them.

Overdoing It

The phrase “too much of a good thing” definitely applies when it comes to accent colors. While a pop of color can be refreshing and highlight the room’s unique features, overdoing it can create a visual overload.

An accent color is meant to draw attention, but when used excessively, it can distract and overwhelm the senses. To avoid this, consider following the 60-30-10 rule: 60% of the room is in a dominant color (usually a neutral tone), 30% in a secondary color, and 10% in the accent color. This ensures a balanced and pleasing palette.

Remember, your goal is to create a cohesive design that enhances the overall aesthetic of your space. For more advice on color schemes, read our article on color choices for your interior painting project.

Ignoring the Room’s Function and Mood

Each room in your home has a different function, and the colors you choose should reflect that. The mood or atmosphere you want to set for each space plays a critical role in determining the right accent colors.

For instance, a vibrant red might be great as an accent color in the living room to stimulate conversation, but it might not be the best choice for a bedroom where you want a more calming environment.

When you’re adding accent colors to your home interior, always consider the function and mood of the room. If you wish to learn more about how color affects mood, check out our article on which paint color is best for your master bedroom?.

Failing to Consider Lighting and Space

The way an accent color looks can greatly vary depending on the lighting and space. Natural light, artificial light, the size of the space, and even the direction the room faces can all affect how a color appears.

For example, a color that looks charmingly bold in a large, well-lit room may feel overpowering in a smaller, darker space.

Before you commit to an accent color, test it in different light conditions and times of the day to see how it changes. This can save you from potential disappointment down the line. For more tips on painting small rooms, have a look at our article on interior painting & design: do’s and don’ts for small rooms.

Avoiding these common mistakes can help ensure your accent colors enhance rather than detract from your home’s overall design. Remember, adding color to your home should be a fun and creative process, so don’t be afraid to experiment and make the space truly yours.

7 Expert Strategies for Prolonging the Life of Your Exterior Paint Jobs

7 tips for making exterior paint jobs last longer

Introduction to Exterior Paint Jobs

When I walk down a street, it’s the houses with the vibrant, well-kept paint jobs that always catch my eye. You too? Well, that’s exactly why exterior paint jobs matter so much.

Why Exterior Paint Jobs Matter

A fresh coat of paint does more than just beautify your home. It acts as a protective shield against weather damage, prevents insects, and even extends the life of your siding. Not to mention, it can significantly boost your home’s curb appeal and overall value. A well-executed exterior paint job is like a good suit – it presents your home in the best light and leaves a lasting impression. If you’re interested in learning more about the benefits of painting your home’s exterior, check out our article on the top 7 benefits of painting your home’s exterior.

The Usual Lifespan of Exterior Paint Jobs

So, how long can you expect a typical exterior paint job to last? It’s a question I get asked all the time. The answer depends on a variety of factors including the quality of the paint, the weather conditions in your area, and how well the job was done in the first place. On average, a good quality paint job should last anywhere from 5 to 10 years. But, with proper care and maintenance, you can extend this lifespan significantly.

My goal in this article is to share with you my top 7 tips for making your exterior paint jobs last longer. It’s about helping you get the most out of your investment and keeping your home looking its best for years to come. So, let’s get started, shall we?

For more information on the lifespan of exterior paint jobs, I recommend checking out our article on how often do you need to paint the exterior of your house?. It dives deeper into what affects the lifespan of a paint job and how to ensure you get the most out of yours.

Expert Strategies for Durable Exterior Paint Jobs

You’re probably here because you want your exterior paint job to last as long as possible. Don’t worry, I’ve got you covered with these 7 expert strategies to ensure that your exterior paint job stands the test of time.

1. Choose Quality Paint

It all starts with the paint. High-quality paint can significantly extend the lifespan of your exterior paint job. While it may cost a bit more upfront, it pays off in the long run. Quality paints are more durable and fade-resistant, allowing your home to look fresh and vibrant for many years to come. Check out our guide on color choices for your interior painting project to give you a headstart on selecting the right paint.

2. Prep Your Surface Well

Surface preparation is a critical step in making your paint job last longer. This process includes cleaning, scraping off loose paint, and priming. Proper prep work ensures the paint adheres well to the surface, providing a smoother finish and greater longevity. For a step-by-step guide on preparing your home for painting, read our article on 5 steps to prepare your home for exterior painting.

3. Consider the Weather

The weather plays a significant role in how well your paint job will hold up. It’s best to paint your home’s exterior in mild weather conditions. Avoid painting in extreme heat, cold, or humidity as they can impact the way the paint dries and adheres to the surface.

4. Apply Multiple Coats

One coat of paint may not be enough to withstand the elements. Applying multiple coats of paint can provide an extra layer of protection and extend the life of your paint job. Remember, it’s not just about adding color, but also about providing a lasting shield for your home.

5. Regular Cleaning and Maintenance

Regular cleaning and maintenance can help your paint job last longer. This includes washing the exterior of your home annually to remove dirt and mildew, which can cause the paint to deteriorate faster. Regular maintenance checks can also help identify and address areas that may need touch-ups or repainting.

6. Protect from Harsh Weather

Harsh weather can take a toll on your exterior paint job. If your area experiences heavy rain, wind, or sun, consider additional protective measures. This might include using specialty paints or finishes designed to withstand these conditions, or installing physical barriers like awnings or shutters.

7. Inspect and Touch Up Regularly

Finally, regular inspections and touch-ups can help prolong the life of your exterior paint job. Keep an eye out for any signs of wear and tear or damage, and address these issues promptly. A quick touch-up now can save you from a more extensive (and expensive) paint job down the line.

Following these 7 tips can help you get the most out of your exterior paint job. But remember, sometimes it’s best to leave it to the professionals. If you’re considering hiring a house painter contractor, we’ve got you covered with tips on what to look for. After all, a quality paint job isn’t just about preserving your home—it’s about creating a space you love.

Hiring Professional Painters

While I’ve given you a rundown of the top strategies for making your exterior paint jobs last longer, let’s not forget that hiring a professional painter can make a world of difference.

Why Consider Professional Painters

Professional painters bring a wealth of experience and expertise to the table. They know all the ins and outs of the painting process, from surface preparation to applying the final coat. Plus, they have the right tools and equipment to get the job done efficiently and safely.

One of the biggest benefits of hiring a professional painter is the quality of the work. A professional will know how to properly prep the surface, choose the right paint for your home’s exterior, and apply it in a way that ensures longevity. They can also provide valuable advice on color choices and finishes, helping you achieve the look you desire.

Hiring a pro also saves you time and effort. Instead of spending your weekends on a ladder with a paintbrush in hand, you can relax and let the professionals handle the hard work. And let’s not forget, a professional paint job can increase the value of your home and boost its curb appeal.

What to Look for in a Painting Contractor

So, you’ve decided to hire a professional painter. Great! But before you dive in, here are a few things to consider in your search for the right painter contractor.

  1. Experience: Look for a painting contractor who has a solid track record and plenty of experience. Find out how long they’ve been in business and ask for references or before-and-after photos of past projects.
  2. License and Insurance: Make sure the contractor is licensed and insured. This protects you in case of any accidents or damages during the painting process.
  3. Estimate: Get a detailed estimate that includes the scope of the project, the type of paint to be used, and the total cost. This will help you avoid any surprises down the line.
  4. Guarantee: A reputable painting contractor will stand by their work. Ask if they offer any type of guarantee or warranty on their painting services.
  5. Reviews and Recommendations: Check online reviews and ask friends or neighbors for recommendations. This can give you a good idea of the contractor’s work ethic and quality of service.

Remember, the goal is to find a painting contractor who can deliver a high-quality paint job that will stand the test of time. By doing your homework and asking the right questions, you can ensure that your home’s exterior is in good hands.

The Eternal Question: How Often Should You Paint Your Homes Exterior?

how often do you need to paint the exterior of your house?

The Importance of House Painting

House painting is more than just an aesthetic choice. It plays a crucial role in maintaining the integrity of your home and protecting it from the elements. Understanding the benefits of regular house painting can provide insight into the question, ‘how often do you need to paint the exterior of your house?’.

What Does Painting Do for Your Home?

The primary purpose of exterior house painting is to provide a protective barrier between your home and the elements. Whether it’s harsh sunlight, heavy rain, or fluctuating temperatures, a well-applied coat of paint can save your house from premature aging.

Aside from this protective role, painting also boosts the curb appeal of your home. A fresh, vibrant color can breathe new life into your house and make it stand out in the neighborhood. Plus, the right shades can enhance architectural details and make your home more pleasing to the eye. For more on the benefits of painting your home’s exterior, check out our article on the top 7 benefits of painting your home’s exterior.

The Cost of Neglect

Ignoring the need for regular painting can lead to serious problems down the line. Unprotected wood can rot and decay, while stucco can crack and crumble. In addition, faded or peeling paint can significantly decrease your home’s resale value.

On a broader scale, the cost of repairing or replacing damaged siding can be significantly higher than the cost of a professional paint job. Therefore, regular maintenance, including painting, can save homeowners from expensive repairs in the future.

In conclusion, regular painting is an investment in your home. It not only enhances the aesthetic appeal of your house but also protects it from various environmental factors. As with any investment, it’s important to make informed decisions, which includes understanding the painting process and hiring a qualified house painter contractor.

Decoding the Painting Cycle

When it comes to exterior house painting, one question often pops up: “how often do you need to paint the exterior of your house?” The answer isn’t as simple as one might think. Several factors come into play, affecting the frequency of exterior painting.

Factors Affecting The Frequency of Exterior Painting

A multitude of factors can affect how often you need to repaint your house’s exterior:

  1. Weather Conditions: Areas with harsh weather conditions, such as extreme heat, cold, or humidity, may require more frequent painting. Sun exposure can cause paint to fade, while moisture can lead to peeling or chipping.
  2. Quality of Previous Paint Job: A high-quality paint job using premium materials can last longer than a quick, budget-friendly job. Proper surface preparation and the use of primer can also extend the life of the paint job.
  3. Type of Siding: Different siding materials wear paint differently. For example, wood siding may need to be repainted every 3-7 years, while fiber cement siding can go 10-15 years before repainting is necessary.
  4. Color: Dark colors absorb more heat and can fade faster than lighter shades.
  5. Maintenance: Regular cleaning and maintenance can prolong the lifespan of a paint job.

For more details on how to maintain your exterior paint job, check out our article 7 tips for making exterior paint jobs last longer.

General Guidelines on Painting Frequency

While the frequency of painting can vary based on the factors above, here are some general guidelines:

Siding Type Painting Frequency
Wood Siding Every 3-7 years
Aluminum Siding Every 5 years
Stucco Every 5-6 years
Brick Every 15-20 years
Vinyl Siding Only needs painting if the color is changed or if the vinyl has been damaged

However, these are just guidelines. It’s important to keep an eye on your home’s exterior and look for signs of peeling, fading, or other damage that might indicate it’s time for a new coat of paint. If you’re unsure, it can be helpful to consult with a professional house painter contractor to assess the condition of your paint job.

Remember, a fresh coat of paint not only enhances the aesthetic appeal of your home but also serves as a protective barrier against the elements. Regularly painting your home’s exterior is a worthwhile investment in the longevity and value of your home.

Signs Your House Needs a New Paint Job

As a homeowner, you may often find yourself asking, “how often do you need to paint the exterior of your house?” While there isn’t a set-in-stone answer to this, certain signs can indicate that your home is due for a fresh coat of paint. Let’s explore some of these telltale signs.

Peeling or Cracked Paint

One of the most obvious signs that your house needs a new paint job is peeling or cracked paint. If the paint on your exterior walls is chipping away or forming cracks, it’s a clear indication that the existing coat of paint is deteriorating. Ignoring this can lead to further damage as water and moisture can seep into these cracks, causing damage to your home’s structure.

Also, peeling or cracked paint can significantly diminish your home’s curb appeal. A fresh paint job can restore your home’s beauty and protect it from potential damage. Check out our article on the top 7 benefits of painting your home’s exterior to understand why it’s a worthwhile investment.

Fading or Bleached Paint

Over time, harsh weather conditions and direct sunlight can cause your home’s paint to fade or bleach. If your once vibrant exterior walls now look dull and lackluster, it’s time for a fresh coat of paint.

Fading or bleached paint not only affects the aesthetics of your home but can also be a sign that the protective properties of the paint are deteriorating. Visit our article on how to minimize color fading on your home’s exterior to get tips on how to prevent this from happening.

Damaged Wood or Stucco

If your home’s exterior is made of wood or stucco, you need to be on the lookout for signs of damage. Rotting wood, cracked stucco, and the presence of mold or mildew are clear indications that your house needs immediate attention.

A fresh paint job can help seal off minor cracks and prevent further damage. Also, painting over damaged wood or stucco can help inhibit the growth of mold and mildew. However, it’s important to address any structural damage before embarking on a painting project. For homeowners with wood siding, our article on 7 tips for painting your home’s wood siding exterior can be a useful guide.

In conclusion, if you notice any of these signs, it’s time to consider hiring a professional house painter contractor to give your home’s exterior the TLC it needs. Remember, a timely paint job not only enhances your home’s appearance but also acts as a protective shield against potential damage.

How to Extend the Life of Your Paint Job

When it comes to the question “how often do you need to paint the exterior of your house?”, a lot depends on how well you take care of your existing paint job. Here are some tips to help extend the life of your paint job:

Quality of the Paint

The quality of paint plays a crucial role in how long a paint job will last. High-quality paint is usually more durable, has better color retention, and is more resistant to weather conditions, which can help extend the life of your paint job. While it may be tempting to save money by choosing a cheaper paint, remember that lower quality paint may not provide the same level of protection and may need to be retouched or redone more frequently. For more information on choosing the right paint for your home, you can check out our article on color choices for your interior painting project.

The Role of Primer

Primer is often overlooked, but it plays a significant role in ensuring the longevity of your paint job. A good quality primer creates a suitable surface for the paint to adhere to, increasing its durability. It also helps in covering up old paint and stains, ensuring a more uniform appearance. Applying a primer before painting can significantly increase the lifespan of your paint job. For more tips on painting, you can check out our article on 5 rules of painting a room with two colors.

The Impact of Proper Preparation

The longevity of a paint job also heavily depends on the preparation of the surface before painting. This includes cleaning the surface, removing any loose or peeling paint, repairing any damages, and smoothing the surface. Proper preparation ensures that the paint adheres better to the surface, resulting in a more durable and long-lasting paint job. You can check out our article on 5 steps to prepare your home for exterior painting for a detailed guide on how to properly prepare your home for painting.

In conclusion, the longevity of your paint job is not just determined by the frequency of painting but also the quality of paint used, the use of primer, and how well the surface is prepared. By taking these factors into account, you can significantly extend the life of your paint job and reduce the frequency of repainting. For more tips on maintaining your paint job, you can read our article on 7 tips for making exterior paint jobs last longer.

Hiring the Right Professionals

When it comes to answering the question of “how often do you need to paint the exterior of your house?”, another crucial factor to consider is the quality of the workmanship. Hiring the right professionals can make a significant difference in how long your paint job lasts.

What to Look for in a House Painter

Choosing the right house painter involves more than just a quick online search. It’s important to consider their experience, reputation, and the quality of their work. A good house painter should have a solid track record of satisfied customers and be able to provide references upon request.

Look for painters who specialize in exterior house painting and have a clear understanding of the unique challenges it presents. They should be knowledgeable about the different types of paint and their appropriate applications. It’s also important that they’re licensed and insured for your peace of mind.

Don’t hesitate to visit the house painter contractor page on our website for more information about what to look for in a professional.

Questions to Ask When Hiring a Painter

When hiring a painter, it’s essential to ask the right questions. Here are a few to get you started:

  1. How long have you been in business?
  2. Can you provide references from previous customers?
  3. Are you licensed and insured?
  4. Do you offer a warranty on your work?
  5. What type of paint do you use and why?
  6. How do you prepare the house for painting?
  7. What measures do you take to protect non-painted areas and clean up after the job is done?

Asking these questions can give you a good sense of the painter’s professionalism, reliability, and attention to detail.

Understanding the Painting Process

The painting process involves several steps, each one crucial to the final result. It usually starts with a thorough cleaning of the exterior, followed by necessary repairs and preparation. The painting itself should be done with precise attention to detail to ensure a uniform and long-lasting finish.

A good painter should be transparent about the entire process, explaining each step and its importance. They should also provide you with a timeline and keep you updated on the progress of the work.

While it is tempting to focus on the cost, remember that a lower price tag might mean cutting corners, leading to subpar results. Investing in a quality paint job can save you from frequent repainting, making it more cost-effective in the long run.

For more insights about the painting process, check out our article on 5 steps to prepare your home for exterior painting.

By hiring the right professionals and understanding the painting process, you can ensure that your house’s exterior remains in great condition for years to come. This, in turn, helps you answer the question “how often do you need to paint the exterior of your house?” with confidence.

Master the Art of Color: Which Paint Color is Best for Your Master Bedroom?

which paint color is best for your master bedroom?

The Power of Color

When it comes to interior design, color is a powerful tool that can significantly impact the overall atmosphere of a room. From setting the mood to influencing perception, the hues you choose play a vital role.

The Impact of Color on Mood

Color can greatly affect mood and emotions. For instance, bright colors like yellow and orange can evoke feelings of happiness and energy, while cooler tones such as blue and green can create a serene and calming effect.

On the contrary, dark colors like black and deep red can create a dramatic and intense atmosphere. When considering which paint color is best for your master bedroom, it’s crucial to take into account the mood you want to set. After all, the bedroom is often a place of relaxation and tranquility. For more insights on how color can influence the mood of a room, check out our article on color choices for your interior painting project.

The Role of Color in Interior Design

In addition to influencing mood, color plays a significant role in the overall aesthetic of a room. The right color can make a small room appear larger, a dark room seem brighter, and can even highlight or downplay architectural features.

For instance, painting a small room with light colors can make it appear more spacious. On the other hand, using darker colors can add depth and intimacy to a large room. It’s essential to consider these factors when deciding on a color for your master bedroom.

When it comes to pairing colors, the use of a color wheel can be beneficial. Complementary colors, which are colors opposite each other on the color wheel, can create a vibrant contrast. Analogous colors, which are colors next to each other on the color wheel, can create a harmonious and cohesive look.

Lastly, it’s also important to consider the finish of the paint. A glossy finish can reflect light and add brightness to a room, while a matte finish can provide a sophisticated and contemporary look. For more tips on using color in interior design, check out our article on 5 rules of painting a room with two colors.

With the right color, your master bedroom can be transformed into a peaceful sanctuary that reflects your personal style. Always remember, when it comes to choosing a color, there are no hard and fast rules. It’s all about creating a space that feels right for you. If you’re considering a painting project, hiring a professional house painter contractor can ensure a quality result.

The Master Bedroom: Your Personal Sanctuary

When considering the design of your home, the master bedroom often holds a special place. It is your personal retreat, a space for relaxation, and a refuge from the outside world.

Understanding the Purpose of Your Master Bedroom

The master bedroom serves a dual function. On one hand, it’s a practical space for sleeping and personal storage. On the other hand, it’s an intimate sanctuary that should reflect your personal taste and style. It’s where you start and end your day, making it an important space to feel comfortable and at peace.

In terms of interior design, the master bedroom should be a harmonious blend of functionality and aesthetics. As such, every element in the room, from the furniture to the wall color, should contribute to creating a serene and inviting atmosphere. This is where the choice of paint color plays a crucial role.

The Importance of Choosing the Right Colors

The color of your master bedroom can significantly influence the overall ambiance of the space. It’s not just about choosing a color that you like; it’s about selecting a shade that complements the room’s size, lighting, and furniture. This is a key aspect of the question, ‘which paint color is best for your master bedroom?’

Different colors can evoke different moods. For instance, lighter shades can make a room appear larger and more airy, while darker hues can create a cozy and enveloping feel. Cool colors like blues and greens are known to promote relaxation and tranquility, making them popular choices for bedrooms. On the other hand, warm tones like reds and oranges can generate a sense of warmth and comfort.

Choosing the right color for your master bedroom can also have practical implications. For instance, a well-chosen color can help to disguise any architectural flaws or highlight attractive features. It can also contribute to the room’s functionality by influencing factors like light reflection and perceived temperature.

When choosing the color for your master bedroom, it’s worth considering your personal preferences and lifestyle. If you prefer a calm and relaxing environment, opt for cool, neutral tones. If you want to create a vibrant and energetic space, consider using bold, bright colors. For more guidance on this topic, check out our article on color choices for your interior painting project.

Finally, remember that choosing the right paint color for your master bedroom is not just about aesthetics. It’s about creating a space that aligns with your personal style and promotes a sense of well-being. With thoughtful consideration and planning, you can transform your master bedroom into a sanctuary that you look forward to retreating to at the end of each day.

Factors to Consider When Choosing Bedroom Colors

When deciding on the paint color for your master bedroom, several factors should be taken into account. These include the size of the room and its lighting, the existing furniture and decor, and your personal preference and lifestyle.

Room Size and Lighting

The size of the room and the amount of natural light it receives can significantly influence how a color looks. Light colors tend to make small rooms appear larger and more open, while dark colors can add depth and coziness to a large room. The lighting in the room, both natural and artificial, will also affect the appearance of the color. For instance, a color may look different under LED lighting compared to natural daylight. Check out our article on interior painting & design: do’s and don’ts for small rooms for more insights.

Existing Furniture and Decor

The color of the existing furniture and decor in your bedroom should also be considered when choosing a paint color. You’ll want to choose a color that complements your existing pieces, creating a cohesive and harmonious look. Think about the dominant color in the room, and consider using a color wheel to identify complementary colors. Our guide on 5 rules of painting a room with two colors can provide some practical tips on using multiple colors in a room.

Personal Preference and Lifestyle

Lastly, your personal preference and lifestyle play a crucial role in determining which paint color is best for your master bedroom. The bedroom is a personal space, and the color should reflect your taste and personality. If you prefer calming and soothing environments, consider tranquil blues or restful greens. If you want to add vibrancy and energy to your space, consider bold and dramatic tones. Our article on color choices for your interior painting project offers some great insights on aligning color choices with personal preferences.

Choosing the right color for your master bedroom is not just about aesthetics; it’s also about creating a space that aligns with your lifestyle and enhances your well-being. Whether you’re a professional house painter contractor or a homeowner looking to refresh your space, understanding these factors will help you make an informed decision on the best paint color for your master bedroom.

Exploring Popular Master Bedroom Colors

The master bedroom is a personal haven, a place of relaxation and rest. The color scheme can play a significant role in creating this ambiance. Here, we delve into some popular color choices that might be perfect for your master bedroom.

Tranquil Blues

Blue is known for its calming, serene qualities, making it an ideal choice for a bedroom. From sky blue to navy, the spectrum of blue hues offers a wealth of options. Lighter shades can make the room feel airy and spacious, while darker tones can create a sense of depth and sophistication. When paired with white or cream accents, blue can evoke a beachy, coastal vibe that’s both refreshing and relaxing. To see how blue might work in your bedroom, check out our guide on color choices for your interior painting project.

Restful Greens

Green, the color of nature, is another excellent choice for a sleep-friendly bedroom. Green can be very soothing to the eyes and help to promote a sense of tranquility. Whether you opt for a soft sage, a vibrant lime, or a deep forest green, this versatile color can complement a variety of decor styles, from traditional to contemporary. Consider pairing green with earthy browns or crisp whites for a balanced, harmonious look.

Warm Neutrals

If you prefer a more neutral palette, consider warm colors like beige, taupe, or light gray. These shades can create a cozy, inviting atmosphere that’s perfect for unwinding at the end of the day. Plus, neutral colors are incredibly versatile and can work well with virtually any furniture or decor. For a touch of warmth, consider adding accents in rich, earthy tones like rust or mustard.

Bold and Dramatic Tones

For those who crave a bit more drama, darker shades can make a striking statement in a master bedroom. Think rich burgundy, deep navy, or charcoal gray. These bold colors can lend a luxurious, sophisticated feel to the room. To keep the space from feeling too dark, consider incorporating lighter elements, such as white bedding or light-colored furniture. Need some inspiration? Check out our tips on painting a room with two colors.

Choosing the right paint color is an important step in transforming your master bedroom into a personal sanctuary. Whether you prefer tranquil blues, restful greens, warm neutrals, or bold and dramatic tones, remember that the best color for your master bedroom is the one that resonates with you and creates the mood you desire. For more guidance and advice, consider consulting with a professional house painter contractor.

Tips for Choosing the Right Paint Color

Deciding on the perfect paint color for your master bedroom can be an exciting yet daunting task. With so many shades and hues to choose from, it’s easy to feel overwhelmed. Here are some tips to help you make the best choice for your personal sanctuary.

The Role of Color Swatches

Color swatches play a vital role in the paint selection process. They allow you to visualize how a particular color will look on your walls, enabling you to compare and contrast different options.

When using color swatches, it’s essential to observe them at different times of the day. The appearance of a color can change dramatically under different lighting conditions. Also, place them next to your furniture and decor to see how they coordinate.

Remember, paint often appears darker when applied to a large area, so it’s a good idea to choose a shade lighter than what you initially had in mind. Check out our article on color choices for your interior painting project for more insights.

Utilizing Color Wheel Theory

The color wheel is a valuable tool when selecting paint colors. It helps you understand the relationship between different colors and how they can complement or contrast each other.

For a harmonious look, consider analogous colors, which are next to each other on the color wheel. For a more dynamic and vibrant look, consider complementary colors, which are opposite each other on the color wheel.

When using the color wheel, consider the mood you want to create. Warm colors like reds, oranges, and yellows can create a cozy and inviting atmosphere. In contrast, cool colors like blues, greens, and purples can create a calm and serene environment. For more tips on using color effectively, take a look at our article on 5 rules of painting a room with two colors.

Considering Trends versus Timelessness

While it’s tempting to follow the latest color trends, it’s important to consider the longevity of your color choice. Trends come and go, but the paint on your walls will likely remain for several years.

Opting for timeless colors can be a safer choice. Neutrals like whites, grays, and beiges rarely go out of style and can serve as a perfect backdrop for any decor. If you still want to incorporate trendy hues, consider using them for accent walls or decor instead.

However, the most important factor is your personal preference. After all, it’s your bedroom, and you should love the color you choose. For a deeper dive into the world of interior color trends and timeless hues, check out our article on tips to add accent colors into your home interior.

Choosing the right paint color for your master bedroom can transform the space into a tranquil retreat. By considering color swatches, using color theory, and balancing trends with timeless hues, you can select a color that enhances the mood and aesthetic of your sanctuary.

Call Now Button