Say Goodbye to Bland: Transforming Your Kitchen with Painted Cabinets

painting kitchen cabinets: a smart alternative to replacement

Unleashing the Power of Paint

The transformative potential of paint is often overlooked, especially when it comes to home interiors. A fresh coat of paint can breathe new life into any space, creating a vibrant and refreshed atmosphere that reflects your personal style.

The Impact of a Kitchen Makeover

The kitchen, often referred to as the heart of the home, is a prime candidate for a paint-based makeover. A kitchen makeover can have a profound impact on the overall ambience of your home. Fresh, updated colors bring an inviting warmth to the space where family and friends often gather. The aesthetic improvements from a kitchen makeover can also add substantial value to your home, making it an investment worth considering.

Why Consider Painting Kitchen Cabinets?

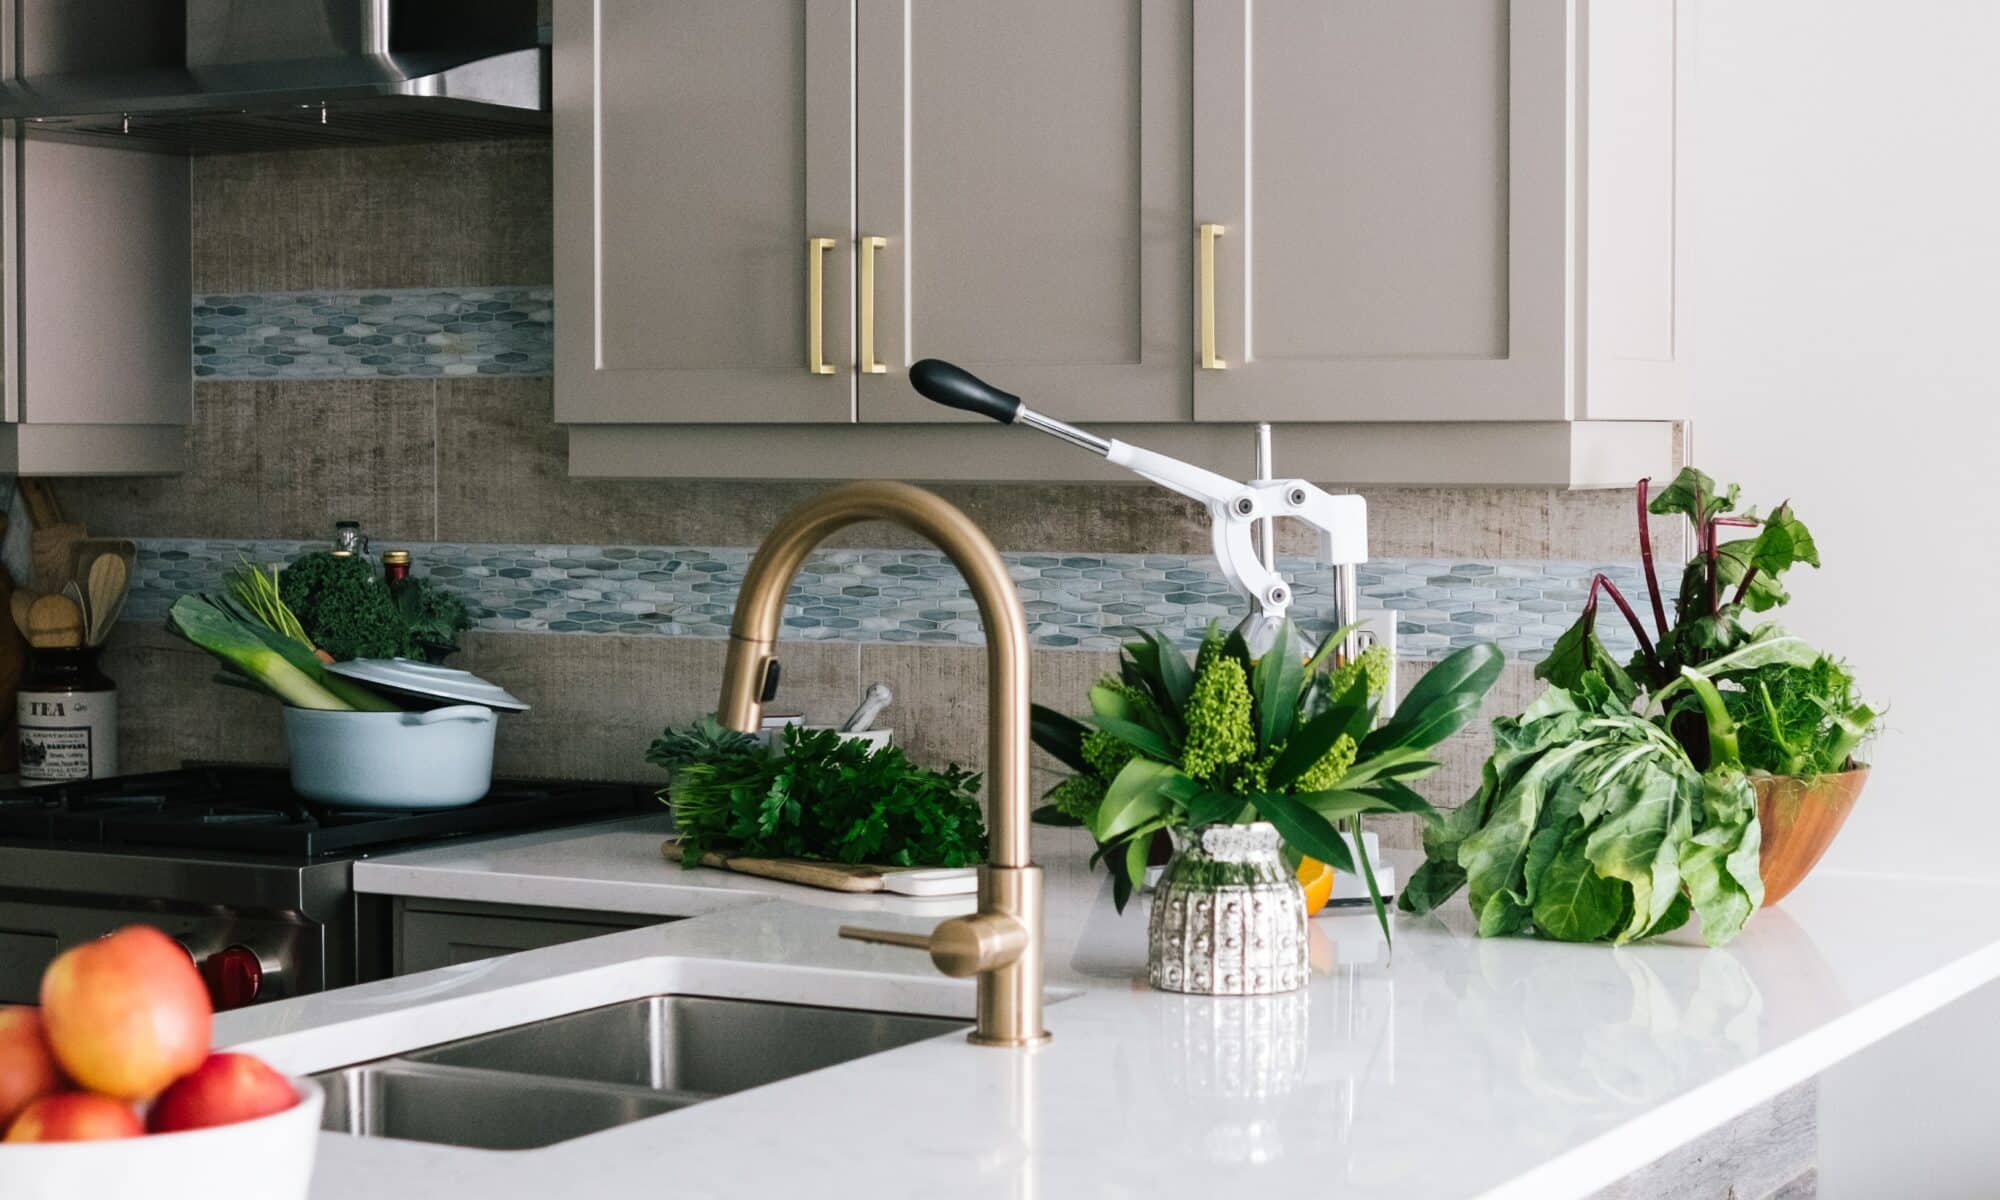
Among the various components of a kitchen, cabinets are a major focal point. They occupy a significant amount of visual space and are key to the functionality of the kitchen. This makes them an excellent candidate for a paint job.

Painting kitchen cabinets is a cost-effective way to give your kitchen a new look without the hefty price tag of a full remodel. It’s a smart alternative to replacement, allowing for a substantial change without the need for major construction.

When it comes to painting kitchen cabinets, the possibilities are endless. With a palette of countless colors and finishes at your disposal, you can create a look that perfectly complements your home’s decor and your personal style.

Whether you’re aiming for a modern, minimalist look with sleek, monochrome cabinets or a more traditional style with richly colored wood tones, painting your cabinets allows you to fully customize the look and feel of your kitchen. For more on the power of paint and how it can transform your space, check out our painting and decorating articles.

Embracing the project of painting kitchen cabinets can make a world of difference in your kitchen’s aesthetic. It’s an affordable, accessible way to update your kitchen and add a personal touch. A well-planned paint job can turn a tired, outdated kitchen into a vibrant, inviting space, proving that sometimes, all it takes is a little paint.

The Smart Alternative: Painting Over Replacement

When it comes to revamping your kitchen cabinets, many people immediately consider a full replacement. However, painting your kitchen cabinets can be a smart alternative that offers significant benefits in terms of cost, time, and environmental impact.

Cost Analysis: Painting versus Replacement

In terms of cost, painting kitchen cabinets is considerably more economical than replacing them. As per industry estimates, the cost of replacing kitchen cabinets can range anywhere from $4,000 to $9,000, depending on the size of the kitchen and the quality of the cabinets. On the other hand, painting kitchen cabinets usually costs between $1,200 to $3,000, making it a far more affordable option.

Cost Range (in USD)
Cabinet Replacement $4,000 – $9,000
Cabinet Painting $1,200 – $3,000

For a detailed breakdown of costs involved in a painting project, refer to our article 10 things you need to know before starting your painting project.

Time Considerations: Painting versus Replacement

When it comes to time, painting kitchen cabinets also wins out. The process of painting cabinets can take anywhere from a few days to a week, depending on the size of the kitchen and the complexity of the job. Conversely, a full cabinet replacement can take several weeks or even months to complete, causing significant disruption to your daily life.

Time Required
Cabinet Replacement Several weeks to months
Cabinet Painting Few days to a week

For more tips on how to manage time efficiently during a painting project, visit our post on why quality paint is worth the price: an expert’s perspective.

Environmental Impact: Painting versus Replacement

Lastly, painting kitchen cabinets is a more environmentally friendly choice. Cabinet replacement often involves discarding old cabinets, which adds to landfill waste. Moreover, new cabinets typically involve the use of new materials and energy for manufacturing. On the other hand, painting reuses existing materials and requires significantly less energy, reducing the environmental footprint of your kitchen makeover.

Environmental Impact
Cabinet Replacement High (adds to landfill waste, requires new materials and high energy for manufacturing)
Cabinet Painting Low (reuses existing materials, requires less energy)

For more insights into environmentally-friendly painting and decorating, refer to our article painting for health: using color psychology in design.

In conclusion, painting kitchen cabinets is a cost-effective, time-efficient, and eco-friendly alternative to cabinet replacement. It’s a smart way to give your kitchen a fresh, new look without breaking the bank or causing unnecessary disruption to your daily routine.

Preparing for Your Cabinet Transformation

Before you dive into painting your kitchen cabinets, it’s crucial to get everything in order. This includes selecting the right paint color, gathering all necessary tools and materials, and understanding the process for prepping your cabinets.

Choosing the Right Paint Color

Selecting the right paint color for your kitchen cabinets can have a dramatic impact on the overall look and feel of your kitchen. When considering color options, think about the overall design of your kitchen, including your countertops, appliances, and flooring. Neutral shades like white, gray, and beige are versatile and can complement a wide range of kitchen styles. For a more vibrant look, consider bold hues like blue, green, or even red. Check out our article on the top 7 interior home painting colors for 2023 for some inspiration.

Necessary Tools and Materials

To ensure a smooth painting project, you’ll need to gather some essential tools and materials. Here’s a quick checklist:

  • Screwdriver (for removing cabinet doors and hardware)
  • Sandpaper (for smoothing the surface)
  • Primer (to prepare the cabinets for painting)
  • High-quality paint (choose a semi-gloss or gloss finish for durability)
  • Paintbrushes and rollers (for application)
  • Painter’s tape (to protect surrounding areas)

Remember, quality materials are key to a professional-looking finish. For more information on why quality paint is worth the price, visit our article why quality paint is worth the price: an expert’s perspective.

Step-by-Step Preparation Guide

  1. Remove Cabinet Doors and Hardware: Using a screwdriver, remove the doors and hardware from your cabinets. Keep all screws and hardware in a safe place for reinstallation.
  2. Clean the Cabinets: Wipe down your cabinets with a mild detergent to remove any grease or grime. This step is crucial for ensuring the paint adheres properly.
  3. Sand the Cabinets: Use sandpaper to smooth any rough spots on your cabinets. This creates a better surface for the primer and paint to adhere to.
  4. Apply Primer: Once the cabinets are clean and smooth, apply a coat of primer. This helps to block any stains and provides a good base for your paint.
  5. Wait for the Primer to Dry: Before moving on to painting, wait for the primer to dry completely.

Remember, preparation is key when painting kitchen cabinets. By taking the time to prepare properly, you’ll set the stage for a successful transformation. For more tips and tricks, visit our guide on 10 things you need to know before starting your painting project.

Painting Your Kitchen Cabinets

Once you’ve decided to take the plunge and paint your kitchen cabinets, it’s time to arm yourself with the right knowledge and techniques to ensure a smooth and professional finish. Let’s delve into the process of cleaning and sanding, applying primer, and using effective painting techniques to transform your kitchen cabinets.

Cleaning and Sanding

Before anything else, it’s crucial to clean the cabinets thoroughly. Grease, dust, and grime can affect paint adhesion, leading to an uneven finish. A mixture of warm water and a mild detergent should do the trick. Once cleaned, let the cabinets dry fully.

Next comes the sanding process. Sanding helps create a surface that the primer and paint can adhere to effectively. Using a medium-grit sandpaper, lightly sand the surfaces you plan to paint. After sanding, wipe down the cabinets with a damp cloth to remove any residual dust.

Applying Primer

Primer serves as a base for the paint, enhancing its durability and vibrancy. It also helps to cover any stains or dark colors on the cabinets, ensuring a uniform finish. Apply the primer using a brush or a roller, and let it dry completely before moving to the next step. If you’re unsure about the type of primer to use, check out our article on painting and decorating for more information.

Painting Techniques for a Professional Finish

When it comes to painting kitchen cabinets, technique matters. Here are some tips to achieve a professional finish:

  1. Use thin coats of paint: Thick coats can lead to drips and uneven texture. Apply thin coats, letting each one dry fully before adding the next.
  2. Use a roller for large flat surfaces: A roller can cover large areas quickly and efficiently. For smaller sections and intricate details, use a brush.
  3. Paint in the direction of the wood grain: This ensures a smooth finish and minimizes visible brush strokes.
  4. Give ample drying time: Patience is key. Rushing the drying process could result in chipping and peeling.

Through careful preparation and the right techniques, painting kitchen cabinets can be a rewarding DIY project. It’s an affordable way to breathe new life into your kitchen, without the need for complete replacement or costly renovations. For more painting and decorating tips, explore our range of articles.

Care and Maintenance of Painted Cabinets

Once you’ve transformed your kitchen by painting your cabinets, it’s essential to know how to maintain them properly. With the right care and attention, your painted cabinets can continue to look great for years to come.

Keeping Your Cabinets Looking New

Ensuring your cabinets stay looking fresh and vibrant is all about regular maintenance. Wipe them down frequently with a soft cloth to prevent dirt and grease from building up. Avoid using abrasive cleaners, which can scratch the paint and dull the finish.

It’s also important to touch up the paint as needed. Over time, the paint may fade due to exposure to sunlight or wear down due to frequent use. Regular touch-ups can help maintain the fresh, newly painted look of your cabinets.

For more tips on maintaining the look of your painted surfaces, check out our article on how often should you repaint your home and why?

Addressing Chips and Scratches

Even with the best care, chips and scratches can occur. When they do, it’s important to address them promptly to prevent them from getting worse. Lightly sand the affected area, then apply a fresh coat of paint. If the chip or scratch is deep, you may need to use a wood filler before painting.

For more detailed information on how to tackle chips and scratches, visit 10 things you need to know before starting your painting project.

Regular Cleaning and Care Tips

Regular cleaning is vital for maintaining the appearance and functionality of your painted cabinets. Use a mild, non-abrasive cleaner and a soft cloth to wipe down the cabinets. Avoid using excessive water, which can seep into the wood and cause damage.

In addition to regular cleaning, it’s important to be mindful of the items you place in your cabinets. Heavy items can cause the shelves to sag over time, while sharp objects can scratch the painted surface.

Remember, keeping your painted cabinets looking new doesn’t have to be a chore. With regular care and maintenance, your kitchen can continue to shine with the beauty of fresh paint. For more tips and tricks on painting and decorating, check out our other articles on painting and decorating.

Painting Magic: How to Transform an Outdated Kitchen – Before and After

transforming an outdated kitchen with paint: a before and after case study

The Charm of a Kitchen Makeover

There’s something magical about seeing an outdated kitchen transform into a fresh, modern space. As a professional painter, I’ve had the pleasure of witnessing these transformations firsthand. For those who are considering a kitchen makeover, let me assure you, the results can be truly astounding, especially when you harness the power of paint.

Why Paint is the Easiest Way to Transform Your Kitchen

Of all the ways to renovate a kitchen, painting is arguably the easiest and most cost-effective. It doesn’t require expensive materials or weeks of construction. Instead, with a few cans of high-quality paint and some creativity, you can dramatically alter the look and feel of your kitchen. This is the story of one such transformation—an outdated kitchen made new again through the power of paint.

When it comes to transforming an outdated kitchen, paint offers endless possibilities. It allows you to change the color palette, hide old and worn surfaces, and even create visual interest with different painting techniques. Whether it’s the cabinets, the walls, or even the ceiling, paint can make a world of difference.

Furthermore, painting is a project that can be done in stages, which is often a relief for homeowners who can’t afford to have their kitchen out of commission for an extended period. And, unlike some other forms of renovation, painting doesn’t produce a lot of waste, making it an environmentally friendly choice.

Lastly, painting offers an opportunity for personal expression. The colors and finishes you choose can reflect your personality and style, making the kitchen truly your own. And if you ever get tired of the look, it’s relatively easy and inexpensive to paint again.

For more insights on the power of paint, check out our articles on painting and decorating, why quality paint is worth the price: an expert’s perspective, and the top 7 interior home painting colors for 2023.

Stay tuned for the ‘before’ and ‘after’ of this kitchen transformation, where I’ll share the process, techniques, and tips that led to this dramatic change.

Tackling an Outdated Kitchen: A Case Study

The journey of transforming an outdated kitchen with paint began with an initial assessment of the space. Following that, I moved on to the critical task of choosing the right paint color and finish.

Initial Assessment: The “Before” Kitchen

Upon entering the kitchen, it was clear that it was stuck in a time warp. The faded wallpaper, outdated fixtures, and dark wooden cabinets gave the room a dull, gloomy feel. The layout was functional, but the aesthetics were far from appealing.

The space lacked natural light, making it appear even smaller and more cramped. The dark cabinets absorbed the little available light, creating a stark contrast with the faded white walls. It was clear to me that a fresh coat of paint could do wonders in breathing new life into this kitchen.

Choosing the Paint Color and Finish

Choosing the right paint color was a critical step in the makeover process. I wanted a color that would brighten up the space, make it feel larger, and complement the existing fixtures. After considering various options from our top 7 interior home painting colors for 2023, I finally settled on a soft, light gray for the cabinets and a crisp white for the walls.

The choice of paint finish was equally important. Given the high-traffic nature of the kitchen, I decided on a semi-gloss finish for the cabinets and a satin finish for the walls. The semi-gloss finish would endure frequent cleaning and resist moisture, while the satin finish would provide a smooth, velvety appearance that’s easy to maintain.

The decision to paint the outdated cabinets instead of replacing them was not only cost-effective but also environmentally friendly. To learn more about the benefits of painting kitchen cabinets, check out our article on painting kitchen cabinets: a smart alternative to replacement.

In the next section, we’ll delve into the makeover process, including how I prepped the kitchen for painting and the techniques I employed for the best results. Stay tuned for the big reveal!

The Makeover Process

Transforming an outdated kitchen requires careful planning and execution. In my case, the makeover process was divided into three main stages: prepping the kitchen for painting, applying the paint, and waiting for the transformation.

Prepping the Kitchen for Painting

Before I could begin painting, I had to ensure that the kitchen was properly prepared. This crucial stage involved cleaning the surfaces to be painted, removing any grease or grime, and lightly sanding the cabinets to ensure that the paint would adhere properly. I also took the opportunity to make any necessary repairs, such as fixing loose hinges or filling in any dents or scratches. For an extensive guide on prepping your space for painting, refer to our article 10 things you need to know before starting your painting project.

All hardware and appliances were carefully removed or covered to protect them from paint splatters. I taped off the areas where the cabinets met the walls to ensure clean lines and prevent any paint from getting onto the walls.

Applying the Paint: Techniques and Tips

Once the kitchen was prepped, it was time to start the actual painting process. I chose a high-quality paint, as I know from experience that it provides better coverage, is more durable, and is easier to work with. For more information on why quality paint is worth the price, check out our article why quality paint is worth the price: an expert’s perspective.

I used a brush for the smaller areas and a roller for the larger surfaces to ensure a smooth, even finish. It’s essential to apply the paint in thin, even layers, allowing each layer to dry before applying the next. This prevents the paint from dripping or appearing too thick in certain areas.

Waiting for the Transformation

After applying the final coat of paint, the waiting period began. Allowing the paint to dry completely is crucial for the longevity and appearance of the final result. During this time, it’s important to avoid touching the painted surfaces or placing anything on them, as this could damage the paint.

While waiting, I cleaned my brushes and rollers and disposed of any used paint cans properly. I also started planning for the final touches I would add once the paint was dry.

Seeing the transformation unfold was incredibly rewarding. The outdated kitchen was slowly but surely turning into a modern and welcoming space, all thanks to the power of paint. The process of transforming an outdated kitchen with paint can be time-consuming, but the result is well worth the effort. For more insights and tips on painting makeovers, visit our painting and decorating section.

The Big Reveal: The “After” Kitchen

After days of hard work, anticipation, and a fair share of paint splatters, the time for the big reveal had finally arrived. The transformation of the outdated kitchen into a bright, welcoming space was nothing short of magical. Let’s explore the changes and improvements.

Observations: Changes and Improvements

The first thing that caught my eye was how the new paint color had completely transformed the overall feel of the kitchen. The previously dull and outdated hues were replaced with a fresh, vibrant color that breathed life into the space.

The cabinets, once a dreary brown, were now a crisp white, highlighting their architectural details. The walls, previously a tired yellow, now sported a warm, inviting shade that complemented the white cabinets perfectly.

Beyond just the aesthetic changes, the new paint had a practical impact as well. The lighter colors reflected more light, making the kitchen feel larger and brighter. The updated color scheme also made the kitchen feel cleaner and more modern, a drastic improvement from the dated look it had before.

How Paint Transformed the Kitchen

The power of paint in transforming an outdated kitchen is truly remarkable. With just a few cans of paint and some elbow grease, I was able to completely alter the look and feel of the kitchen.

The change was more than just visual. The new colors brought a new energy into the space, making it feel more inviting and comfortable. It was as if the kitchen had undergone not just a physical transformation, but an emotional one as well.

The fresh paint also highlighted the kitchen’s best features. The architectural details on the cabinets that were previously lost in the old color scheme were now front and center. The new color on the walls brought out the texture and character of the old plaster, adding depth and interest to the space.

Overall, the transformation was a testament to the power of paint in refreshing and revitalizing a space. If you’re considering a kitchen makeover, don’t underestimate what a fresh coat of paint can do. Check out our painting and decorating services for more information on how we can help you transform your kitchen, or any other room in your home.

Lessons Learned

After completing the task of transforming an outdated kitchen with paint, there are several lessons that I learned along the way. These lessons not only expanded my understanding of painting and decorating, but also provided valuable insights that could be applied to other home improvement projects.

The Power of Paint: What I Learned

The major takeaway from this project was realizing the transformative power of paint. Even in an outdated kitchen, a fresh coat of paint could breathe new life into the space, giving it a modern, fresh, and inviting appeal.

I learned that beyond aesthetics, paint can also influence the mood and overall ambience of a room. In our case, by choosing a bright, welcoming color, we turned a once-drab kitchen into a vibrant and cheerful heart of the home. For more insights into how paint colors can affect mood, check out our article on painting for health: using color psychology in design.

Furthermore, I realized the importance of proper preparation before starting a painting project. The prepping stage, which included cleaning, sanding, and priming, played a key role in the smooth application of paint and the longevity of the finish.

Tips for Those Considering a Kitchen Paint Makeover

For those considering a kitchen paint makeover, I have several tips based on my experience:

  1. Choose the Right Paint: Not all paints are created equal. Some are better suited for kitchens due to their durability and ease of cleaning. Check out our article on why quality paint is worth the price: an expert’s perspective for more information.
  2. Proper Preparation: Spend adequate time preparing the kitchen for painting. This includes cleaning the surfaces, repairing any damages, and applying a suitable primer. Our guide on 10 things you need to know before starting your painting project offers more detailed advice.
  3. Test Colors: Before committing to a paint color, test it in different lighting conditions to see how it looks at different times of the day. Our guide on the ultimate guide to choosing paint colors for your interior trim can provide helpful tips.
  4. Protect Your Belongings: Cover your appliances, countertops, and floor to protect them from paint splatters and spills.
  5. Take Your Time: Don’t rush the painting process. Apply the paint carefully and evenly to ensure a smooth, streak-free finish.

A kitchen makeover with paint is a cost-effective way to modernize your kitchen without the need for extensive renovations. With the right approach and understanding, you can transform your outdated kitchen into a space you love. For more painting and decorating tips, check out our blog.

Call Now Button