Boost Your Homes Curb Appeal: Uncovering the Top 7 Benefits of Painting the Exterior

top 7 benefits of painting your home’s exterior

Unveiling the Power of Paint

Painting: it’s not just about changing the color of your house. It’s about transforming your home and giving it a new lease on life. The power of paint extends far beyond aesthetics, playing a crucial role in home improvement and maintenance.

The Magic of a Fresh Coat

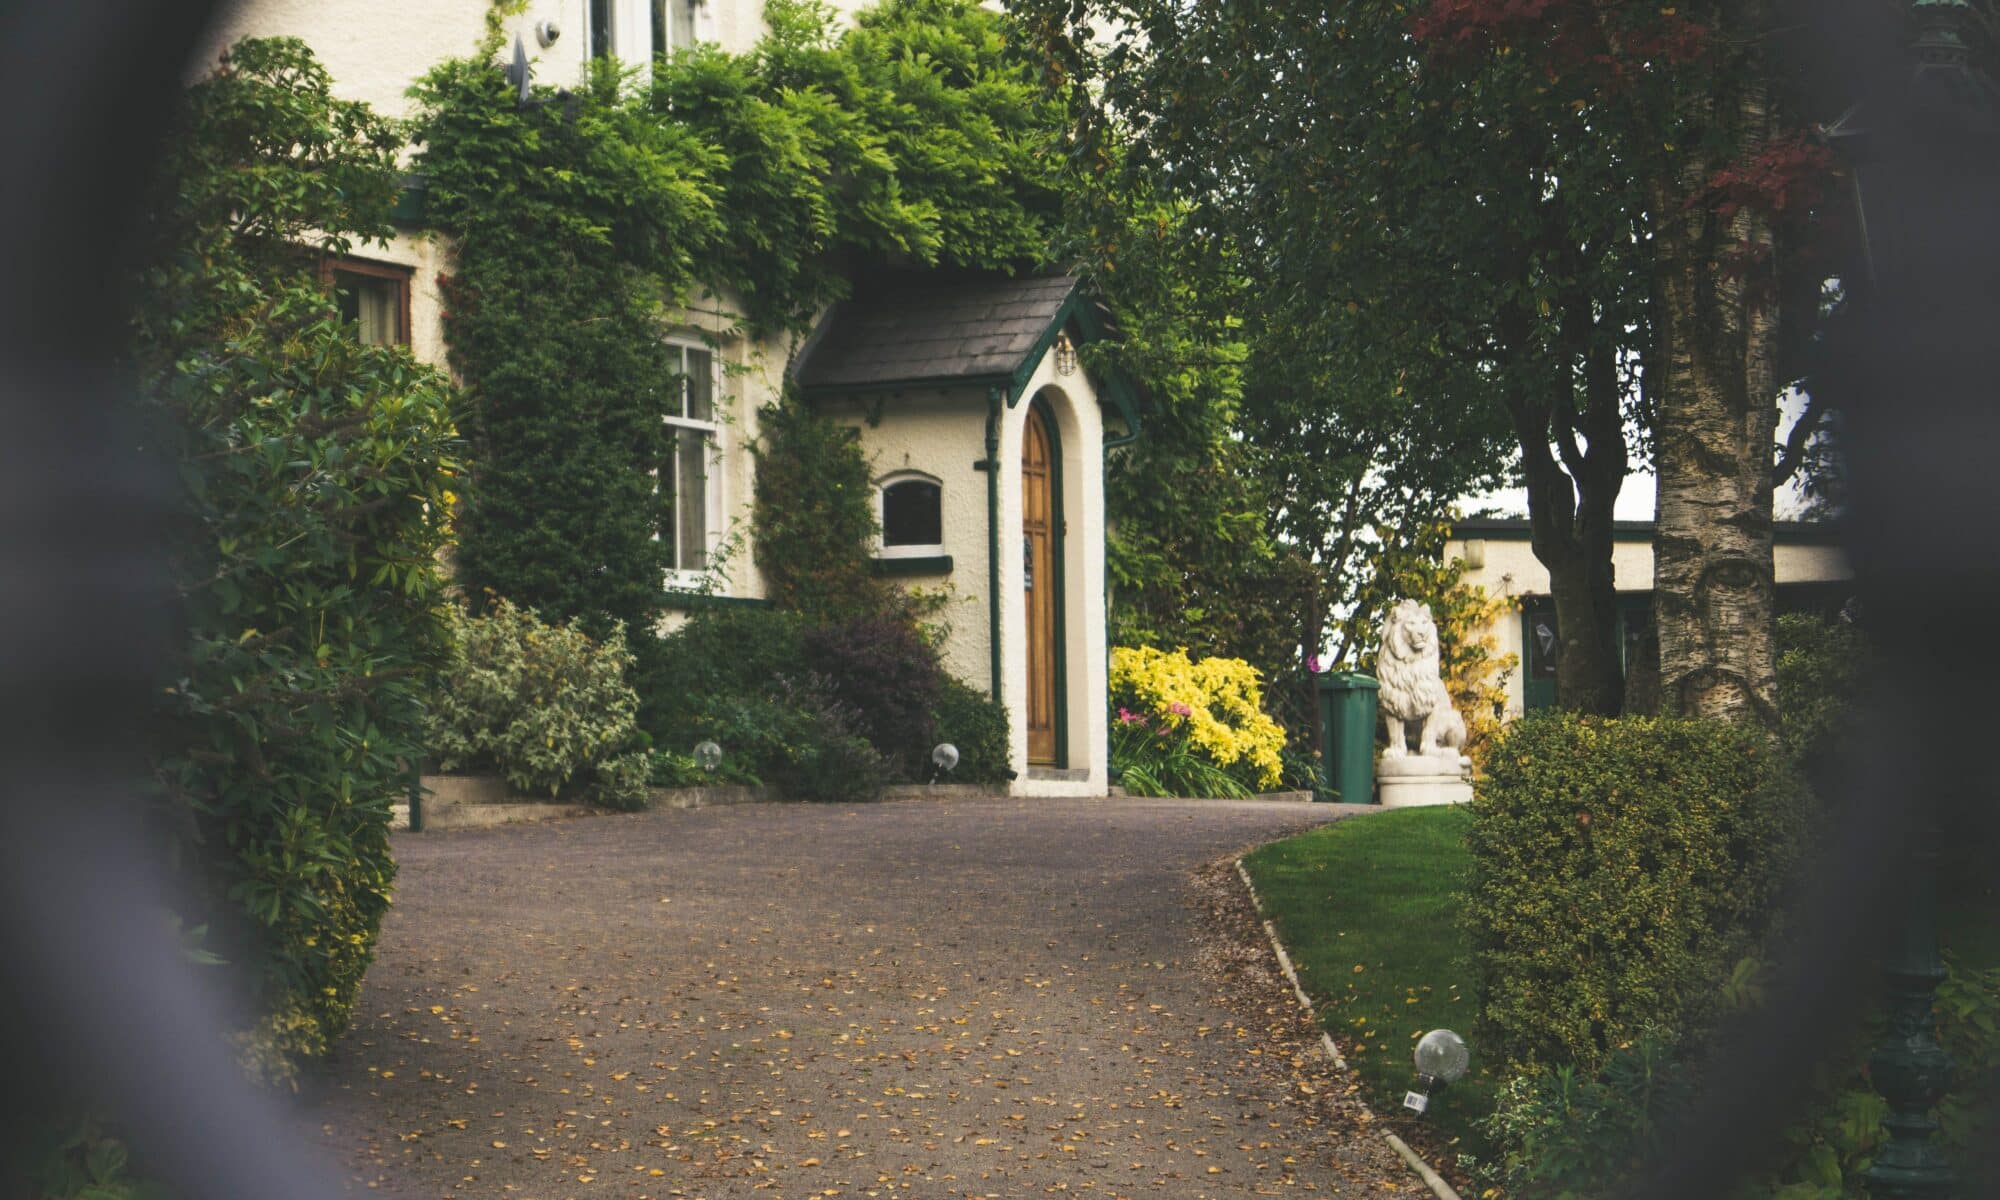
Ever walked past a house and paused just to admire its beautiful, vibrant exterior? That’s the magic of a fresh coat of paint. It’s like a face lift for your home, instantly making it look newer, cleaner, and more inviting. But the benefits don’t stop there.

A fresh coat of paint also acts as a shield, protecting your home against the elements. It can prevent damage from the sun, rain, wind, and even pesky insects. Plus, it can help you spot and address minor problems before they turn into major headaches. Check out our article on how often you need to paint the exterior of your house for more information.

The Role of Exterior Painting in Home Improvement

When it comes to home improvement, exterior painting is a game changer. It’s one of the most effective ways to boost your home’s curb appeal and increase its value. In fact, a quality paint job can deliver a significant return on investment when it’s time to sell.

But it’s not just about making a good impression. Painting your home’s exterior can also improve its energy efficiency, especially if you opt for a lighter color that reflects the sun’s rays. This can help keep your home cooler in summer and reduce your air conditioning costs.

Moreover, painting allows you to customize your home to reflect your personal style and taste. Whether you prefer bold, vibrant hues or subtle, earthy tones, the choice is yours. Need some inspiration? Check out our article on color choices for your interior painting project.

So, are you ready to experience the top 7 benefits of painting your home’s exterior? Grab your brush, roll up your sleeves, and let the transformation begin! And remember, if you ever need a helping hand, you can always turn to a professional house painter contractor.

The Top 7 Benefits of Painting Your Home’s Exterior

When it comes to home improvement, one of the most effective and rewarding projects you can undertake is painting your home’s exterior. Here are the top 7 benefits of freshening up your home’s exterior with a new coat of paint.

Boost Curb Appeal

The first thing people notice about your house is its exterior. A fresh, vibrant paint job can dramatically boost your home’s curb appeal, making it stand out in the neighborhood. Whether you’re planning to sell or simply want to improve your home’s appearance, a new paint job can make a world of difference.

Increase Property Value

Did you know a good exterior painting job could increase your property’s value? Studies have shown that painting your home’s exterior can significantly enhance its resale value. It’s one of the most cost-effective home improvement projects that can offer a high return on investment.

Protect Your Home from Weather Damage

A new coat of paint not only improves your home’s appearance, but it also serves as a protective shield against weather damage. High-quality exterior paint provides a barrier against harmful elements like wind, rain, snow, and UV rays. Check out our article on how to minimize color fading on your home’s exterior to know more.

Extend the Life of Your Siding

Whether your home’s siding is made of wood, vinyl, or any other material, a fresh coat of paint can extend its life. Paint acts as a sealant, preventing moisture from seeping into the siding, which can lead to rot or other damage. For more information, see our tips on 7 tips for painting your home’s wood siding exterior.

Keep Away Pests

Paint can act as a deterrent for pests. Small cracks and crevices in your home’s exterior can be an inviting home for bugs and other pests. Painting can help seal these gaps and deter pests from making your home theirs.

Improve Your Home’s Energy Efficiency

Believe it or not, painting your home’s exterior can improve its energy efficiency. Lighter colors tend to reflect more heat, keeping your home cooler in the summer. This can help reduce your air conditioning costs, making your home not only more beautiful but also more energy-efficient.

Reflect Your Personal Style

Finally, painting your home’s exterior gives you the chance to express your personal style. You can choose colors that reflect your personality and make your home truly yours. For some inspiration, check out our article on color choices for your interior painting project.

So, are you ready to reap these benefits with a fresh coat of paint? Remember to consider hiring a professional house painter contractor to ensure a high-quality finish that will last for years. Happy painting!

Tips for a Successful Exterior Paint Job

Painting the exterior of your home is a significant project, but with the right preparation and knowledge, it can be a smooth and rewarding process. Here are some key tips to help you get started.

Choosing the Right Time to Paint

Timing is crucial when it comes to exterior painting. The best time for painting is typically in late spring or early fall when the weather is mild and humidity is low. You want to avoid extreme temperatures, which can affect the way the paint dries and adheres to the surface. For more detailed advice on timing your paint job, check out our article on how often do you need to paint the exterior of your house?.

Preparing Your Home for Painting

Before you start painting, it’s important to prepare your home’s exterior. This includes cleaning the surface to remove dirt, grime, and mildew, as well as scraping off any old, flaking paint. You should also repair any damaged areas, such as wood rot or cracked stucco. Doing this will ensure that your new paint adheres properly and lasts longer. For a step-by-step guide on preparing your home for painting, refer to our article on 5 steps to prepare your home for exterior painting.

Selecting the Right Paint

Choosing the right paint is critical for achieving a durable, long-lasting finish. You’ll need to consider factors like the type of surface you’re painting, the weather conditions in your area, and the color you want. Lighter colors tend to reflect sunlight and can help keep your home cooler, while darker colors absorb heat. You should also consider whether you want to use latex (water-based) or oil-based paint, as each has its own set of advantages. For more guidance on selecting the right paint, see our articles on color choices for your interior painting project and 5 rules of painting a room with two colors.

Remember, painting your home’s exterior is a big job, but it’s also an opportunity to make a great impression. With careful planning and attention to detail, you can boost your home’s curb appeal and enjoy the many benefits of a fresh paint job.

Why Consider a Professional House Painting Contractor

Painting the exterior of your home can be a daunting task. From choosing the right colors to mastering the technique, it might be more than you bargained for. That’s where a professional house painting contractor comes in. They can help you unlock the top benefits of painting your home’s exterior without the hassle.

The Role of a Professional House Painting Contractor

A professional house painting contractor takes care of all the details that go into painting your home’s exterior. They’re equipped with the right tools, skills and knowledge to execute the job flawlessly. From preparing your home’s exterior for painting to applying the final coat, they handle it all.

A contractor can also guide you in choosing the right color palette that suits your home’s style and your personal taste. They’re well-versed in predicting trends and understanding how different colors interact with each other and with various architectural styles. If you’re unsure about the right colors for your home, our articles on color choices for your interior painting project and 5 rules of painting a room with two colors can give you some insights.

Benefits of Hiring a Professional House Painter

  1. Quality Results: A professional will deliver quality results. They know how to prepare surfaces properly and apply paint in a way that ensures longevity and aesthetic appeal.
  2. Efficiency: With their experience and professional tools, house painters can complete the job in a fraction of the time it would take you to do it yourself.
  3. Safety: Professional painters are trained to handle all kinds of situations and have the proper safety gear to protect themselves during the job.
  4. Preventative Measures: They’re knowledgeable about potential problems like rot or structural defects and can spot these issues early.
  5. Clean Up and Disposal: Once the job is done, they’ll take care of the clean-up and disposal of materials, leaving your property clean and tidy.
  6. Stress-free: Hiring a professional means you can sit back and relax while your house is transformed.

Remember, while DIY can be rewarding in certain scenarios, the complexity and scale of painting a house’s exterior often calls for professional help. To ensure the job is done right, consider hiring a house painter contractor. Not only will they help you achieve the top 7 benefits of painting your home’s exterior, but they’ll also provide advice and expertise to make the process smooth and stress-free.

Painting Magic: Transforming Small Rooms with the Right Dos and Donts

interior painting & design: do’s and don’ts for small rooms

The Magic of Interior Painting

Interior painting is one of the most effective ways to transform your living space. With just a few strokes of a brush, you can create a whole new atmosphere, evoke specific moods, and even give the illusion of more space. Let’s delve into the magic of interior painting, particularly the do’s and don’ts for small rooms.

Changing Perceptions with Paint

The impact of a fresh coat of paint on a room’s ambiance can’t be overstated. A well-chosen color scheme can make a room feel cozy, vibrant, tranquil, or refined. But the magic of paint goes beyond aesthetics—strategic use of color and design techniques can visually alter the dimensions of a room.

In small rooms, paint can become your secret weapon. The right colors can make a small room feel more spacious and inviting, while the wrong colors can make it feel cramped and claustrophobic. You can also use paint to highlight architectural features, conceal imperfections, or create focal points.

Remember, it’s not just about choosing the right color—how you apply the paint also matters. For instance, painting horizontal stripes can make a room seem wider, while vertical stripes can make ceilings look higher. To delve deeper into the power of color choices, check our article on color choices for your interior painting project.

Understanding the Power of Paint in Small Spaces

When it comes to small spaces, color can make a significant difference. Light colors, for example, are known for making a room feel larger and more open. They reflect light, brightening up the space and making it feel airy. On the other hand, while dark colors can add depth and create a cozy atmosphere, they can also make a small room feel even smaller.

But color isn’t the only factor. The finish of the paint also plays a role. Glossy finishes reflect more light, which can help to create a sense of spaciousness. On the other hand, matte finishes absorb light, which can make a room feel smaller but also more intimate.

Remember, there’s no one-size-fits-all when it comes to interior painting. The best approach depends on your specific room and your personal preferences. Don’t be afraid to experiment with different colors and techniques. After all, the great thing about paint is that it’s not permanent—you can always paint over it if you’re not happy with the result.

Whether you’re considering a DIY project or thinking about hiring a professional house painter contractor, understanding the power of paint is key to transforming your small space.

Do’s for Painting Small Rooms

When it comes to interior painting & design, there are certain do’s that can make a small room feel more spacious and welcoming. Let’s explore these techniques.

Light Colors

Firstly, we suggest using light colors. Light colors are known to make a room feel larger and brighter. Light and neutral colors reflect light, creating an illusion of space. Opt for colors like white, cream, light grey, or pastel shades. These colors can help to maximize the perceived size of the small room. To learn more about the impact of color choices, check out our article color choices for your interior painting project.

Using Monochromatic Shades

Next, consider using monochromatic shades. Sticking to a single color, or variations of it, can give a room a cohesive, spacious appearance. By limiting the number of colors used, the room feels less busy and visually cluttered. For more tips on using multiple colors in a room, visit 5 rules of painting a room with two colors.

Emphasizing Vertical Space

Another key strategy is to emphasize the vertical space in a room. One way to do this is by painting vertical stripes on the walls. This pattern can give the illusion of height, making a small room feel taller. Alternatively, painting the lower half of the wall with a darker shade and the upper half with a lighter one can emphasize the vertical space.

Reflecting Natural Light

Lastly, aim to reflect as much natural light as possible. Reflecting natural light can make a room feel brighter and larger. Choosing paint with a satin or semi-gloss finish can help reflect light around the room. Also, consider the placement of mirrors or shiny objects to bounce the light around even more.

These are just a few do’s when it comes to painting small rooms. Remember, the goal is to create an illusion of space and make the room feel more open and inviting. While these tips can help, don’t be afraid to experiment with your own ideas and add a personal touch to your space. For more advice, check out our house painter contractor services.

Don’ts for Painting Small Rooms

Creating a sense of openness and space in small rooms with interior painting and design can be challenging. However, by avoiding certain pitfalls, you can enhance the perception of space and achieve a pleasing aesthetic. Let’s delve into some don’ts for painting small rooms.

Avoiding Dark Colors

While dark colors can create a cozy and intimate ambiance in larger spaces, they tend to make small rooms feel even smaller. Dark shades absorb light rather than reflecting it, giving the room a closed-off feel. When working with small spaces, it’s generally a good idea to stick to light, airy colors that can help create the illusion of a larger room. For a deeper dive into color selection, check out our guide on color choices for your interior painting project.

Steering Clear of Busy Patterns

Busy patterns, especially on walls, can overwhelm small spaces, making them appear cluttered and cramped. Instead, opt for simple, understated designs that won’t dominate the room. If you’re keen on incorporating patterns, consider using them sparingly as accents or in accessories like throw pillows or rugs. For more tips on working with accent colors, check out our article on tips to add accent colors into your home interior.

Not Neglecting the Ceiling

The ceiling is often referred to as the “fifth wall,” and when it comes to small rooms, it shouldn’t be overlooked. A common mistake is painting the ceiling a dark color, which can make the room feel boxy and enclosed. Instead, paint the ceiling a light color to draw the eye upwards and create a sense of height.

Avoiding Clutter with Color

Too many colors in a small room can create visual clutter, making the space feel chaotic and smaller than it is. We recommend sticking to a cohesive color palette with one or two main colors and an accent color for best results. This helps to keep the room visually balanced and harmonious. For more on this, see our article on 5 rules of painting a room with two colors.

By avoiding these common painting and design mistakes, you can help your small rooms feel larger and more inviting. And when you’re ready to transform your space, our team at house painter contractor is here to help!

Smart Design Techniques

When it comes to interior painting and design, especially for small rooms, we recommend trying out some smart design techniques. These methods can help to create an illusion of space, making your rooms appear larger and more open.

Incorporating Stripes

In the world of interior design, it’s a well-known trick that stripes can elongate or widen a space. For a small room, we suggest painting vertical stripes. This helps to draw the eyes upward, making the ceilings appear higher and the room larger. Don’t be afraid to play around with the width and color of the stripes. Sometimes, subtle tonal stripes can have a more significant visual impact than bold, contrasting ones. For more tips on color choices for your interior painting project, check out our detailed guide.

Playing with Accent Walls

Accent walls are a great way to add depth to a small room. By painting one wall in a bold, contrasting color, you can create a focal point that draws the eye and extends the visual length of the room. It’s like an optical illusion for your living space! Keep in mind, though, that the key to a successful accent wall is choosing the right wall and the right color. For more help with this, check out our article on tips to add accent colors into your home interior.

Using Color Blocking Techniques

Color blocking is another technique that can help to manipulate perceptions of size and space in a small room. This technique involves painting different areas of the room in different shades or tones. You could, for instance, paint the lower half of the walls in a darker shade and the upper half in a lighter one. This can make the ceilings seem higher and the room more spacious. For a step-by-step guide on how to achieve this, see our article on 5 rules of painting a room with two colors.

Remember, these are just guidelines. The most important thing is that you feel comfortable and happy in your space. So, don’t be afraid to experiment and find what works best for you. If you’re unsure about doing it yourself, consider hiring a professional house painter contractor. They can provide expert guidance and ensure a high-quality finish.

Getting Professional Help

Whether you’re a seasoned DIY enthusiast or a novice homeowner, there comes a time when painting small rooms can be a daunting task. And that’s where professional help comes in.

When to Hire a Professional Painter

While painting may seem like a simple task, achieving that flawless finish in a small room can be trickier than you might think. Here are a few situations when it’s best to hire a professional painter:

  1. Lack of Time or Experience: If you’re not confident in your painting skills or if you simply don’t have the time to dedicate to the project, hiring a professional painter can save you a lot of hassle.
  2. Complex Patterns or Techniques: If you’re looking to incorporate complex patterns or techniques like stripes or color blocking, a professional painter’s expertise can ensure a high-quality finish. Check out our article on 5 rules of painting a room with two colors for more insights.
  3. High Ceilings or Difficult-to-Reach Areas: Painting high ceilings or other hard-to-reach areas can be physically challenging and potentially unsafe without the right equipment. In such cases, it’s best to leave it to the professionals.
  4. Flawless Finish: A professional painter has the expertise to ensure a smooth, streak-free finish, something that can be difficult to achieve if you’re not experienced.

If you are unsure about when to hire a professional, check out our article on the top 7 benefits of painting your home’s exterior to understand the value a professional painter brings.

What to Expect From a Painting Contractor

When you hire a professional painting contractor, here’s what you can expect:

  1. Consultation and Quote: A professional painter will first provide a consultation where they’ll assess the room, discuss your vision and desired color scheme, and provide a quote for the project. Take a look at our article on color choices for your interior painting project for some ideas.
  2. Preparation: The painter will prepare the room for painting, which includes moving or covering furniture, removing wall hangings, and protecting your floors.
  3. Painting: The contractor will then start the painting process, which may include priming the walls, applying the chosen paint colors, and incorporating any special techniques or designs you have chosen.
  4. Clean-up and Final Inspection: Once the painting is complete, the contractor will clean up the space, replace any moved items, and conduct a final inspection with you to ensure you’re happy with the results.

Hiring a professional painter can take the stress out of painting small rooms and ensure a high-quality, professional finish. They can also provide guidance and advice on the best colors, finishes, and techniques to transform your small room. So why not explore our house painter contractor services to see how we can help you create the small room of your dreams.

Expert Tips: Exterior Painting Mistakes Homeowners Must Avoid

exterior painting mistakes every homeowner should avoid

Introduction to Exterior Painting

Painting the exterior of a house seems like a simple affair, but it’s a task that’s laden with numerous challenges. Understanding the nuances of this process can help homeowners avoid common pitfalls, ensuring that their homes look fresh and inviting.

Importance of Exterior Painting

Exterior painting plays a significant role in shaping the first impressions of a home. It’s not just about aesthetics; a well-executed exterior paint job also serves as the first line of defense against weather elements. Paint provides a protective coat that shields the building materials from sun, rain, and other detrimental conditions.

Moreover, timely exterior painting can help homeowners maintain and even increase their property’s value. It’s an investment that pays off, both in terms of curb appeal and longevity of the house. To learn more about the benefits of painting your home’s exterior, take a look at our article on the top 7 benefits of painting your home’s exterior.

Challenges Faced by Homeowners in Exterior Painting

Despite its importance, exterior painting can pose several challenges to homeowners. One of the most common issues is the lack of proper preparation. This includes failing to clean and prime the surface appropriately before painting, which can lead to uneven paint application and reduced longevity of the paint job.

Another challenge is choosing the right paint. Not all paints are created equal, and the wrong choice can lead to peeling, cracking, or fading over time. Homeowners often struggle with selecting the right color as well. The perfect hue can enhance the architectural details of the house and blend it seamlessly with its surroundings. For tips on choosing the right color, check out our article on color choices for your interior painting project.

Lastly, weather conditions can significantly affect the outcome of an exterior paint job. Painting in extreme heat, cold, or humidity can lead to a host of problems, including slow drying times, blistering, and poor adhesion. Understanding the effect of weather on painting is crucial to avoid these issues.

These challenges underline the importance of proper planning and execution when it comes to exterior painting. By being aware of potential pitfalls, homeowners can take steps to avoid common exterior painting mistakes and achieve a professional-looking finish. Stay tuned for our expert tips on how to sidestep these mistakes in the upcoming sections.

Common Exterior Painting Mistakes

Exterior painting can be a tricky task for homeowners, especially when going at it alone. To ensure a successful painting project, it’s essential to be aware of common painting mistakes that can compromise the finish and durability of the paint job.

Lack of Proper Preparation

One of the most common exterior painting mistakes is skipping the preparation stage. It’s easy to get excited about a new look for the home and jump straight into painting. However, without proper preparation, the paint may not adhere well to the surface, leading to peeling, cracking, or bubbling in the future.

Preparation involves cleaning the surface to remove dirt, mildew, and loose paint. It also includes repairing any damage and priming the surface as needed. For a more in-depth look at this crucial step, refer to our article on 5 steps to prepare your home for exterior painting.

Choosing the Wrong Paint

Another common blunder is choosing the wrong type of paint. Not all paints are created equal, and the type you choose can significantly impact the longevity and appearance of your paint job. It’s important to select a paint that’s suitable for your home’s exterior material and the weather conditions in your area.

Choosing the wrong color is another issue. While it’s tempting to select a color based on personal preference alone, it’s essential to consider how the color will look in different lighting conditions and how it will complement the rest of your home’s exterior. Our articles on color choices for your interior painting project can provide some tips to help you make the right decision.

Ignoring Weather Conditions

Weather conditions play a significant role in the success of an exterior painting project. Ignoring the weather can lead to a host of problems, from paint not adhering properly to the surface to water damage to the fresh paint.

Painting in extreme heat can cause the paint to dry too quickly, leading to brush marks and clumps. On the other hand, painting in cold weather can prevent the paint from drying properly, leading to longer drying times and potential damage from rain or frost. Before beginning your painting project, check the weather forecast and plan accordingly.

Rushing the Job

Exterior painting is a time-consuming task, and rushing through the job can lead to mistakes. It’s important to take your time with each step of the process, from preparation to the final coat. Rushing can lead to uneven application, drips, and a lack of attention to detail, all of which can negatively impact the final result.

Remember, a successful exterior painting project is not just about changing the color of your house; it’s about improving its overall appearance and protecting it from the elements. For more tips on how to make your paint job last longer, check out our article on 7 tips for making exterior paint jobs last longer.

By being aware of these common exterior painting mistakes, homeowners can take the necessary steps to avoid them, ensuring a successful painting project that enhances the beauty and value of their home. When in doubt, don’t hesitate to seek advice from a professional house painter contractor.

Expert Tips to Avoid Painting Mistakes

When it comes to exterior painting, avoiding common mistakes can make a significant difference in the longevity of your paint job and the overall aesthetic of your home’s facade. Here are some expert tips to help homeowners steer clear of these errors.

Proper Surface Preparation

The first step in ensuring a successful exterior paint job is proper surface preparation. It’s tempting to skip this step, but it’s crucial for the paint to adhere correctly and last longer. Surface preparation involves cleaning the walls to remove dirt and grime, scraping off loose paint, and repairing any damaged areas. For a detailed step-by-step guide on preparing your home for exterior painting, check out our article on 5 steps to prepare your home for exterior painting.

Choosing the Right Paint for Your Home’s Exterior

The type of paint you choose plays a significant role in the durability and final look of your paint job. It’s essential to select a paint that is designed for exterior use and can withstand the elements in your local climate. Also, consider the material of your home’s exterior, as certain types of paint work better on specific surfaces. When it comes to color selection, take your time to choose a color that complements the style of your home and the surrounding landscape. Our article on color choices for your interior painting project offers tips that can also be applied to exterior color selection.

Understanding the Effect of Weather on Painting

Weather conditions can significantly affect the outcome of an exterior paint job. Ideal painting conditions are typically dry and mild. Extreme heat can cause the paint to dry too quickly, leading to cracking or peeling, while wet or humid conditions can prevent the paint from adhering properly. Always check the weather forecast before starting your painting project and plan accordingly. Visit our post on 7 tips for making exterior paint jobs last longer for more tips on how to navigate weather conditions.

Taking Your Time with the Process

Rushing the painting process can lead to unsatisfactory results. Taking the time to properly prepare the surface, apply the paint, and allow it to dry is crucial for a long-lasting, quality finish. This might mean dedicating more than just a weekend to the project or hiring a professional house painter contractor to ensure the job is done right.

By following these expert tips, homeowners can avoid common exterior painting mistakes and achieve a professionally painted exterior that enhances the curb appeal and value of their home.

Importance of Hiring a Professional

DIY projects can be fun and fulfilling, but when it comes to exterior house painting, it’s often best to call in the professionals. Here’s why:

The Value of Expertise

Professional house painters bring a level of knowledge and expertise that’s hard to match. They understand the nuances of different paint types, the impact of weather on paint application, and the best techniques to ensure a smooth, long-lasting finish. They know how to avoid common exterior painting mistakes every homeowner should avoid.

This expertise translates into a higher-quality result. Professionals know how to properly prepare surfaces, select the right paint, and apply it in a way that will stand up to the elements. They’re also up-to-date on the latest trends and can offer advice on color selection, blending, and accents. For more on this, check out our articles on color choices for your interior painting project and tips to add accent colors into your home interior.

How Professionals Avoid Common Mistakes

Hiring a professional painter can save homeowners from common pitfalls. For example, DIY painters often skimp on prep work, leading to peeling, cracking, or uneven paint. Professionals know that preparation is key and will take the time to properly clean, sand, and prime surfaces before painting.

Professionals also have access to high-quality tools and materials, which can make a big difference in the finished product. They know how to select the right paint for different surfaces and weather conditions, and they’re skilled at applying it evenly for a smooth finish. For more tips on how professionals ensure long-lasting results, read our article on 7 tips for making exterior paint jobs last longer.

When to Consider Hiring a Professional

While some homeowners may feel comfortable tackling a small painting project, there are several situations where it’s wise to hire a professional. If your house is large or multi-story, painting can be a physically demanding task that’s best left to professionals.

Similarly, if your house has complex architectural details, a professional will have the skills and tools to paint them properly. And if your home’s exterior is in poor condition, a professional can assess the situation, perform necessary prep work, and apply paint that will protect and beautify your home for years to come. For more on when to consider hiring a professional, check out our article on how often do you need to paint the exterior of your house?.

While hiring a professional may cost more upfront than doing it yourself, the investment can pay off in the form of a high-quality, long-lasting paint job that enhances the beauty and value of your home. To learn more about the benefits of hiring a professional, visit our house painter contractor page.

Effortless Exterior Painting: 5 Steps to Prep Your Home Like a Pro

5 steps to prepare your home for exterior painting

The Importance of Proper Preparation

Before you dive into the task of painting your home’s exterior, it’s crucial to understand the importance of proper preparation. A well-prepared surface not only makes the painting process smoother but also ensures a long-lasting, high-quality finish.

Why Preparation Matters

Preparation is a critical component in the process of exterior painting. It’s not just about slapping a new coat of paint on your home; it’s about ensuring the surface is clean, smooth, and ready to receive the paint. This process enables the paint to adhere properly, resulting in a smoother finish, better color retention, and increased lifespan of your paint job.

Without adequate preparation, you might end up with a paint job that chips, peels, or fades prematurely. This not only detracts from the aesthetic appeal of your home, but also requires costly and time-consuming touch-ups or re-paints. So, to avoid these potential pitfalls, it’s essential to follow the 5 steps to prepare your home for exterior painting.

Understanding the Process

The process of preparing your home for exterior painting involves several key steps, each of which plays a vital role in the final outcome of your paint job. These steps include:

  1. Inspection: Identifying problem areas and planning for repairs.
  2. Cleaning: Choosing the right cleaning method and effectively removing dirt, dust, and other contaminants from the surface.
  3. Repairs: Addressing any damage to the exterior of your home and creating a smooth, even surface for painting.
  4. Priming: Applying primer to ensure proper adhesion of the paint and to block any stains or discoloration.
  5. Masking and Covering: Protecting non-painted areas from accidental paint splatters and drips.

By understanding each of these steps, you’ll be well-equipped to ensure your home is fully prepared for a fresh, new look. For more tips and advice on exterior painting, check out our articles on how often do you need to paint the exterior of your house? and 7 tips for making exterior paint jobs last longer.

Step 1: Inspection

The first step in preparing your home for exterior painting involves a thorough inspection of the house. This step is critical as it helps identify any problem areas that need to be addressed before the painting begins.

Identifying Problem Areas

During the inspection, it’s essential to look for signs of damage or wear and tear. This includes peeling or faded paint, wood rot, mildew, and cracks in the siding or stucco. These areas will need special attention and repair before the new paint can be applied.

Here are some common problem areas to look for:

  • Cracked or peeling paint
  • Mold or mildew
  • Wood rot or termite damage
  • Cracks in stucco or brickwork
  • Deteriorated caulking around windows and doors

For more details on what to look out for, check out our article on exterior painting mistakes every homeowner should avoid.

Planning for Repairs

Once the problem areas have been identified, the next step is to plan for the necessary repairs. This might involve scraping off old paint, filling in cracks, replacing rotten wood, or treating areas affected by mold or mildew. It’s important to address these issues before painting to ensure a smooth, long-lasting finish.

Problem Area Proposed Solution
Cracked or peeling paint Scraping and sanding
Mold or mildew Treatment with fungicidal wash
Wood rot or termite damage Replacement of affected areas
Cracks in stucco or brickwork Filling with suitable filler
Deteriorated caulking around windows and doors Re-caulking

Remember, a well-executed preparation process is key to achieving a professional-looking paint job. If you’re unsure about tackling these repairs yourself, consider hiring a house painter contractor to ensure the job is done right.

Stay tuned for the next step in the process, where we’ll discuss the best methods for cleaning the exterior of your home to prepare for painting.

Step 2: Cleaning

Once you’ve completed the inspection phase, the next step in preparing your home for exterior painting is cleaning. This is a critical part of the process as it ensures that the paint adheres properly to the surface, and it gives your home a neat, refreshed look.

Choosing the Right Cleaning Method

There are several methods for cleaning your home’s exterior, and the best one will depend on the type of surface and the extent of the dirt and grime. Power washing is a common method that uses high-pressure water to remove dirt, mold, and mildew. However, be careful as too much pressure can damage the siding.

For delicate surfaces or areas with peeling paint, a soft wash system that uses lower pressure may be more appropriate. Alternatively, hand washing with a scrub brush and soapy water can be effective, particularly for small areas or stubborn stains.

It’s important to remember that different materials require different cleaning techniques. For instance, wood siding needs a gentler approach compared to brick or vinyl. Check out our article on 7 tips for painting your home’s wood siding exterior for more tips on dealing with wood surfaces.

Tips for Effective Cleaning

When it comes to cleaning your home’s exterior, here are a few tips to keep in mind:

  1. Start from the top: Always begin cleaning from the top of your home and work your way down. This prevents dirty water and debris from staining clean areas.
  2. Use the right cleaning solution: Choose a cleaning solution designed for exterior use. Some solutions are designed to remove specific types of stains, such as mold or rust.
  3. Rinse thoroughly: After washing, make sure to rinse your home thoroughly to remove all soap and residue. Any leftover soap can interfere with the paint’s ability to adhere to the surface.
  4. Allow it to dry: Before moving on to repairs or priming, let your home dry completely.

Remember, proper cleaning is a crucial part of the exterior painting process. Not only does it improve the appearance of your home, but it also allows the paint to adhere better, resulting in a smoother, more durable finish. For more on exterior painting preparation, read our article on 7 tips for making exterior paint jobs last longer.

Step 3: Repairs

The third step in prepping your home for exterior painting involves addressing any damages on the exterior surfaces. This stage is crucial as it ensures a smooth and even application of paint, ultimately leading to a more professional-looking finish.

Common Types of Exterior Damage

Exterior surfaces are constantly exposed to harsh weather conditions, which can lead to various kinds of damage. Here are some of the most common types of exterior damage:

  1. Peeling Paint: This is often the result of previous paint jobs not adhering properly to the surface, possibly due to moisture or lack of proper surface preparation.
  2. Mold and Mildew: These can form on surfaces that are routinely exposed to high moisture levels, such as those in shady areas.
  3. Wood Rot: Most commonly found on wooden surfaces, wood rot is caused by prolonged exposure to moisture.
  4. Cracks and Holes: Cracks can form in the walls due to shifting of the house or temperature changes, while holes might be a result of damage from insects or animals.

How to Make Necessary Repairs

Once you’ve identified the problem areas, here’s how you can tackle them:

  • Peeling Paint: Start by scraping off the loose paint using a paint scraper or a wire brush. This provides a smooth surface for new paint to adhere.
  • Mold and Mildew: These can be removed using a solution of bleach and water. Remember to rinse the area thoroughly after cleaning and allow it to dry completely before painting.
  • Wood Rot: Rotted wood should be replaced before painting. If the area is small, you may be able to use a wood filler to fix the damage.
  • Cracks and Holes: Small cracks and holes can be filled with a good quality exterior filler. Larger cracks or holes might require professional help.

Remember, each house is unique and might require different repair methods. It’s always best to consult with a professional house painter contractor if you’re unsure about any part of the repair process.

Making necessary repairs not only improves the aesthetic appeal of your home but also extends the life of your paint job. For more tips on maintaining your home’s exterior, check out our articles on how to minimize color fading on your home’s exterior and 7 tips for making exterior paint jobs last longer.

Step 4: Priming

Now that your home’s exterior is clean and repaired, it’s time to move on to the next step in the process – priming.

What is Primer and Why is it Important?

Primer is a special type of paint that’s applied before the regular paint. The main job of a primer is to provide a smooth and uniform surface for the paint to adhere to. It can help cover up old paint, stains, and minor imperfections, making your paint job look more professional and uniform.

Another important function of primer is to prevent stains and tannin bleed-through, particularly when painting over wood. It also improves the durability and longevity of the paint, helping to protect your home’s exterior from weather damage.

Using a primer is especially crucial when painting over a darker color with a lighter one, as it helps to prevent the old color from showing through the new paint. If you’re interested in learning more about how color choices can impact your painting project, check out our article on color choices for your interior painting project.

How to Apply Primer

Applying primer is similar to painting. You can use a brush, roller, or sprayer, depending on the size of the area and your personal preference. Here are the general steps:

  1. Start by stirring the primer to ensure it’s well mixed.
  2. Pour the primer into a paint tray.
  3. Dip your brush or roller into the primer, making sure to remove any excess.
  4. Apply the primer to the surface using even strokes. If you’re using a sprayer, hold it a consistent distance from the surface and move it in a steady, even motion.
  5. Allow the primer to dry completely before moving on to painting. The drying time can vary depending on the type of primer and the weather conditions, so make sure to read the manufacturer’s instructions.

Remember, the goal of priming is to create a smooth, uniform surface for the paint. Don’t worry if the primer doesn’t completely cover the old paint or stains – that’s what the paint is for!

Priming is an essential step in the 5 steps to prepare your home for exterior painting. By taking the time to apply primer correctly, you’re setting the stage for a beautiful and durable paint job. For more tips on achieving a long-lasting exterior paint job, check out our article on 7 tips for making exterior paint jobs last longer.

Step 5: Masking and Covering

In the fifth step of preparing your home for exterior painting, the focus shifts to masking and covering. This stage is crucial to ensure a neat, professional finish that highlights your home’s best features.

Protecting Non-Painted Areas

When painting the exterior of a house, it’s important to protect the areas that aren’t meant to be painted. This could include windows, doors, light fixtures, or any decorative elements.

To protect these areas, they should be covered with a sturdy material such as plastic sheeting or drop cloths. This not only prevents accidental paint splatters but also protects these areas from dust and debris that can be stirred up during the painting process.

For windows and doors, painter’s tape can be used to create a crisp, clean line between the painted and non-painted areas. This tape should be applied carefully to ensure it adheres properly and prevents paint from seeping underneath.

Techniques for Effective Masking

Effective masking requires a keen eye and a steady hand. Begin by placing masking tape along the edges of the areas you want to protect. Make sure the tape is firmly pressed down to prevent paint from bleeding underneath.

Next, cover larger areas like doors and windows with plastic sheeting or drop cloths. These can be secured with additional masking tape or clips. Remember to cover hardware like door handles and light fixtures as well.

Finally, don’t forget about the ground and landscaping around your home. Cover these areas with drop cloths to protect them from paint drips and spills.

By taking the time to properly mask and cover your home, you can ensure that the painting process goes smoothly and results in a professional finish. This is just one of the 5 steps to prepare your home for exterior painting, but it’s an important one. If you’re interested in learning more about the benefits of a fresh coat of paint on your home’s exterior, check out our article on the top 7 benefits of painting your home’s exterior.

Dont Let Your Home Fade Away: Minimizing Color Fading on Your Exterior

how to minimize color fading on your home’s exterior

Understanding Exterior Color Fading

When it comes to maintaining the exterior appearance of your home, one of the key challenges is minimizing the fading of exterior paint colors. This is a common issue, particularly in climates with harsh weather conditions and strong sunlight. Recognizing the reasons behind color fading and understanding its impact can help you formulate a strategy to keep your home looking its best.

The Causes of Exterior Paint Color Fading

Several factors contribute to the fading of exterior paint colors:

  1. Sunlight: The ultraviolet (UV) rays in sunlight can break down the chemical bonds in paint, leading to fading and discoloration.
  2. Weather conditions: Harsh weather conditions, like heavy rain, snow, and hail, can wear down the paint over time and cause it to fade.
  3. Poor quality paint: Inferior quality paint is less resistant to fading. High-quality paint generally offers better UV protection and lasts longer.
  4. Incorrect application: If paint is applied too thinly or inconsistently, it may fade more quickly.

It’s important to consider these factors when planning your exterior paint job. Selecting high-quality paint, applying it correctly, and considering the impact of local weather can all help to minimize fading. If you’re unsure about any of these factors, it may be worth consulting with a professional house painter contractor.

The Impact of Fading on Your Home’s Appearance

Fading can have a significant impact on your home’s exterior, causing it to look worn and aged. It can also affect the overall color scheme of your home, as the faded areas may not match the original color. This inconsistency can detract from the aesthetic appeal of your home, and may even reduce its market value.

In addition, faded paint often provides less protection for your home’s exterior surfaces. This can leave your home more vulnerable to damage from the elements, potentially leading to more serious problems like wood rot and structural damage.

To maintain a vibrant and protective coat of paint on your home’s exterior, it’s important to regularly check for signs of fading and take appropriate action when necessary. This could involve touch-ups or a complete repaint, depending on the extent of the fading. For more information on how often you should repaint your home exterior, check out our article here.

By understanding the causes and impacts of exterior color fading, you’re well-equipped to take steps to minimize this issue and keep your home looking its best. In the next section, we’ll explore how to select the right paint and apply it properly to help prevent color fading.

Minimizing Color Fading on Your Home’s Exterior

When it comes to home exteriors, color fading can be a significant concern. However, with the right steps, it’s possible to minimize this effect and maintain your home’s vibrant hue. Here’s how you can go about it.

Selecting the Right Paint

The first step in minimizing color fading on your home’s exterior is choosing the right paint. High-quality, fade-resistant paints are designed to withstand the effects of sunlight, temperature fluctuations, and other weather conditions. These paints contain UV-protective additives that help maintain the paint’s color over time.

When selecting paint, it’s also important to consider the color. Dark colors absorb more heat and are more prone to fading than lighter colors. Opting for lighter shades can help prolong the paint’s lifespan and reduce the likelihood of noticeable fading. For guidance on selecting the right color, you can refer to our article on color choices for your interior painting project.

Prepping Your Home’s Exterior

Proper preparation of your home’s exterior is crucial in preventing paint color fading. This involves thoroughly cleaning the surfaces to be painted, removing any loose or peeling paint, and repairing any damage. These steps ensure a smooth, clean surface for the paint to adhere to, which can help enhance its durability and resistance to fading.

Additionally, it’s important to prime the surfaces before painting. Primer creates a barrier that helps prevent the underlying material from showing through the paint, which can contribute to fading. For more information on preparing your home for painting, check out our article on 5 steps to prepare your home for exterior painting.

Proper Application Techniques

The way the paint is applied can also have a significant impact on its resistance to fading. Using the proper application techniques can help ensure even coverage and prevent the formation of thin spots that could fade more quickly.

It’s typically recommended to apply at least two coats of paint. The first coat seals the surface and provides a base for the second coat, which adds color depth and enhances durability. Between each coat, it’s important to allow sufficient drying time to prevent peeling and other issues that could lead to premature fading.

In terms of application methods, both brushing and spraying can provide good results if done properly. However, spraying can cover large areas more quickly and evenly, while brushing may be better for smaller or more detailed areas.

Regardless of the application method, it’s crucial to maintain a wet edge to avoid overlapping and streaking, which can contribute to uneven color and faster fading. For more tips on applying paint, check out our article on 7 tips for making exterior paint jobs last longer.

By selecting the right paint, properly preparing your home’s exterior, and using the correct application techniques, you can significantly minimize color fading on your home’s exterior. Remember, maintaining the vibrancy of your home’s exterior paint job is a task that requires both time and effort, but the results can be well worth it.

Important Factors in Preventing Color Fading

When it comes to maintaining the vibrancy of your home’s exterior paint, several factors play a crucial role. These include weather conditions, routine maintenance, and the use of professional services. Understanding these factors can help in effectively preventing color fading and in preserving the aesthetic appeal of your home.

The Role of Weather

Weather conditions significantly affect the longevity of the exterior paint. Sunlight, rain, snow, and even humidity can lead to color fading. Ultraviolet (UV) rays from the sun are particularly damaging, causing the paint pigments to break down and lose their vibrancy over time.

In regions with high rainfall, moisture can seep into the paint, causing it to bubble, peel, or crack. On the other hand, areas with high humidity levels can prevent the paint from drying properly, leading to an uneven finish and quicker color fading.

To combat the effects of weather on your home’s exterior, it’s crucial to choose high-quality paint with UV protection and water-resistant properties. Additionally, regular inspections can help detect early signs of weather-induced damage, allowing for timely touch-ups.

The Importance of Maintenance

Regular maintenance is key to minimizing color fading on your home’s exterior. This involves routine cleaning to remove dust, dirt, and mildew that can dull the paint color over time. Pressure washing, for instance, can effectively clean the exterior surfaces without causing damage to the paint.

Regular inspections are also part of the maintenance process. They help identify areas with faded or peeling paint that may require touch-ups or repainting. For more information about maintaining the exterior paint, check out our article on 7 tips for making exterior paint jobs last longer.

The Benefit of Professional Services

While DIY painting projects may seem cost-effective initially, hiring professional services can be more beneficial in the long run. Professionals have the expertise and equipment to ensure proper application and finishing, which can significantly reduce the risk of color fading.

A professional house painter contractor can also provide valuable advice on choosing the right paint and color for your home’s exterior. They can guide you through the selection process, considering factors such as the architectural style of your house, the surrounding landscape, and even the local climate.

Moreover, professional painters know the importance of thorough surface preparation, which is crucial in achieving a long-lasting finish. From power washing to removing loose paint and repairing minor damages, they ensure that your home’s exterior is ready for painting. To understand more about this process, check out our article on 5 steps to prepare your home for exterior painting.

The role of weather, the importance of maintenance, and the benefit of professional services are all key factors in preventing color fading on your home’s exterior. By considering these aspects, you can ensure that your home continues to shine with vibrant colors for years to come.

Tips and Tricks for Long-Lasting Exterior Paint

Learning how to minimize color fading on your home’s exterior is critical for maintaining your home’s curb appeal. Here are some practical tips and tricks to achieve long-lasting exterior paint.

Keeping Your Home’s Exterior Clean

A clean exterior can significantly extend the lifespan of your paint job. Regular cleaning helps to prevent dust, dirt, and mildew from accumulating on the surface, which can cause the paint to fade or peel prematurely. Use a soft-bristle brush or a pressure washer on a low setting to gently clean the painted surfaces. Always follow the manufacturer’s cleaning instructions to avoid damaging the paint.

Regular Inspection and Touch-ups

Routine inspection is vital in identifying signs of wear and tear early. Look for signs of fading, chipping, or peeling paint, and address these issues promptly. Regular touch-ups can help maintain the vibrancy of your home’s exterior and delay the need for a complete repainting job. For more information on when to repaint your home, read our article on how often do you need to paint the exterior of your house?.

Seeking Professional Advice When Needed

While DIY projects can be rewarding, some tasks are best left to professionals. If you notice significant fading or other problems with your paint, it may be time to consult a house painter contractor. Professionals have the knowledge and tools to address problems effectively and provide guidance on maintaining your home’s exterior.

In conclusion, taking preventative measures and regular maintenance can greatly reduce color fading on your home’s exterior. By keeping the exterior clean, performing regular inspections and touch-ups, and seeking professional advice when needed, you can prolong the life of your paint job and keep your home looking its best. For more tips on making exterior paint jobs last longer, check out our article 7 tips for making exterior paint jobs last longer.

Common Questions About Exterior Color Fading

When it comes to maintaining the look of your home’s exterior, there are often many questions that homeowners have about color fading. In this section, we’ll address some of the most common queries regarding how often a home exterior should be repainted, whether all surfaces can resist fading, and what the signs are that your exterior paint is fading.

How Often Should I Repaint My Home Exterior?

The frequency of repainting your home exterior depends on a variety of factors such as the quality of the previous paint job, the type of paint used, and your local weather conditions. However, as a general rule of thumb, most experts recommend repainting every 5-10 years. This helps maintain a fresh and vibrant look, and also provides an opportunity to address any damage or wear that may have occurred. For a more detailed answer, you can refer to our article on how often do you need to paint the exterior of your house?.

Can I Prevent Fading on All Surfaces?

While it is possible to minimize fading on various surfaces, it’s important to note that each material has unique properties that may affect how well it retains color. Factors such as direct sunlight, harsh weather conditions, and the quality of paint used can all play a part. For example, wood surfaces may require special attention as they are more susceptible to weather-induced damage. Check out our article on 7 tips for painting your home’s wood siding exterior for more information.

What Are Signs My Exterior Paint Is Fading?

Identifying the signs of fading paint early on can help you prevent further damage and maintain the curb appeal of your home. Look for areas where the color appears washed out or lighter than the rest of the house. Another common sign of fading is cracking or peeling paint. If you notice these signs, it may be time to consider a fresh coat of paint. You can also refer to our article on exterior painting mistakes every homeowner should avoid to ensure you’re keeping your home’s exterior in the best possible condition.

Maintaining your home’s exterior is an ongoing task, but with the right information and resources, it becomes a more manageable endeavor. Keep these tips in mind and remember to consult with a professional house painter contractor when needed to ensure your home stays vibrant and fade-free for years to come.

Mastering the Paint Job: Hiring the Ultimate House Painter Contractor

house painter contractor

Understanding the Need for a House Painter Contractor

If you’re thinking about refreshing your home’s look, painting can be a fantastic option. However, it’s important to understand the complexities that come with painting a house and the value of hiring a professional house painter contractor for the job.

The Complexity of Painting a House

Painting a house isn’t as simple as slapping on a coat of paint. It’s a detailed process that requires careful planning, preparation, and execution.

Firstly, you need to select the right colors. This isn’t just about personal preference, but also about understanding how different colors can change the mood and perception of a space. For instance, lighter colors can make a room seem larger, while darker colors can create a cozy, intimate feel. Check out our article on color choices for your interior painting project for some expert advice.

Next, there’s the preparation phase, which can include cleaning the walls, repairing any damages, sanding, and priming. This stage is crucial for ensuring that the paint adheres properly and provides a smooth, even finish.

Then comes the painting itself, which requires skill and precision to ensure straight lines and avoid drips or splotches. Plus, different types of surfaces require different painting techniques and materials.

Lastly, there’s the cleanup and final touch-ups to ensure a polished and professional finish.

The Value of a Professional Touch

Given the complexities involved, it’s clear why many homeowners choose to hire a professional house painter contractor. These professionals come with the necessary experience, skills, and tools to deliver high-quality results. They understand the nuances of the job and can provide expert advice on color choices, finishes, and techniques.

Hiring a professional also saves you time and effort. Painting a house can be a time-consuming task, particularly if you’re inexperienced. A professional can complete the job more efficiently and often to a higher standard.

Furthermore, a house painter contractor is well-versed in safety measures to prevent accidents, particularly when working on exterior walls or high areas. They are also likely to be insured, providing you with peace of mind.

Finally, a professional painter can spot potential issues, such as rot, decay, or structural defects, that you might overlook. Early detection of these problems can save you from costly repairs down the line.

In conclusion, although it might be tempting to embark on a DIY painting project, the expertise and convenience provided by a professional house painter contractor make them a worthy investment for your home improvement endeavors.

Identifying the Right House Painter Contractor

Choosing the right house painter contractor can feel like a daunting task. With so many options available, how do you ensure you’re hiring a professional who will deliver quality work? Here are some qualifications to look for and questions to ask that will help you identify the right contractor for your painting needs.

Essential Qualifications to Look For

When hiring a house painter contractor, the first step is to check their qualifications. A reputable contractor should have:

  1. Licensing and Insurance: These are fundamental requirements for any contractor. The license indicates they are legally permitted to operate in your area, while the insurance protects you from any liabilities during the project.
  2. Experience: Look for a contractor with a proven track record in the painting industry. Experienced contractors can better handle unexpected issues that may arise during the project.
  3. Portfolio: A portfolio of their previous work can give you a sense of their style and quality. It can also help you visualize how they could transform your space.
  4. References: A good contractor should be able to provide references from past clients. This can give you insights into their work ethic and customer satisfaction.
  5. Knowledge: They should have a thorough understanding of painting techniques, materials, and trends. This knowledge will ensure they can provide the best advice and service.

Questions to Ask a Potential Contractor

Once you’ve narrowed down your list of potential contractors based on their qualifications, it’s time to ask some key questions:

  1. What is the estimated timeline for the project? Understanding the timeline can help you plan accordingly and set realistic expectations.
  2. What is included in the quote? Make sure you understand what the quote includes. It should cover labor, materials, and any other potential costs.
  3. How will they protect your property? The contractor should explain how they will protect your furniture, landscape, and other items from paint spills and damage.
  4. Do they offer a warranty or guarantee? A warranty shows that the contractor stands behind their work. It can provide peace of mind knowing that any issues will be addressed.
  5. How do they handle prep work and clean up? Prep work and cleanup are just as important as the painting job itself. You want to ensure they’ll leave your space clean and tidy.

By carefully vetifying your house painter contractor, you can have confidence in your decision and look forward to a beautifully painted home. For more tips on preparing your home for painting, check out our articles on 5 steps to prepare your home for exterior painting and color choices for your interior painting project.

Decoding the Contract

After selecting the right house painter contractor, the next crucial step is understanding and agreeing to the contract. The contract outlines the scope of work and payment terms, two fundamental aspects that homeowners should fully understand before proceeding with the painting job.

Understanding the Scope of Work

The scope of work in the contract laid out by your house painter contractor is essentially a detailed description of the painting job. It should clearly specify the areas to be painted, the type of paint and finishes to be used, and any additional services such as prep work or clean-up.

For example, if you’re getting the exterior of your house painted, the contract should mention whether the contractor will handle tasks like power washing the surfaces before painting, covering the windows and doors, and cleaning up the area after the job.

Scope of Work Included
Power washing Yes
Prepping surfaces Yes
Painting exterior Yes
Clean-up after painting Yes

Make sure you comprehensively go through the scope of work and request changes if necessary. It’s important to have a clear agreement on what the job entails to prevent any misunderstanding or disputes later on.

Payment Terms and Conditions

The contract should also clearly outline the payment terms and conditions. This generally includes the total cost of the job, the payment schedule, and the method of payment. Whether you’re required to pay a deposit upfront, make payments in installments, or settle the bill at the end of the job, should all be mentioned in the contract.

Payment Term Detail
Total cost $5000
Deposit $1000
Final Payment $4000

Moreover, the contract should specify what happens in the event of additional costs. For example, if the contractor discovers that more prep work is needed or if you decide to change the paint color halfway through the job, how these additional costs will be handled should be clearly stated in the contract.

Understanding the contract is an important step in hiring a house painter contractor. It not only protects you as the homeowner but also sets clear expectations for the contractor. Before you sign, make sure you read and understand the contract, ask any questions, and feel comfortable with the terms and conditions. After all, a well-painted home is not just about the aesthetic appeal, but also about the peace of mind knowing that you’ve hired a professional you can trust.

Preparing Your Home for Painting

Before the house painter contractor arrives, there’s plenty you can do to ensure a smooth and efficient painting process. From selecting the right color to preparing your home, these steps will help set the stage for a successful paint job.

Tips on Color Selection

Choosing the perfect color for your home can be both exciting and daunting. It’s a decision that significantly impacts the overall look of your home. Here are some tips to guide you through the color selection process:

  1. Consider Your Home’s Architecture: The style and era of your home can influence your color choice. Some architectural styles have traditional colors associated with them.
  2. Look at Your Surroundings: Your environment, including your neighborhood, landscaping, and climate, can inspire your color palette. For instance, earthy tones may complement a home surrounded by nature.
  3. Think About Your Interior: The exterior of your home should harmonize with the interior. Consider the colors you’ve used inside your home as a starting point for your exterior color scheme.
  4. Test Your Colors: Once you’ve narrowed down your options, test them out. Buy small amounts of paint and apply them to a small area of your home. Observe how the colors look at different times of the day and in various weather conditions.
  5. Seek Professional Advice: A professional house painter contractor can provide valuable insight and recommendations based on their experience.

For more guidance on color selection, check out our articles on color choices for your interior painting project and tips to add accent colors into your home interior.

Pre-Painting Preparations for Homeowners

Once you’ve selected the perfect color, you’ll need to prepare your home for the arrival of the house painter contractor. Here are some steps to take:

  1. Clear the Area: Remove outdoor furniture, grills, and other items from your patio or deck. Also, ensure your cars are out of the driveway.
  2. Trim Landscaping: Trim any overgrown shrubs or trees that may obstruct the painter’s access to your home.
  3. Clean Your Exterior: A clean surface is crucial for ensuring the paint adheres properly. Consider power washing your home’s exterior to remove dirt and mildew.
  4. Make Necessary Repairs: Address any issues such as rotten wood, loose siding, or cracked stucco before painting begins.
  5. Notify Your Neighbors: Let your neighbors know about your painting project. This courtesy heads-up will allow them to prepare for any minor inconveniences, like noise or parking restrictions.

Preparing your home for painting not only ensures a smoother painting process but also helps achieve the best results. For more tips, visit our article on 5 steps to prepare your home for exterior painting.

Once you’ve hired a house painter contractor, the real fun begins! But what should you expect during the painting job, and how can you ensure quality control and satisfaction?

What to Expect During the Painting Job

A professional house painter contractor will start by preparing the area. This usually involves moving or covering furniture, protecting floors, and removing wall hangings. They’ll then prep the walls, which could include scraping, sanding, patching, and priming, depending on the condition of your walls. Remember, good preparation is the key to a flawless finish!

Once the prep work is done, the painting begins. This typically involves applying at least two coats of paint, with drying time in between. Depending on the size of your home and the specifics of the job, painting could take anywhere from a few days to a couple of weeks.

During the painting process, you can expect the contractor to maintain a clean work area and minimize disruption to your home life as much as possible. But be prepared for some noise and mess, as painting is a messy job!

Ensuring Quality Control and Satisfaction

To ensure the quality of the painting job, it’s important to regularly check the contractor’s work. Look for consistent color, clean lines, and good coverage. Don’t be afraid to speak up if you see something that doesn’t look right; a good contractor will appreciate your feedback and make the necessary corrections.

Once the job is complete, do a final walk-through with the contractor before making the final payment. Make sure you’re satisfied with the work and that all the terms of the contract have been met.

Remember, a quality paint job should last for years. However, the longevity of the paint job can be affected by factors such as the quality of the paint used, the preparation of the surfaces, and the exposure to the elements. Check out our article on how often do you need to paint the exterior of your house? for more information.

Ultimately, the key to a successful painting project is hiring a house painter contractor who understands your vision, communicates clearly, and takes pride in their work. By doing your homework, asking the right questions, and staying involved throughout the process, you can ensure that you’ll be satisfied with the end result.

Maintaining Your Paint Job

After the house painter contractor has finished painting, it’s time to ensure that the paint job lasts for as long as possible. This involves knowing how to take care of your newly painted house and recognizing when it’s time to consider another paint job.

Proper Care for Your Newly Painted House

A fresh coat of paint can drastically change the look and feel of your home. To keep it looking its best, proper care is key. This involves regular cleaning and maintenance, as well as avoiding actions that could damage the paint.

Keep the walls clean by dusting them regularly and washing them with a soft, damp cloth if necessary. Avoid using harsh cleaning products that could strip away the paint. To prevent accidental scratches or chips, be careful when moving furniture or other items against the walls.

For the exterior of your house, regular inspections are necessary to catch any signs of damage early on. Look out for peeling or chipped paint, which could indicate a need for touch-ups. Regular cleaning can also help to remove any dirt or mold that could damage the paint over time. For more tips on caring for your home’s exterior, check out our article on how to minimize color fading on your home’s exterior.

When to Consider Another Paint Job

The longevity of a paint job depends on several factors, including the quality of the paint, the skill of the house painter contractor, and the conditions the paint is exposed to. However, there are some general guidelines on when to consider another paint job.

For the interior of your house, a fresh coat of paint is generally needed every five to seven years. High-traffic areas such as hallways and kitchens may need to be repainted more frequently. You should also consider repainting if you notice signs of wear and tear, such as scuff marks, peeling paint, or noticeable fading.

As for the exterior, it typically needs repainting every seven to ten years. However, this could vary depending on factors like the type of siding, the quality of the previous paint job, and the local climate. Signs that your exterior needs repainting include peeling or cracked paint, bare wood, or mold and mildew growth. For more information on this topic, check out our article on how often do you need to paint the exterior of your house?.

In conclusion, maintaining your paint job is an ongoing task that involves regular cleaning, inspections, and touch-ups when necessary. By doing so, you can keep your house looking fresh and vibrant for years to come.

Unlocking the Power: How Color Psychology in Design Affects Your Health

painting for health: using color psychology in design

The Power of Color

When it comes to painting and decorating, color choice goes beyond aesthetics. Colors can impact your mood, health, and overall wellbeing. That’s where color psychology comes in. So let’s dive in and explore this concept.

Understanding Color Psychology

Color psychology is the study of how colors can affect your mood, behavior, and feelings. Each color has a unique psychological value and can evoke certain emotions in people. For instance, blue tends to be calming and restful, while red can stimulate energy and passion.

When planning your next painting project, it’s worth considering the psychological effects of your chosen colors. This allows you to create a space that not only looks good but also promotes your desired atmosphere. For instance, if you want to create a calming retreat in your bedroom, you might opt for soft blues or greens. On the other hand, if you’re looking to stimulate creativity in your home office, warmer colors like orange or yellow might be more suitable.

How Color Affects Mood and Health

Color can significantly impact our mood and health. Bright, warm colors like red, orange, and yellow can energize and stimulate, while cool colors like blue and green tend to be calming and relaxing.

Research has shown that color can even affect physiological reactions. For instance, exposure to red has been found to increase heart rate, while blue can slow it down.

When it comes to painting for health and using color psychology in design, it’s all about balance. Too much of a bright, stimulating color can lead to restlessness or anxiety, while too much of a calming color might make you feel lethargic or uninspired.

The key is to consider how you want to feel in each room and choose your colors accordingly. If you’re not sure where to start, check out our articles on the top 7 interior home painting colors for 2023 for inspiration.

Remember, color is just one piece of the puzzle. Other aspects of your space, like furniture, lighting, and decor, can also contribute to mood and atmosphere. So take a holistic approach to your design for the best results.

In the next sections, we’ll explore how to apply color psychology in different rooms of your home, common pitfalls to avoid, and the crucial relationship between color and light. Stay tuned!

Color Psychology in Design

When you’re sprucing up your space, the color choices you make can have a significant impact beyond just aesthetics. This is where color psychology comes into play, especially in interior design.

The Role of Color in Interior Design

In interior design, color isn’t just about what looks good. It’s also about how it makes you feel. Indeed, color psychology suggests that the hues you surround yourself with can influence your mood and even your well-being.

Thinking about the energy you want in each room can guide your color choices. For instance, you might want calming colors in the bedroom to promote restful sleep, or vibrant colors in the living room to foster lively conversations. When you’re painting and decorating, considering the psychological effects of color can help you create spaces that not only look great but also support your health and happiness.

How Different Colors Impact Emotions and Well-being

So, how exactly do different colors affect your emotions and well-being? Let’s break it down:

  • Red: This bold color is associated with energy and passion. It can stimulate conversation and appetite, making it a popular choice for dining rooms. But be careful, too much red might be overwhelming.
  • Blue: Known for its calming effects, blue is often used in bedrooms and bathrooms to promote relaxation and tranquility. It’s like bringing a bit of the serene sky or a quiet ocean into your home.
  • Green: This color is linked to nature, health, and renewal. It can create a calming yet invigorating environment, perfect for a home office where you need to stay focused and creative.
  • Yellow: As a color of sunshine, yellow can make a room feel cheerful and inviting. It’s great for kitchens and breakfast nooks where you want to start your day on a positive note.
  • Purple: This color can feel luxurious and romantic, making it a beautiful choice for a master bedroom. Lighter shades like lavender can also have a calming effect.

Remember, these are just guidelines. The key is to tune into your personal response to different colors. After all, it’s your space. Your comfort and joy are what matter most.

As you embark on your painting project, don’t forget to read our 10 things you need to know before starting your painting project for some handy tips. And if you’re curious about what colors are trending for homes in the coming year, check out our the top 7 interior home painting colors for 2023.

By understanding the power of color psychology in design, you’re not just painting for looks. You’re ‘painting for health’, creating a home that supports your well-being every day. Happy painting!

Color Choices for Different Rooms

When considering the role of color psychology in design, it’s crucial to choose the right hues for different rooms. Each room has a unique purpose and energy, and the color you select can significantly influence this. Let’s explore how to choose the best colors for your kitchen, living room, bedroom, and home office.

Kitchen: Colors for Appetite and Energy

The kitchen, often seen as the heart of the home, is a place of energy, creativity, and nourishment. Colors that stimulate appetite and evoke a sense of warmth can be ideal here. Shades of red, orange, and yellow can encourage both appetite and conversation, making them great choices for a lively, welcoming kitchen. Before you get started, make sure you read our article on 10 things you need to know before starting your painting project.

Living Room: Colors for Relaxation and Conversation

Your living room is typically a gathering spot for relaxation and conversation. Therefore, you’ll want to choose colors that create a calming yet inviting atmosphere. Cool blues, soft greens, or earthy neutrals can serve to promote tranquility while fostering a welcoming environment for guests. For more advice on creating a cozy space, check out our article on 7 tips for painting a large room to make it cozy.

Bedroom: Colors for Rest and Rejuvenation

The bedroom is your personal sanctuary, a place for rest and rejuvenation. Colors that promote relaxation and help reduce stress are ideal. Consider cool blues, gentle greens, or soothing lavender. These calming hues can help create a tranquil environment conducive to restful sleep. For a look at trending bedroom colors, take a peek at our article on the top 7 interior home painting colors for 2023.

Home Office: Colors for Focus and Creativity

If you’re designing a home office, you’ll want colors that can help stimulate focus and creativity. Here, you might lean towards shades of green, which are known to enhance concentration, or blues that promote calm and clear thinking. For a more energetic workspace, consider adding touches of yellow or orange, known for boosting creativity and energy.

Choosing the right colors for each room is a crucial step in painting for health and using color psychology in design. By considering the purpose and desired mood for each space, you can create an environment that supports your well-being and fits your style. For more tips and advice on painting and decorating, visit our blog.

Applying Color Psychology in Your Home

Harnessing the power of color psychology can have a significant impact on your mood and overall health. Here’s how you can consciously apply color psychology to your home design and painting choices.

Steps to Choose the Right Color for Each Room

Choosing the right color for each room in your house can be a fun and exciting process. Here are some steps to guide you:

  1. Identify the Purpose of the Room: Is the room used for relaxation, work, or entertainment? The room’s purpose will influence the color choice.
  2. Consider the Room’s Size and Shape: Light colors can make a small room appear larger, while dark colors can make a large room feel cozier. Check out our article on 7 tips for painting a large room to make it cozy.
  3. Evaluate the Room’s Lighting: The amount of natural light a room gets can significantly impact how a color is perceived. Read more about this in our article on the ultimate guide to choosing paint colors for your interior trim.
  4. Think About Mood: What kind of mood do you want to create in the room? For instance, blues and greens can be calming, while reds and oranges might be more energizing.
  5. Test the Paint: Before you commit, apply a small amount of paint to a section of the wall and observe it at different times of the day and under various lighting conditions.

Remember that the color you choose can have a profound effect on your mood and overall health, so take your time and choose wisely.

The Balance of Color and Other Design Elements

When considering painting for health using color psychology in design, it’s crucial to balance color choices with other design elements in your home. Too much of one color can be overwhelming, while too little may leave a room feeling dull.

Consider incorporating a variety of colors to create a harmonious and balanced design. For example, if you choose a bold color for the walls, consider neutral furniture and decor to balance it out, or vice versa.

Furthermore, consider the flow of color from room to room. While each room can have its own color scheme, try to ensure there’s a visual connection between adjacent spaces for a cohesive look.

Lastly, don’t forget about the impact of texture and patterns. These can add depth and interest to a room, and can either enhance or soften the impact of the chosen color.

Remember, a successful design is all about balance. Your color choices should work in harmony with the other elements in your room, creating a space that not only looks good but feels good too.

For more advice on how to apply color psychology in your home and make the right painting choices, check out our other articles on painting and decorating.

Common Pitfalls and How to Avoid Them

When it comes to using color in design for health and wellness, there are a few common missteps you might make. But hey, no worries – we’re here to set you straight. Let’s dive into the common pitfalls and how you can sidestep them.

Overstimulation Through Too Many Bright Colors

Bright colors can bring energy and vitality to a space. Still, too much of these vibrant hues can lead to overstimulation, making a room feel chaotic and stressful. You might think painting your room in a rainbow of colors seems fun, but it could end up feeling like you’re living inside a pinball machine.

Avoid this by using bright colors sparingly or balancing them out with neutral tones. For instance, while painting your walls, you might choose one accent wall in a bright color, leaving the rest in a calming neutral. If your heart is set on a bright scheme, balance it out with neutral furniture or décor. Check out our guide to choosing paint colors for your interior trim for more tips.

Depression Through Too Many Dark Colors

On the flip side, while dark colors can create a sophisticated, cozy ambiance, deploying too many can make a room feel gloomy, oppressive, and even depressing. Imagine sitting in a room painted floor to ceiling in black. It’s not exactly a mood booster, right?

To avoid this pitfall, consider using dark colors as accents rather than the main color. For example, you could paint one wall in a dark hue and keep the rest light. Alternatively, use dark-colored furniture or accessories against a light backdrop. Here are 7 tips for painting a large room to make it cozy.

The Impact of Too Little Color

Playing it too safe can also be a pitfall. A room with too little color can feel sterile and uninspiring, like you’re living in a grayscale photograph. Keeping everything in white or beige might seem like a safe bet, but it can lead to a lack of visual interest and stimulation.

The key here is to sprinkle in some color – even if it’s in small doses. You could introduce color through accessories like throw pillows, artwork, rugs, or even a colorful piece of furniture. And remember, paint isn’t permanent. If you try a color and don’t love it, you can always repaint. For inspiration, check out our top 7 interior home painting colors for 2023.

By sidestepping these pitfalls, you’re well on your way to creating a space that not only looks great but also supports your health and wellbeing. Remember, it’s all about balance. Happy painting!

Color and Light: A Crucial Relationship

Let’s switch gears and talk about how light plays a significant role in color perception. Light can dramatically change how a color looks and feels in a space. Understanding this relationship can help you make smarter design decisions and use color psychology for health and wellbeing.

The Role of Natural and Artificial Light in Color Perception

Ever noticed how a color swatch looks different in the store than it does in your living room? That’s because the type and quality of light can greatly influence how we perceive color.

Natural light, which changes throughout the day, can make colors appear different at various times. Morning light tends to cast a cool, bluish hue, whereas the evening light is warmer and can make colors appear more red or yellow.

Artificial light, on the other hand, can also impact color perception. Incandescent bulbs produce warm, yellowish light that can intensify warm colors but mute cooler ones. Fluorescent lighting tends to emit a cool, bluish light that can enhance blues and greens but make reds and yellows look dull.

So, when you’re deciding on a paint color for a room, it’s essential to consider the type and amount of light the space receives. You might want to test a color in different lighting conditions before making your final decision.

Tips for Matching Light Conditions with Color Choices

When it comes to matching light conditions with color choices, here are a few tips to get you started:

  1. Use Light to Your Advantage: If a room gets plenty of natural light, consider using cooler colors to balance out the warm light. On the contrary, spaces with less natural light can benefit from warmer colors to create a cozy and inviting atmosphere.
  2. Test, Test, Test: Always test a color in the room you plan to paint. Assess how it looks at different times of the day and under different types of artificial light. This will help you get a real sense of how the color will look once it’s on the walls.
  3. Consider Light Reflectance Values (LRV): LRV measures the amount of light a color reflects. Colors with a high LRV (closer to 100) will reflect more light and can help brighten a room. Colors with a low LRV (closer to 0) absorb more light, which can make a room feel smaller or darker.

Remember, mastering the relationship between color and light is an art. So, don’t be afraid to experiment until you find the perfect balance. For more tips on painting and decorating, check out our guide on painting and decorating or 10 things you need to know before starting your painting project. And remember, the right color can create a mood, evoke emotions, and even improve your health, so choose wisely!

The Key to Long-Lasting Beauty: How Often Should You Repaint Your Home?

how often should you repaint your home and why?

The Importance of Repainting

Often overlooked, the act of repainting your home plays a crucial role in maintaining its aesthetic appeal and structural integrity. But exactly why is repainting so important? Let’s delve deeper into this aspect.

Enhancing Beauty and Value

Repainting your home, be it interior or exterior, is a surefire way to enhance its beauty. Freshly painted walls provide an instant uplift to the overall ambiance, making the house look clean, vibrant, and well-maintained. It’s a quick and effective way to transform your living space, whether you’re trying to create a cozy environment, a vibrant workspace, or a relaxing retreat.

Different paint colors can evoke different emotions and atmospheres. For instance, cool blues can create a calm and relaxing space, while warm reds and oranges can make a room feel cozy and inviting. If you’re unsure about which colors to choose, our article on the top 7 interior home painting colors for 2023 might help.

Moreover, a well-executed paint job can significantly increase the value of your home. If you’re planning on selling or renting out your property, a fresh coat of paint can help attract potential buyers or tenants and could even increase the selling or rental price.

Protection and Preservation

Beyond aesthetics, repainting your home serves a more practical purpose – protection and preservation. Paint acts as a barrier against external elements that can cause damage to your property. For exteriors, a fresh coat of paint can protect against weather damage, sun exposure, and insects. It can also prevent moisture from seeping into your walls, which can lead to problems like mold and structural damage.

For interiors, paint acts as a protective layer against everyday wear and tear, dirt, and stains. It can help prevent damage from moisture in areas like the bathroom and kitchen and can make your walls easier to clean.

It’s important to note that the quality of paint used plays a significant role in providing this protection. High-quality paint generally lasts longer and provides better coverage and protection. We delve deeper into this topic in our article on why quality paint is worth the price: an expert’s perspective.

In conclusion, repainting your home not only enhances its aesthetic appeal but also contributes to its longevity. If you’re contemplating ‘how often should you repaint your home and why?’, remember it’s not just about keeping up with the latest color trends. It’s also about preserving your home and ensuring it remains a safe, comfortable space for you and your loved ones.

Understanding the Ideal Painting Frequency

When it comes to maintaining the beauty and longevity of your home, one question we often hear is, “How often should you repaint your home and why?” The answer to this question depends on various factors, including the type of paint used, the room’s usage, and environmental conditions.

Factors Influencing Repainting Frequency

Several factors determine how often you should repaint your home. These include:

  1. Type of Paint: Higher quality paints tend to last longer than lower quality options. To learn more about why quality paint is worth the price, check out our article here.
  2. Room Usage: High-traffic areas like kitchens and bathrooms may need to be painted more frequently due to increased wear and tear.
  3. Environmental Conditions: Homes in areas with harsh weather conditions may require more frequent exterior painting.
  4. Previous Paint Job: The quality of the previous paint job can also affect how soon you’ll need to repaint.

Typical Lifespan of Interior Paint

The lifespan of interior paint can vary based on the room. For instance, bedrooms and living rooms that experience less traffic can go 5-7 years before they require a new coat of paint. However, kitchens, bathrooms, and hallways may need a fresh coat every 3-4 years due to higher usage.

Room Paint Lifespan
Bedrooms 5-7 Years
Living Rooms 5-7 Years
Kitchens 3-4 Years
Bathrooms 3-4 Years
Hallways 3-4 Years

For more insights into interior painting, including color trends, check out our article on the top 7 interior home painting colors for 2023.

Typical Lifespan of Exterior Paint

Exterior paint typically has a lifespan of 5-7 years, but it can vary based on factors like the type of paint used, the quality of the previous paint job, and the home’s exposure to sun and weather. For instance, sides of the house that are more exposed to severe weather conditions may need repainting more frequently.

Exposure Paint Lifespan
High Sun and Weather Exposure 3-5 Years
Average Exposure 5-7 Years
Low Exposure 7-10 Years

To ensure a successful exterior paint job, avoid common mistakes as highlighted in our article on exterior painting mistakes every homeowner should avoid.

Understanding the typical lifespan of interior and exterior paint, along with the factors influencing repainting frequency, will help you plan your painting projects effectively. Remember, a fresh coat of paint is not just about aesthetics—it’s also about protecting the structure and materials of your home.

Signs Your Home Needs a Fresh Coat of Paint

Determining when to repaint your home can be a bit perplexing. Although we’ve discussed the typical lifespan of interior and exterior paint, it’s important to note that the actual frequency might be influenced by various factors such as the quality of the previous paint job, the type of paint used, and local weather conditions. Nonetheless, there are some clear signs that indicate it’s time for a fresh coat of paint.

Wear and Tear

One of the most evident signs that your home needs repainting is visible wear and tear. This can come in the form of cracks, chips, or dents in the paint, often caused by natural aging, impact damage, or exposure to harsh weather conditions. These signs of wear and tear not only diminish the appearance of your home but can also create weak spots where moisture can seep in, potentially leading to more severe damage over time. Addressing these issues promptly by repainting can help preserve the integrity and beauty of your home.

Fading and Peeling

Fading paint is another sign that a repaint is due. Sun exposure, particularly in areas with high UV levels, can cause the paint’s color to fade over time, resulting in a dull and lackluster appearance. On the other hand, peeling paint usually indicates that the paint has lost its adhesion, often due to moisture or poor surface preparation during the previous paint job.

If you notice your paint is fading or peeling, it’s a clear signal that a fresh coat of paint is needed. Not only will a new paint job restore the vibrancy and appeal of your home, but it will also provide an additional layer of protection against the elements. To learn more about the role of paint in home protection, check out our article on painting and decorating.

Stains and Marks

Stains and marks on your walls can also be an indicator that it’s time to repaint. These can occur for a multitude of reasons, including water damage, smoke stains, or just everyday wear and tear. While some minor stains can be cleaned or covered up, more severe or widespread stains might require a full repaint to effectively hide them.

Remember, painting your home is not just about maintaining its aesthetic appeal. It’s also a crucial step in preserving your home’s structural integrity and value. So, if you notice any of these signs, it’s best to act sooner rather than later. For more advice on when and how to repaint your home, check out our article on 10 things you need to know before starting your painting project.

Preparing for a Paint Job

Once you’ve determined that your home requires repainting, the next step is to prepare for the task. This involves choosing the right paint and preparing your walls for painting. These are essential steps in ensuring the longevity and aesthetic appeal of your paint job.

How to Choose the Right Paint

The selection of paint is a crucial aspect of your painting project. There are a variety of factors to consider, including the type of paint, its finish, and its color.

For the type of paint, you can choose between oil-based and water-based paints. Oil-based paints are durable and stain-resistant, making them suitable for high-traffic areas. Water-based paints, on the other hand, are easy to apply and dry quickly. They are also environmentally friendly and have less odor compared to oil-based paints.

The finish of the paint refers to its sheen or shine. This can range from flat, which has no shine, to high gloss, which is highly reflective. The right finish depends on the area being painted and the desired look. High-traffic areas like kitchens and bathrooms usually benefit from a semi-gloss or high gloss finish due to their durability and ease of cleaning.

The color of the paint can significantly influence the ambiance and aesthetic appeal of a room. When choosing a color, consider the size of the room, the amount of natural light it receives, and the overall design theme of your home. For more guidance on choosing paint colors, refer to our article on the top 7 interior home painting colors for 2023.

It’s also important to remember that investing in high-quality paint can pay off in the long run. High-quality paints offer better coverage, longer-lasting results, and are often easier to clean and maintain. Learn why quality paint is worth the price in our article why quality paint is worth the price: an expert’s perspective.

Prepping Your Walls for Painting

Proper preparation of your walls is key to achieving a flawless paint job. This involves cleaning, repairing, and priming your walls before painting.

Start by cleaning your walls to remove any dust, dirt, or grease. This can be done using a mild detergent and water. For exterior painting, you might consider pressure washing your house. Check out our guide on how to pressure wash your house in 5 simple steps for more information.

Next, inspect your walls for any cracks, holes, or dents. These should be repaired using a suitable filler or patching compound. Once the repairs have dried, sand the area smooth and wipe away any dust.

Finally, apply a primer to your walls. Primer helps to provide a suitable surface for the paint to adhere to, improving the durability of your paint job. It can also help to hide any previous colors or stains on your walls.

Preparing for a paint job can be a time-consuming process, but it is an essential step in ensuring the longevity and quality of your paint job. With the right preparation and the right paint, you can transform the look of your home and ensure its long-lasting beauty.

The Process and Benefits of Professional Painting

When it comes to answering the question, ‘how often should you repaint your home and why?’ it’s important to consider who will be doing the painting. While many homeowners opt for the DIY route, there’s a lot to be said for hiring professional painters. In this section, we will cover what professional painters do and why it might be worth considering their services.

What Professional Painters Do

Professional painters bring a wealth of experience and expertise to your painting project. They take into account several factors such as the type of surface that needs to be painted, the current condition of the surface, the type of paint to be used, and the weather conditions in the case of exterior painting.

The process starts with a thorough inspection and assessment of the surfaces to be painted. This helps to identify any issues such as peeling paint, water damage, or mold that need to be addressed before the painting begins.

After the inspection, the preparation work begins. This may involve cleaning the surfaces, scraping off old paint, filling in cracks and holes, and priming the surfaces. For more on this, check out our guide on 10 things you need to know before starting your painting project.

Once the surfaces are ready, the professional painters carefully apply the paint using the appropriate techniques for the type of surface and paint. They also take care to protect your furniture, floors, and other items from paint splashes.

Finally, they do a final inspection to ensure the quality of the work and clean up the area.

Why Consider Hiring a Professional Painter

There are several reasons why homeowners and business owners might choose to hire professional painters. First and foremost, professional painters can save you time and effort. Painting, especially large areas or multiple rooms, can be a time-consuming task. By hiring professionals, you can focus on other tasks or simply sit back and relax while the work is done for you.

Secondly, professional painters have the expertise to deliver high-quality results. They know how to prepare the surfaces properly, choose the right type of paint, and apply it evenly for a smooth, durable finish. They also know how to handle any issues that might arise during the painting process.

Thirdly, professional painters can offer advice and guidance on color choices and finishes, helping you to achieve the look you desire. They stay updated on the latest trends and can provide expert recommendations. For some color inspiration, check out our post on the top 7 interior home painting colors for 2023.

Lastly, many professional painting companies offer warranties on their work, giving you peace of mind that if anything goes wrong, it will be taken care of.

Hiring professional painters can be a worthwhile investment when you consider the time, effort, and skill required to paint a house effectively. Whether you’re painting your home’s interior, exterior, or both, a professional painting service can help ensure the job is done right.

Cozy up Your Space: 7 Expert Tips for Painting a Large Room

7 tips for painting a large room to make it cozy

Introduction to Large Room Painting

Painting a large room can be a daunting task, especially when it comes to achieving a cozy and inviting ambiance. From choosing the right color to understanding how light impacts the room, every detail matters. This article aims to provide expert advice on transforming a large room into a warm and welcoming space. Here, we will discuss the relevance of paint in room aesthetics and address the unique challenges of painting large rooms.

Relevance of Paint in Room Aesthetics

The paint color of a room plays a pivotal role in shaping its aesthetic appeal. It can influence the room’s mood, perceived size, and overall ambiance. Paint can either make a room feel airy and spacious or warm and intimate, depending on the color palette and finish chosen. A well-painted room can also enhance architectural details, create visual interest, and serve as a backdrop for your furniture and decor. Check out our ultimate guide to choosing paint colors for your interior trim for some inspiration.

Moreover, a high-quality paint job can have practical benefits too, such as protecting the walls from wear and tear, and increasing the value of your property. That’s why it’s crucial to choose quality paint, as we discuss in our article on why quality paint is worth the price: an expert’s perspective.

Unique Challenges of Painting Large Rooms

When it comes to painting a large room, several unique challenges may arise. One of the most common issues is ensuring the paint color remains consistent across the entire room. This can be a difficult task, considering the large surface area and the varied lighting conditions that can subtly alter the perceived color.

Another challenge is maintaining a cozy and intimate feel despite the room’s size. Large rooms can often feel cold and impersonal without proper planning. Therefore, it’s essential to consider how the chosen paint color will interact with the room’s size, layout, and natural light.

Finally, painting a large room is a significant undertaking that requires more time, effort, and materials than painting a smaller room. It’s crucial to plan accordingly and ensure you have the necessary resources and expertise to complete the job effectively. For more insights on what to consider before starting a painting project, check out our article on 10 things you need to know before starting your painting project.

In the following sections, we will delve into our ‘7 tips for painting a large room to make it cozy’, providing practical advice on how to overcome these challenges and achieve the desired aesthetic.

Expert Tips for Painting a Large Room

When it comes to painting a large room, there are several factors to consider. The color of the paint, the lighting in the room, and the focal point all play a role in creating the desired ambiance. In this section, we delve into these aspects, offering expert advice to help you make your large room cozy.

Tip 1: Choosing the Right Color

The choice of color can dramatically change the look and feel of any room. When selecting a color for a large room, consider the mood you want to create. Light, neutral colors like beige or off-white can make the room feel more spacious and airy. On the other hand, darker shades can add depth and warmth.

Think about what the room will be used for. If it’s a living room or family room, you might want a warm and inviting color. If it’s a bedroom, perhaps a soothing and relaxing color would be appropriate. For more insights on choosing the right color, check out our article on the top 7 interior home painting colors for 2023.

Tip 2: Using Light to Your Advantage

Lighting plays a crucial role in how a paint color is perceived. Natural light can make a color look different than artificial light. During the day, a room with a lot of natural light may make the paint color look lighter. At night, with artificial light, the same color may appear darker.

Consider the direction your room faces and the amount of natural light it receives. A north-facing room tends to have cooler, bluer light, while a south-facing room gets warmer, yellow light. East-facing rooms have bright light in the morning and west-facing rooms have it in the afternoon and evening.

Tip 3: Creating a Focal Point

Creating a focal point in a large room can help make it feel more cozy and inviting. This can be achieved through the strategic use of paint. For example, painting one wall a different color can create an accent wall that draws the eye.

The focal point could also be a large piece of furniture, artwork, or even a fireplace. Use paint to enhance and draw attention to these features. For instance, if you have a beautiful fireplace, consider painting the wall behind it a complementary color to make it stand out.

Each of these tips is an integral part of painting a large room to make it cozy. Keeping them in mind during your next painting project can help you create a space that is not only aesthetically pleasing, but also comfortable and inviting. Don’t forget to check out our other articles for more advice on painting and decorating.

More Expert Tips for Cozy Spaces

After choosing the right color and considering the role of light in your large room, several other factors can contribute to a cozy, inviting space. These include accent walls, the ceiling, textures, patterns, and room accessories.

Tip 4: Utilizing Accent Walls

An accent wall can significantly impact the room’s overall feel, particularly in a large space. Choosing a bold or contrasting color for one wall can create a focal point while adding depth and interest. It’s a clever trick often used by professional painters to make a large room feel more intimate. For more on color choices, you might find the top 7 interior home painting colors for 2023 useful.

Tip 5: Considering the Ceiling

Often overlooked, the ceiling can also play a significant role in room aesthetics. Painting the ceiling a lighter shade than the walls can create an illusion of height, making a large room feel more cozy and less overwhelming. Alternatively, a darker ceiling can bring a sense of warmth and intimacy to a spacious room.

Tip 6: Using Textures and Patterns

Textures and patterns can add character and visual interest to a large room. Stripes, stencils, or textured paint techniques can break up large wall spaces, making the room feel more cozy and inviting. For more on paint techniques, refer to our painting and decorating guide.

Tip 7: Embracing the Power of Accessories

Lastly, room accessories can enhance the cozy feel of a large room. Area rugs, large pieces of furniture, and strategically placed artwork can visually break up the space, creating a more inviting atmosphere. Additionally, soft lighting and window treatments can contribute to the room’s overall warmth and coziness.

Remember, painting a large room to make it feel cozy is not just about the paint color or the walls. It’s about creating a harmonious balance between various elements, including color, light, texture, and accessories. For more expert tips on painting and decorating, check out our article on 10 things you need to know before starting your painting project.

Painting Techniques for Large Rooms

When painting a large room, the right techniques can make all the difference. From understanding the different paint techniques to adopting the proper painting sequence, these strategies can help ensure a smooth and even paint application.

Understanding Paint Techniques

Different paint techniques can dramatically change the look and feel of a room. For instance, color washing creates a soft, warm glow that can make a large room feel cozier. On the other hand, a technique like rag rolling can add depth and texture, making the walls more visually interesting.

When selecting a paint technique, it’s important to consider the desired aesthetic and the room’s purpose. For example, a technique that creates a calm, soothing effect might be best for a bedroom, while a more vibrant technique might be suitable for a living space. For more on this, check out our article on painting and decorating.

Adopting Proper Painting Sequence

The sequence in which a room is painted can also impact the final outcome. Experts typically recommend starting with the ceiling before moving on to the walls. This prevents paint drips from marring a freshly painted wall.

Furthermore, it’s advisable to paint one wall at a time, working in sections to maintain a wet edge. This helps to avoid visible seams where the paint overlaps. Finally, any trim or molding should be painted last to ensure clean, crisp lines. Check out our guide on 10 things you need to know before starting your painting project for more information.

Tips for Smooth and Even Paint Application

Achieving a smooth and even paint application is key to a professional-looking finish. Here are a few tips:

  1. Use Quality Tools: High-quality brushes and rollers can significantly improve paint application, reducing streaks and improving coverage.
  2. Prepare the Surface: Before painting, ensure the walls are clean, dry, and free of any peeling paint or wallpaper. You might also need to fill in any cracks or holes.
  3. Prime the Walls: A primer can help the paint adhere better and can also help to hide any stains or dark colors.
  4. Apply Multiple Coats: Especially when using lighter colors, multiple coats of paint may be necessary to achieve an even, opaque finish.
  5. Let the Paint Dry: Between coats, let the paint dry completely to avoid pulling off wet paint and creating an uneven surface.

Remember, patience and attention to detail are key when painting a large room. For more tips on achieving the perfect paint job, check out our article on why quality paint is worth the price: an expert’s perspective.

By using the right techniques and taking the time to do the job correctly, painting a large room can be a rewarding project that significantly enhances the comfort and aesthetics of your space.

Maintaining Your Newly Painted Room

Once your large room has undergone a transformation with a fresh coat of paint, it’s essential to maintain its new look and feel. This stage involves protecting the paint job and carrying out regular cleaning and maintenance tasks.

Protecting Your Paint Job

Keeping the paint job in good condition is crucial. It involves safeguarding the walls from scratches, stains, and moisture. Use quality paint as it tends to be more resilient and easier to clean. If you are wondering why it’s essential to invest in quality paint, read our article on why quality paint is worth the price: an expert’s perspective.

If your walls do get marked or stained, avoid scrubbing too hard during cleaning as it can lead to the paint wearing off. In rooms with high moisture levels, like kitchens or bathrooms, consider using a mildew-resistant paint or a moisture barrier to protect the walls.

Regular Cleaning and Maintenance Tips

Regular cleaning is an integral part of paint maintenance. Dust and clean the walls periodically to prevent build-up that can dull the paint color. Using a soft cloth or a duster is often enough for routine cleaning.

For more stubborn stains or marks, a mild soapy solution and a soft sponge can be effective. Ensure to test this solution on an inconspicuous area of the wall first to ensure it doesn’t affect the paint. After cleaning, dry the area thoroughly to prevent any water marks.

Regular maintenance also involves checking for any signs of peeling or chipping paint. If you spot any, it’s essential to address them promptly to prevent further damage. You might need to touch up the paint in these areas.

Lastly, it’s important to know when it’s time to repaint your room. Depending on factors like the quality of paint used and the room’s usage, a fresh coat of paint might be necessary every few years. For more insights on when to repaint your home, you can read our article on how often should you repaint your home and why?.

Maintaining your newly painted room not only extends the life of the paint job but also keeps the room looking fresh and inviting. By following these tips, you can ensure your large room continues to look cozy and welcoming for years to come. This concludes our 7 tips for painting a large room to make it cozy.

Your Decks Best Friend: 5 Pro Tips for Achieving a Perfect Stain

5 pro tips for staining your deck

Introduction to Deck Staining

Welcome to the world of deck staining! As a homeowner, your deck is one of your most valuable assets. It’s an outdoor extension of your living space where you can relax, entertain, and enjoy the beauty of nature. However, to keep it looking its best and lasting for years to come, proper staining is crucial.

Understanding the Importance of Deck Staining

Deck staining is about more than just giving your deck a fresh, appealing look. It’s an essential part of painting and decorating that serves a functional role too. Staining protects your deck from the harsh elements, such as sun, rain, and snow, which could otherwise lead to warping, splitting, and rotting of the wood. Moreover, a well-stained deck enhances the curb appeal of your home, making it more attractive to potential buyers should you decide to sell.

Staining also allows you to customize the aesthetic of your deck. You can choose from a wide variety of stain colors and finishes, from natural tones that enhance the wood’s natural grain to bold hues that make a statement. This can complement the overall look of your home and reflect your personal style.

The Impact of Proper Staining on Your Deck’s Lifespan

Proper staining can significantly extend the lifespan of your deck. By providing a protective seal, stain helps to prevent moisture from seeping into the wood, thus reducing the risk of decay and structural damage. It also shields the wood from the harmful UV rays of the sun, which can cause the wood to fade and become brittle over time.

But remember, not all stains are created equal. The quality of the stain you use, along with your application technique, can greatly influence the effectiveness of the stain and the longevity of your deck. That’s why it’s important to follow our ‘5 pro tips for staining your deck’ to ensure you achieve a long-lasting, beautiful finish.

So, let’s dive in and learn how to give your deck the care and protection it deserves!

Pro Tip 1: Choose the Right Stain

The first step in achieving a beautifully stained deck is choosing the right product. Stains not only add color and beauty to your deck but also protect the wood from the elements.

Understanding Different Types of Stains

Stains come in a variety of types, each with their own unique characteristics and benefits.

  1. Transparent Stains: As the name suggests, these stains are clear and allow the natural beauty of the wood grain to shine through. They provide minimal protection against UV rays but are excellent for showcasing the wood’s natural aesthetics.
  2. Semi-transparent Stains: These stains provide a balance between color and clarity. They offer some color while still allowing the wood grain to be visible. They also offer better protection against UV rays than transparent stains.
  3. Semi-solid Stains: Semi-solid stains offer more color and less visibility of the wood grain. They provide excellent UV protection and are a great option if you want to add a bit of color to your deck.
  4. Solid Stains: These act more like paint than stain, providing a thick, opaque color that hides the wood grain completely. They offer the best protection against UV rays and weathering.

Factors to Consider When Choosing a Stain

When choosing a stain for your deck, consider the following factors:

  1. Deck Wood Type: The type of wood your deck is made of can influence the stain you should choose. Some woods absorb stain better than others, and certain colors may look better on specific wood types.
  2. Desired Look: Think about the final look you want for your deck. If you want to show off the natural wood grain, opt for a transparent or semi-transparent stain. If you prefer a bold color, a solid stain may be the best choice.
  3. Maintenance: Consider how much time and effort you’re willing to put into maintaining your deck. Transparent stains may need to be reapplied annually, while solid stains can last up to five years.
  4. Weather Conditions: If your deck is exposed to harsh weather conditions, you might want to choose a stain that provides excellent protection against the sun and water.

Remember, deck staining is not just about aesthetics. It’s also about protecting your investment. Choosing the right stain can extend the life of your deck and enhance the enjoyment you get from your outdoor space. For more tips on deck staining, check out 6 essential tips for staining your deck like a pro.

Pro Tip 2: Prepare Your Deck

Before you can even begin to think about staining, your deck needs to be in the right condition. This is where the critical steps of cleaning and sanding come in.

Importance of Cleaning and Sanding

Proper cleaning and sanding of your deck are essential steps in the staining process. Cleaning removes dirt, mildew, and old stain that can prevent the new stain from adhering properly. Sanding smooths out the wood’s surface, opening up the pores of the wood to allow for a more even absorption of the stain.

If you skip these steps, you might end up with a blotchy, uneven stain that will not only look bad but also won’t offer the protection your deck needs. If you want your deck to look its best and last as long as possible, don’t underestimate the importance of proper preparation.

Steps for Effective Deck Preparation

  1. Clear the Deck: Remove all furniture and other items from the deck to give yourself a clear working space.
  2. Sweep: Use a broom to sweep away loose debris like leaves, dirt, and small twigs.
  3. Clean: Use a deck cleaner to thoroughly clean the surface of the deck. This will remove dirt, grease, mildew, and old stain. For best results, use a bristle brush or a power washer. If you’re using a power washer, make sure to follow the instructions in our guide on how to pressure wash your house in 5 simple steps.
  4. Sand: After the deck has dried completely, use a sander to smooth out the surface of the wood. Start with a coarse-grit paper to remove rough spots and old stain, then finish with a finer grit to achieve a smooth finish.
  5. Dust: Sweep or vacuum the deck to remove any dust or debris left from sanding.
  6. Check: Inspect the deck for any remaining rough spots or patches of old stain. If necessary, repeat the cleaning and sanding process.

By following these steps, you can ensure that your deck is thoroughly prepared and ready for staining. Remember, proper preparation is key to achieving a beautiful, long-lasting finish. For more tips on staining your deck, check out our article on 6 essential tips for staining your deck like a pro.

Pro Tip 3: Apply Stain in the Right Weather

Weather plays a significant role in the process of staining your deck. When you know how different weather conditions affect the staining process, you can plan your project effectively.

Understanding How Weather Affects Staining

Believe it or not, weather has a significant impact on staining. Temperature, humidity, and sun exposure all affect how the stain dries and adheres to your deck’s surface.

High temperatures can cause the stain to dry too quickly, preventing it from properly soaking into the wood. On the other hand, if the weather is too cold, the stain may not dry at all. Humidity also plays a role – if it’s too high, it can delay the drying process and result in a blotchy finish.

Sunlight is another factor to consider. While a bit of natural light can help the stain dry, too much direct sunlight can cause uneven drying, leading to a patchy and unattractive finish.

Ideal Conditions for Staining Your Deck

So when is the best time to stain your deck? Ideally, you should apply stain when the weather is dry and the temperature is between 50 and 90 degrees Fahrenheit. A cloudy day with little to no wind is perfect, as it keeps the stain from drying too quickly and allows for more even application.

Also, consider the forecast for the next few days. Once applied, the stain needs time to dry properly. Rain or high humidity in the following 12-24 hours could ruin your hard work.

Weather Condition Impact on Staining
High Temperature Causes stain to dry too quickly
Low Temperature Prevents stain from drying
High Humidity Delays drying process, may result in a blotchy finish
Direct Sunlight Can cause uneven drying

For more expert tips on staining your deck, check out our article on 6 essential tips for staining your deck like a pro. Remember, preparation is key when it comes to painting and decorating, so always ensure you have the right conditions before starting your staining project.

Pro Tip 4: Use the Right Tools

To achieve a professional-looking deck stain, the tools you use are just as important as the stain itself. Here’s how to choose and use the right ones.

The Role of Brushes and Rollers in Staining

Brushes and rollers play a crucial role in staining your deck. They help to apply the stain evenly across the surface of your deck, ensuring all areas are covered and the stain penetrates deep into the wood.

Brushes are great for getting into those hard-to-reach areas and for applying a thick coat of stain. Rollers, on the other hand, are ideal for covering large areas quickly. They help to spread out the stain and create a smooth finish. In general, a combination of both brushes and rollers can provide the best results.

Tips for Choosing and Using Staining Tools

When choosing brushes and rollers for staining your deck, consider the following tips:

  1. Brush Type: Choose a brush with stiff bristles for applying stain. A brush with synthetic bristles is often a good choice as they are durable and easy to clean.
  2. Brush Size: The size of the brush should match the job. Use smaller brushes for tight spaces and larger brushes for broad surfaces.
  3. Roller Material: When choosing a roller, a lambswool or microfiber roller can provide a smooth application of stain.
  4. Roller Size: Like brushes, the size of the roller should match the task. Use smaller rollers for narrow areas and larger rollers for wide surfaces.
  5. Tool Maintenance: Keep your tools clean. After staining, clean your brushes and rollers immediately to keep them in good condition. This will ensure they are ready to use for the next staining project.
  6. Technique: Apply the stain in long, even strokes. Avoid overloading your brush or roller with stain as this can lead to drips and uneven coverage.

Using the right tools and techniques can make a significant difference in the outcome of your staining project. For more pro tips on staining your deck, check out our comprehensive guide on 6 essential tips for staining your deck like a pro.

Pro Tip 5: Apply Multiple Coats

As we wrap up our 5 pro tips for staining your deck, let’s talk about the importance of applying multiple coats.

The Benefit of Using Multiple Coats

When staining your deck, it may be tempting to stop after a single coat, especially if you’re satisfied with the color. However, applying multiple coats of stain has several benefits that can greatly impact the lifespan and appearance of your deck.

Firstly, multiple coats provide a stronger, more durable finish that can withstand the elements. This means your deck will be better protected against sun damage, moisture, and general wear and tear. Secondly, multiple coats can enhance the color of the stain, giving your deck a rich, vibrant appearance that a single coat simply can’t achieve. Lastly, applying several coats can ensure a more even finish, covering any spots that may have been missed or lightly covered in the first application.

Advice on Timing and Technique

When it comes to applying multiple coats, timing is crucial. You don’t want to apply the second coat too soon or too late. The ideal time to apply a second coat is when the first coat is dry to the touch but hasn’t fully cured. This can vary depending on the type of stain you’re using, so be sure to check the manufacturer’s instructions.

As for technique, remember to apply the stain in the direction of the wood grain and use even strokes. This will help you achieve a smooth, consistent finish. If you’re working on a large deck, consider tackling it in sections to ensure each area gets the attention it needs before the stain starts to dry.

It’s also worth mentioning that while multiple coats are beneficial, more isn’t always better. Applying too many coats can lead to a sticky or flaky finish. Stick to two or three coats for the best results.

Applying multiple coats of stain is a key step in achieving a durable and beautiful deck. Remember, patience is key. Take your time, do it right, and you’ll be rewarded with a deck that’s both stunning and long-lasting. For more expert painting and staining advice, check out our article on 6 essential tips for staining your deck like a pro.

Call Now Button