Painting 101: 10 Insider Tips for a Successful Project Start

10 things you need to know before starting your painting project

Introduction to Painting

Embarking on a painting project can be both exciting and daunting. Whether it’s a simple DIY project or a major home makeover, understanding the painting process can make all the difference between a smooth transition and a stressful ordeal.

Understanding the Painting Process

The journey of a painting project is not just about applying color to a surface. It’s a multi-step process that begins with careful planning and ends with proper maintenance. The process involves choosing the right paint and tools, preparing the surface, applying primer if necessary, painting, and finally, taking care of the painted surface for longevity. Each of these steps plays a crucial role in achieving a successful painting project. Delving deeper into these steps, along with the 10 things you need to know before starting your painting project, will equip you with the knowledge and confidence to tackle your painting project head-on.

Importance of Preparation Before Starting

Preparation is key when it comes to painting. It sets the foundation for a smooth painting process and helps ensure the longevity of the paint job. This step typically involves cleaning the surface to be painted, patching any holes or cracks, sanding if necessary, and applying primer. The type and extent of preparation depend on the condition of the surface and the type of paint being used.

Moreover, preparation is not just about the physical surface—it also involves planning. This includes choosing the right color scheme, estimating the amount of paint needed, and scheduling the project. Good planning can save you time, money, and hassle in the long run. It also allows you to anticipate potential challenges and devise solutions beforehand.

In the world of painting, a well-prepared canvas can make a world of difference. It’s the difference between a paint job that peels and cracks within months and one that lasts for years. For more insights into the importance of preparation and planning, keep reading our guide on painting and decorating.

10 Things You Need to Know Before Starting Your Painting Project

Embarking on a painting project can be a daunting task. However, armed with the right knowledge and tools, you can achieve professional results. Here are 10 things you need to know before starting your painting project.

1. Choosing the Right Paint

The first step in any painting project is choosing the right paint. Not all paints are created equal, and the type of paint you choose can greatly impact the final result. Consider factors like finish (matte, semi-gloss, gloss), durability, and coverage. For more information on why quality paint is worth the price, check out our expert’s perspective.

2. Selecting Quality Brushes and Rollers

The tools you use can make or break your painting project. Quality brushes and rollers provide better paint application, save you time, and can give you a smoother finish.

3. Importance of Surface Preparation

Preparation is key for a successful painting project. This involves cleaning your surfaces, filling in any holes or cracks, and sanding if necessary. Surface preparation ensures that paint adheres properly and lasts longer. You can learn more about surface preparation in our guide on how to pressure wash your house.

4. The Role of Priming

Priming prepares your surfaces for painting, ensuring better adhesion of paint, increasing durability, and providing additional protection for the material being painted.

5. Understanding Color Schemes

Choosing the right color scheme is crucial. Consider the mood you want to set for the room, the existing color of your furniture and decor, and the amount of natural light the room receives. You can explore our article on the top 7 interior home painting colors for 2023 for inspiration.

6. Planning Your Painting Technique

Planning your painting technique is also important. Techniques can vary depending on the type of surface you’re painting and the look you’re trying to achieve.

7. Safety Considerations

Remember to prioritize safety. Wear protective gear, ensure proper ventilation, and be cautious when using ladders.

8. Maintaining a Clean Workspace

Keeping your workspace clean will make your project go smoother and prevent accidents. Cover your floor and furniture with drop cloths to protect them from drips and splatters.

9. Timing Your Project

Timing your project correctly can ensure better results. Avoid painting in extreme temperatures and consider the drying time between coats.

10. Aftercare and Maintenance

After your project is complete, proper aftercare and maintenance can keep your paint looking fresh and extend its lifespan. Regular cleaning and touch-ups can keep your paint job looking new. For advice on how often you should repaint your home, check out our article.

These 10 tips can help you successfully complete your painting project. Remember, the key to a great paint job lies in the preparation. Happy painting!

Additional Tips for a Successful Painting Project

Beyond the essential ’10 things you need to know before starting your painting project’, here are some extra insights to ensure smooth sailing for your painting venture.

How to Avoid Common Painting Mistakes

A great painting project isn’t just about getting the job done, it’s about doing it right. Here are some common pitfalls to look out for:

  • Skipping Surface Preparation: A clean, smooth surface is vital for a superior finish. Always clean and sand the surface before applying paint. Check out our guide on how to pressure wash your house in 5 simple steps for exterior projects.
  • Using Cheap Materials: Low-quality paint and brushes can lead to a poor finish and more work in the long run. Learn more about why quality paint is worth the price: an expert’s perspective.
  • Ignoring Prime Time: Priming is a step you shouldn’t skip. It provides a proper base for the paint, enhancing its durability and appearance.
  • Rushing the Job: Good painting is a process. Don’t rush the drying times between coats for the best results.

Handy Tools for a Smooth Painting Process

A painter’s toolkit isn’t complete without these essentials:

  • Quality Brushes and Rollers: These tools determine the finish of your paint job.
  • Painter’s Tape: For clean edges and protecting areas you don’t want to paint.
  • Drop Cloths: Protect your furniture and floors from paint splatters and spills.
  • Ladder: For those hard-to-reach areas.

Remember, investing in good tools pays off by making the process easier and the results better.

Keeping Stress Levels Down During Your Project

Painting can be a large task, but it doesn’t need to be stressful. Here are some tips:

  • Plan Ahead: Make a realistic timeline for your project. Break down the job into manageable tasks.
  • Stay Organized: Keeping your workspace clean and tools organized can make your project go smoother.
  • Take Breaks: Don’t forget to rest. Taking breaks can help prevent fatigue and keep your morale up.
  • Enjoy the Process: Turn on some music, invite a friend over to help, and remember to enjoy the transformation taking place.

Whether you’re painting an entire house or a single room, the process can be a rewarding experience, especially when you see your vision come to life. Be sure to check out more tips and tricks on painting and decorating to make your project a success.

Colorful Transformations: Your Ultimate Guide to Interior Trim Paint Selection

the ultimate guide to choosing paint colors for your interior trim

Introduction: The Power of Interior Trim Paint

Welcome to our ultimate guide to choosing paint colors for your interior trim! Here, we’ll dive into the world of interior trim paint and discuss why it’s such a crucial design element and how it can completely transform a room.

Why Trim Paint is an Important Design Element

The magic of paint lies in its ability to create illusions. When used effectively, trim paint can alter the perceived dimensions of a room. Darker trim paint can make walls appear further away, creating a sense of spaciousness. Conversely, lighter trim paint can bring walls closer, fostering a cozier atmosphere.

But that’s not all. Trim paint also serves as a frame for the walls, accentuating the colors and patterns of the wallpaper or paint. It’s like the finishing touch in a painting: it ties everything together and gives it a polished, professional look. The trim color can match the wall for a seamless blend, or it can contrast to create a striking visual impact.

How Trim Paint Can Transform a Room

Trim paint has a transformative power that often goes underappreciated. Imagine a room with white walls and white trim. Now, envision the same room, but this time, the trim is painted a bold black. The room instantly goes from simple and safe to dramatic and sophisticated.

Or consider a room with pastel-colored walls. Painting the trim a vibrant, contrasting color can make the room feel energetic and playful. On the other hand, choosing a gentle, complementary color for the trim can create a soothing, harmonious atmosphere.

In essence, the trim color sets the tone for the room. It’s a design decision that should be made thoughtfully and intentionally. The good news is, we’re here to help! In this guide, we’ll walk you through the process of choosing the perfect paint color for your interior trim.

Whether you’re looking to give your home a complete makeover or just want to refresh a particular room, the right trim paint can make all the difference. So, roll up your sleeves, grab your paintbrush, and let’s dive in!

For more tips and expert advice on painting and decorating, check out our other articles.

Getting Started with Choosing Trim Paint

Diving into the world of trim paint, there are a few foundational elements we need to discuss. It’s not just about picking a color you like; it’s about understanding the basics of color theory and considering the mood you want to set in your space.

Understanding the Basics of Color Theory

Color theory is a fundamental concept in design and a crucial consideration when choosing paint colors for your interior trim. It’s the study of how colors interact with each other and how they can influence our emotions and perceptions.

There are three primary colors: red, yellow, and blue. All other colors are derived from these three. For instance, mixing red and yellow gives you orange, while combining all three creates a neutral color like brown or gray.

Secondary colors are created by mixing the primary colors in equal parts, and tertiary colors are made by mixing primary and secondary colors. This understanding of color mixing is integral in creating color schemes for your trim paint.

Furthermore, colors can be categorized into warm (red, orange, yellow) and cool (blue, green, purple) hues. Warm colors tend to evoke feelings of warmth and comfort, while cool colors give off a calming and soothing vibe.

For a deeper dive into color theory, check out our blog post on painting for health: using color psychology in design.

Considering the Mood You Want to Set

Aside from the aesthetics, another essential aspect to consider when choosing trim paint is the mood you want to set in the room. Colors can significantly influence how a room feels. For instance, lighter colors tend to make a room feel bigger and brighter, while darker hues can add depth and coziness.

If you want to create a calm and peaceful environment, consider using cool colors like blue or green. On the other hand, if you’re going for a more energetic and lively atmosphere, warm colors like red and orange might be a good fit.

Always remember, the color of your trim should complement the overall color scheme of your room and align with the mood you’re trying to achieve.

Armed with the basics of color theory and an understanding of the mood you want to evoke, you’re now ready to make an informed decision on the best paint colors for your interior trim. As always, we’re here to help guide you in this colorful journey. For more tips and tricks, check out our other articles on painting and decorating.

Choosing the Right Sheen for Your Trim

It’s not just color that can make a difference when it comes to painting your trim. The sheen, or finish, you choose can also have a big impact on the final look.

The Difference Between High-Gloss, Semi-Gloss, and Satin Finishes

When you’re choosing paint for your interior trim, you’ll have three main sheens to pick from: high-gloss, semi-gloss, and satin.

High-gloss finish is the most reflective and durable. It’s perfect if you want your trim to stand out and shine. It’s also easy to clean, making it a great choice for areas that see a lot of traffic or wear and tear.

Semi-gloss finish, on the other hand, has a slightly less reflective sheen. It’s still pretty durable and easy to clean, but it won’t make your trim stand out as much as a high-gloss finish.

Satin finish is the least reflective of the three. It gives a more understated, sophisticated look to your trim. However, it’s not as easy to clean, so you might want to avoid using it in high-traffic areas.

Sheen Reflectiveness Durability Easy to Clean
High-Gloss Most reflective Most durable Yes
Semi-Gloss Moderately reflective Durable Yes
Satin Least reflective Less durable No

Factors to Consider When Choosing a Sheen

Choosing the right sheen for your trim isn’t just about the look you want. You’ll also need to consider practical factors like the amount of traffic the area sees and how easy the sheen is to clean.

High-traffic areas or rooms where the walls may get dirty, like the kitchen or bathroom, can benefit from a high-gloss or semi-gloss sheen. These sheens are easy to clean and can handle a lot of wear and tear.

On the other hand, for areas that don’t see a lot of traffic, like the living room or bedroom, you might want to consider a satin sheen. It gives a classier, more understated look to your trim.

Another factor to consider is the condition of your trim. If it’s in great shape, a high-gloss sheen can really make it stand out. But if there are flaws or imperfections, a satin sheen might be a better choice, as it won’t highlight these issues as much.

Ultimately, the sheen you choose will depend on your style, the condition of your trim, and the practical needs of the room. Before you make your final decision, we recommend testing out a few different sheens to see which one you like best. For more tips on getting your paint job just right, check out our article on 10 things you need to know before starting your painting project.

Tips for Matching Trim Paint to Wall Paint

Choosing the right paint colors for your interior trim is a significant part of your decorating project. The color of your trim can either complement or contrast your wall paint, creating a cohesive and visually pleasing space. Here are some insights into matching your trim paint to your wall paint.

Complementary Colors and Contrast

Complementary colors are colors that are opposite each other on the color wheel. They provide a striking contrast and can make each other stand out. If you’re aiming for a bold look, consider painting your trim in a complementary color to your walls.

For example, if your walls are a soft blue, a warm orange trim might just be the pop of color you need. On the other hand, if you have vibrant red walls, a cool green trim can balance the intensity.

Contrast can also be achieved by using different shades of the same color. If your walls are a light shade, consider using a darker shade for the trim, or vice versa. This creates a subtle, sophisticated contrast that adds depth to your space.

Monochromatic Schemes and the Role of Tone

A monochromatic color scheme involves using different tones, shades, and tints of a single color. This creates a harmonious and cohesive look that’s easy on the eyes.

If you’re going for a monochromatic scheme, consider the role of tone. Lighter tones tend to make a room feel larger and more open, while darker tones can create a cozy, intimate atmosphere.

If your walls are painted a mid-tone color, you might opt for a lighter or darker tone for the trim. For example, if your walls are a medium gray, a crisp white or deep charcoal trim can elevate the look.

Remember, the key to a successful interior design is balance. Whether you opt for a complementary color scheme or a monochromatic look, make sure that the colors harmonize with each other and with the overall design of your space.

For more guidance on selecting the perfect paint colors, check out our ultimate guide to choosing paint colors for your interior trim.

Common Mistakes to Avoid When Painting Trim

As you embark on the journey of transforming your space by painting your interior trim, it’s crucial to avoid common pitfalls that can affect the final outcome. We’re here to guide you through these potential challenges and help you achieve a professional look. Let’s explore some common mistakes to avoid when painting trim.

Skipping Primer

One of the most common mistakes we see is skipping the primer. A primer is essential because it ensures the paint adheres to the surface optimally, enhances the paint’s durability, and helps to bring out the true color of the paint. When you skip the primer, you risk the paint peeling off or not adhering well to the surface. Additionally, the color may not pop as expected. Therefore, always apply a coat of primer before painting. For more information, check our article on 10 things you need to know before starting your painting project.

Ignoring the Importance of Prep Work

Preparation is key to a successful painting project. This involves cleaning the trim, sanding it to smooth out any rough patches, and taping off the edges to protect the wall from paint splatters. Ignoring these steps can lead to a messy finish that doesn’t meet your expectations. Dedicate enough time to prep your trim and space for painting. You might want to check out our article on how often should you repaint your home and why?.

Choosing the Wrong Tools

Just like a chef needs the right tools to create a culinary masterpiece, you need the right painting tools to achieve a smooth, even finish. Using poor quality brushes or the wrong type of brush can lead to visible brush strokes, uneven application, and a less-than-professional finish. Invest in high-quality painting tools, including brushes, rollers, and painter’s tape. Remember, the right tools can make a huge difference in the final outcome. For more tips on this, you can check our guide on why quality paint is worth the price: an expert’s perspective.

Avoiding these common mistakes can help ensure you get the most out of your painting project and achieve a beautiful, professional-looking finish. Remember, with the right preparation, tools, and technique, you can transform any space with the power of paint. Happy painting!

Painting Your Trim Like a Pro

Ready to transform your interior trim? We’re here to guide you through the process. From prep work to painting and aftercare, we’ve got you covered.

Step-by-Step Guide to Painting Trim

  1. Preparation: Remove any furniture or items close to the trim. Cover the floor and nearby walls with a drop cloth to protect them from paint splatter.
  2. Cleaning: Clean the trim with a damp cloth to remove any dust or grime. Ensure it’s completely dry before moving to the next step.
  3. Sanding: Lightly sand the trim to remove any old paint and create a smooth surface. Don’t forget to wipe away the dust after sanding.
  4. Priming: Apply a coat of primer to the trim. This will help the paint adhere better and provide a more vibrant color.
  5. Painting: Once the primer is dry, apply the first coat of paint. Use a high-quality brush for the best results. Allow the paint to dry before applying the second coat.
  6. Cleanup and Touchups: After the paint has fully dried, remove the drop cloth and touch up any missed spots.

Remember, patience is key when painting trim. Don’t rush the process, and make sure each step is completed thoroughly. For more detailed information, check out our article 10 things you need to know before starting your painting project.

Tips for a Smooth, Even Finish

Achieving a smooth, even finish when painting trim can be tricky, but these tips should help:

  • Always use a high-quality brush or roller. This will provide a smoother application and help prevent brush marks.
  • Don’t overload your brush with paint. Too much paint can lead to drips and uneven coverage.
  • Always paint in the same direction as the grain of the wood.
  • Take your time. Rushing can lead to mistakes and a less-than-perfect finish.

Care and Maintenance for Painted Trim

Taking care of your freshly painted trim will ensure it stays looking great for years to come.

  • Clean it regularly with a damp cloth to remove dust and dirt.
  • Avoid using harsh chemicals or abrasive cleaning tools, as they can damage the paint.
  • If the paint gets chipped or scratched, touch up the area as soon as possible to prevent further damage.

Remember, paint isn’t just about aesthetics; it also serves to protect the wood. So, regular maintenance is key to keeping your trim in top shape. If you’re curious about how often you should repaint, check out our article how often should you repaint your home and why?.

Congratulations! You’re now equipped with the knowledge and tips to paint your interior trim like a pro. Remember, choosing the right paint colors for your interior trim is just the start. Proper application and maintenance are just as important. Happy painting!

A Fresh Start: The Top 7 Interior Home Painting Colors to Embrace in 2023

the top 7 interior home painting colors for 2023

The Power of Color in Interior Design

Color plays a vital role in interior design, contributing significantly to the overall aesthetic and ambiance of a space. Understanding the psychology of color can help individuals make informed decisions about their home’s interior paint colors.

The Role of Paint Colors in Setting the Mood and Tone

The paint colors chosen for a room can set its mood and tone, impacting the way people feel within the space. For instance, warm colors like reds, oranges, and yellows can evoke feelings of comfort and energy, while cool colors such as blues and greens can create a calm and soothing atmosphere.

Neutral colors like white, grey, and beige offer flexibility and can create a balanced and peaceful environment. Dark colors, on the other hand, can add depth and sophistication, but they should be used wisely as they can also make a room feel smaller.

Understanding these dynamics can help you choose paint colors that align with the desired mood and tone of your space. For more on this, check out our article on painting for health: using color psychology in design.

How to Choose the Right Paint Colors

Choosing the right paint colors for your interior can be a daunting task, given the myriad of options available. However, with a few considerations, you can make this process more manageable.

  1. Consider the Room’s Function: The room’s intended use can guide your color choice. For instance, for a bedroom, you might prefer calming colors for relaxation, while for a home office, you might choose colors that stimulate productivity.
  2. Factor in Light: Natural and artificial light can significantly affect how a paint color looks. Test paint samples at different times of the day to see how the color changes under varying lighting conditions.
  3. Think About Size: As a general rule, light colors can make a small room seem larger, while dark colors can make a large room feel cozier.
  4. Consider Your Furniture and Decor: Your paint color should complement your existing furniture and decor. If your furnishings are colorful, consider neutral walls. If your furniture is neutral, a bolder wall color may work.
  5. Test Before You Commit: Paint a small section of your wall and observe it at different times of the day before making your final decision.

For more detailed information on this topic, check out our article on the ultimate guide to choosing paint colors for your interior trim.

Trend Forecast: The Top 7 Interior Paint Colors for 2023

As we look forward to 2023, it’s time to explore the top 7 interior home painting colors that are set to dominate the year. These shades represent a mix of comforting hues and vibrant tones that can transform any space.

Color 1: Tranquil Teal

Tranquil Teal is a soothing blend of blue and green that creates a peaceful ambiance in any room. This versatile color works well in bedrooms and bathrooms, creating a calming environment that promotes relaxation and restfulness. Pair it with warm neutrals or crisp whites for a balanced look.

Color 2: Honeyed Peach

Honeyed Peach is a warm, inviting color that adds a touch of cozy comfort to your interiors. This shade is perfect for living rooms and dining areas, enveloping the space with a welcoming glow. Complement it with earthy browns or soft creams to enhance its cozy appeal.

Color 3: Crisp Celadon

Crisp Celadon is a soft, muted green that brings a touch of nature indoors. This refreshing shade is ideal for kitchens or home offices, infusing the space with a sense of calm and focus. Pair it with soft grays or warm woods for a harmonious look.

Color 4: Radiant Orchid

Radiant Orchid is a vibrant, energetic shade of purple that adds a pop of color to your interiors. This bold hue is ideal for accent walls or statement pieces, bringing life and energy to the space. Balance its intensity with neutral tones or soft pastels.

Color 5: Smoky Charcoal

Smoky Charcoal is a deep, intense shade of gray that adds depth and sophistication to your interiors. This powerful color is perfect for creating a dramatic effect in living rooms or bedrooms. Pair it with soft whites or metallic accents for a modern, chic look.

Color 6: Sunlit Coral

Sunlit Coral is a bright, cheerful shade that brings a sense of warmth and positivity to your interiors. This uplifting color is perfect for children’s rooms or creative spaces, stimulating creativity and joy. Complement it with soft neutrals or vibrant blues for a balanced, lively look.

Color 7: Serene Blue

Serene Blue is a soft, calming shade that brings a sense of tranquility to your interiors. This soothing color is ideal for bedrooms or bathrooms, creating a peaceful, restful environment. Pair it with crisp whites or warm neutrals for a refreshing, serene look.

These are the top 7 interior home painting colors for 2023 that are set to transform your spaces. Whether you prefer calming hues or vibrant tones, there’s a color to suit every style and mood. For more insights on painting and decorating, visit our blog.

Tips for Incorporating These Colors into Your Space

Once you’ve chosen from the top 7 interior home painting colors for 2023, the next step is to incorporate them into your space. Here are a few tips to help you seamlessly integrate these trending colors into your existing decor, make a bold statement, and create a cohesive color palette.

Coordinating with Existing Decor

When introducing new paint colors into a room, it’s important to take into account the existing decor. Consider the color and style of your furniture, artwork, and accessories. Aim to match or complement these elements with the new paint color. For example, if your living room is furnished with dark wood pieces, you might consider lighter shades for contrast. On the other hand, vibrant artwork could be complemented by neutral wall colors.

Another tactic is to draw color inspiration from a favorite piece of decor or artwork in the room. You might choose a color that matches a prominent hue in a beloved painting, for instance. This can help create a sense of harmony and cohesion in the room. For more on how to choose the right paint colors, check out our ultimate guide to choosing paint colors for your interior trim.

Making a Statement with Bold Colors

Bold colors from the top 7 interior home painting colors for 2023 can be a fantastic way to make a statement. You might choose to paint a single accent wall in a vibrant hue or even the entire room if you’re feeling adventurous. Remember, the goal is to create a focal point, not overwhelm the space.

When using bold colors, balance is key. Pair a bold wall color with neutral furnishings, or consider using the bold color on trim or molding rather than the entire wall. You can also use these vibrant hues in smaller rooms or spaces where you want to evoke a certain mood.

Before committing to a bold color, it’s a good idea to test it on a small patch of wall first. This will give you an idea of how the color will look in different lights and how it will interact with the other colors and elements in the room.

Creating a Cohesive Color Palette

When incorporating multiple colors from the 2023 trend list into your home, it’s important to ensure they work together to create a cohesive color palette. This doesn’t mean all the colors have to match perfectly. Instead, look for colors that complement each other or share a similar undertone.

One strategy for creating a cohesive palette is to choose one dominant color, a few secondary colors, and an accent color for small highlights. The dominant color is typically a neutral shade that provides a backdrop for the other colors. Secondary colors add variety and visual interest, while the accent color brings in a pop of brightness or boldness.

Remember, your color palette should reflect your personal style and the overall vibe you want for your home. For more guidance on creating a color palette, check out our article on painting for health: using color psychology in design.

Preparing for a Successful Painting Project

Before you dive into painting your space with the top 7 interior home painting colors for 2023, it’s crucial to prepare adequately for a successful painting project. This involves thorough planning and adherence to best practices in interior painting.

Initial Considerations and Planning

The first step in any successful painting project is thorough planning. This begins with understanding the scope of your project. Are you painting a single room or the entire house? Knowing the extent of your project will help you estimate the amount of paint required, the time it will take, and the costs involved.

Next, consider the condition of your walls. If they are damaged or have stains, they may need preparation such as patching or priming before painting. This step can significantly impact the finish and longevity of your paint job.

Choosing the right paint is also a critical part of planning. While color is a significant factor, it’s equally important to consider the type and quality of paint. High-quality paint can offer better coverage and durability, leading to a longer-lasting and more professional-looking result. For a deeper understanding of why quality paint is worth the price, read our expert’s perspective on why quality paint is worth the price: an expert’s perspective.

Lastly, plan your painting schedule wisely. Painting is best done in dry, less humid conditions. If you’re painting a room you use daily, consider how you’ll manage without access to that space during the painting process.

Best Practices for Interior Painting

Once you have your plan in place, it’s time to execute. Here are some best practices for interior painting:

  1. Prepare the Room: Remove all furniture and fixtures where possible, or cover them with drop cloths. Use painter’s tape to protect trim and fixtures from accidental splashes.
  2. Prepare the Surface: Clean your walls to remove dust and grime for better paint adherence. Repair any cracks or holes with filler, and sand the surface for a smooth finish.
  3. Prime the Walls: Priming is particularly important if you’re painting over dark colors, stained surfaces, or new drywall. It provides a uniform base for your paint, leading to a more vibrant color.
  4. Use the Right Tools: The right brushes and rollers can make a significant difference in the application of paint. Brushes are ideal for detail work and smaller areas, while rollers are best for large, flat surfaces.
  5. Apply Paint Correctly: Start with the edges and corners, then move to the larger surfaces. Apply paint in a ‘W’ pattern for even distribution, and maintain a wet edge to avoid visible lines.
  6. Clean Up and Dispose of Paint Properly: Clean your brushes and rollers promptly to keep them in good condition. Dispose of any leftover paint in accordance with local regulations.

Remember, painting isn’t just about changing the color of your walls. It’s also an opportunity to protect your interior surfaces and improve your home’s overall aesthetic. For more information on planning and executing a painting project, check out our article on 10 things you need to know before starting your painting project.

Say Goodbye to Bland: Transforming Your Kitchen with Painted Cabinets

painting kitchen cabinets: a smart alternative to replacement

Unleashing the Power of Paint

The transformative potential of paint is often overlooked, especially when it comes to home interiors. A fresh coat of paint can breathe new life into any space, creating a vibrant and refreshed atmosphere that reflects your personal style.

The Impact of a Kitchen Makeover

The kitchen, often referred to as the heart of the home, is a prime candidate for a paint-based makeover. A kitchen makeover can have a profound impact on the overall ambience of your home. Fresh, updated colors bring an inviting warmth to the space where family and friends often gather. The aesthetic improvements from a kitchen makeover can also add substantial value to your home, making it an investment worth considering.

Why Consider Painting Kitchen Cabinets?

Among the various components of a kitchen, cabinets are a major focal point. They occupy a significant amount of visual space and are key to the functionality of the kitchen. This makes them an excellent candidate for a paint job.

Painting kitchen cabinets is a cost-effective way to give your kitchen a new look without the hefty price tag of a full remodel. It’s a smart alternative to replacement, allowing for a substantial change without the need for major construction.

When it comes to painting kitchen cabinets, the possibilities are endless. With a palette of countless colors and finishes at your disposal, you can create a look that perfectly complements your home’s decor and your personal style.

Whether you’re aiming for a modern, minimalist look with sleek, monochrome cabinets or a more traditional style with richly colored wood tones, painting your cabinets allows you to fully customize the look and feel of your kitchen. For more on the power of paint and how it can transform your space, check out our painting and decorating articles.

Embracing the project of painting kitchen cabinets can make a world of difference in your kitchen’s aesthetic. It’s an affordable, accessible way to update your kitchen and add a personal touch. A well-planned paint job can turn a tired, outdated kitchen into a vibrant, inviting space, proving that sometimes, all it takes is a little paint.

The Smart Alternative: Painting Over Replacement

When it comes to revamping your kitchen cabinets, many people immediately consider a full replacement. However, painting your kitchen cabinets can be a smart alternative that offers significant benefits in terms of cost, time, and environmental impact.

Cost Analysis: Painting versus Replacement

In terms of cost, painting kitchen cabinets is considerably more economical than replacing them. As per industry estimates, the cost of replacing kitchen cabinets can range anywhere from $4,000 to $9,000, depending on the size of the kitchen and the quality of the cabinets. On the other hand, painting kitchen cabinets usually costs between $1,200 to $3,000, making it a far more affordable option.

Cost Range (in USD)
Cabinet Replacement $4,000 – $9,000
Cabinet Painting $1,200 – $3,000

For a detailed breakdown of costs involved in a painting project, refer to our article 10 things you need to know before starting your painting project.

Time Considerations: Painting versus Replacement

When it comes to time, painting kitchen cabinets also wins out. The process of painting cabinets can take anywhere from a few days to a week, depending on the size of the kitchen and the complexity of the job. Conversely, a full cabinet replacement can take several weeks or even months to complete, causing significant disruption to your daily life.

Time Required
Cabinet Replacement Several weeks to months
Cabinet Painting Few days to a week

For more tips on how to manage time efficiently during a painting project, visit our post on why quality paint is worth the price: an expert’s perspective.

Environmental Impact: Painting versus Replacement

Lastly, painting kitchen cabinets is a more environmentally friendly choice. Cabinet replacement often involves discarding old cabinets, which adds to landfill waste. Moreover, new cabinets typically involve the use of new materials and energy for manufacturing. On the other hand, painting reuses existing materials and requires significantly less energy, reducing the environmental footprint of your kitchen makeover.

Environmental Impact
Cabinet Replacement High (adds to landfill waste, requires new materials and high energy for manufacturing)
Cabinet Painting Low (reuses existing materials, requires less energy)

For more insights into environmentally-friendly painting and decorating, refer to our article painting for health: using color psychology in design.

In conclusion, painting kitchen cabinets is a cost-effective, time-efficient, and eco-friendly alternative to cabinet replacement. It’s a smart way to give your kitchen a fresh, new look without breaking the bank or causing unnecessary disruption to your daily routine.

Preparing for Your Cabinet Transformation

Before you dive into painting your kitchen cabinets, it’s crucial to get everything in order. This includes selecting the right paint color, gathering all necessary tools and materials, and understanding the process for prepping your cabinets.

Choosing the Right Paint Color

Selecting the right paint color for your kitchen cabinets can have a dramatic impact on the overall look and feel of your kitchen. When considering color options, think about the overall design of your kitchen, including your countertops, appliances, and flooring. Neutral shades like white, gray, and beige are versatile and can complement a wide range of kitchen styles. For a more vibrant look, consider bold hues like blue, green, or even red. Check out our article on the top 7 interior home painting colors for 2023 for some inspiration.

Necessary Tools and Materials

To ensure a smooth painting project, you’ll need to gather some essential tools and materials. Here’s a quick checklist:

  • Screwdriver (for removing cabinet doors and hardware)
  • Sandpaper (for smoothing the surface)
  • Primer (to prepare the cabinets for painting)
  • High-quality paint (choose a semi-gloss or gloss finish for durability)
  • Paintbrushes and rollers (for application)
  • Painter’s tape (to protect surrounding areas)

Remember, quality materials are key to a professional-looking finish. For more information on why quality paint is worth the price, visit our article why quality paint is worth the price: an expert’s perspective.

Step-by-Step Preparation Guide

  1. Remove Cabinet Doors and Hardware: Using a screwdriver, remove the doors and hardware from your cabinets. Keep all screws and hardware in a safe place for reinstallation.
  2. Clean the Cabinets: Wipe down your cabinets with a mild detergent to remove any grease or grime. This step is crucial for ensuring the paint adheres properly.
  3. Sand the Cabinets: Use sandpaper to smooth any rough spots on your cabinets. This creates a better surface for the primer and paint to adhere to.
  4. Apply Primer: Once the cabinets are clean and smooth, apply a coat of primer. This helps to block any stains and provides a good base for your paint.
  5. Wait for the Primer to Dry: Before moving on to painting, wait for the primer to dry completely.

Remember, preparation is key when painting kitchen cabinets. By taking the time to prepare properly, you’ll set the stage for a successful transformation. For more tips and tricks, visit our guide on 10 things you need to know before starting your painting project.

Painting Your Kitchen Cabinets

Once you’ve decided to take the plunge and paint your kitchen cabinets, it’s time to arm yourself with the right knowledge and techniques to ensure a smooth and professional finish. Let’s delve into the process of cleaning and sanding, applying primer, and using effective painting techniques to transform your kitchen cabinets.

Cleaning and Sanding

Before anything else, it’s crucial to clean the cabinets thoroughly. Grease, dust, and grime can affect paint adhesion, leading to an uneven finish. A mixture of warm water and a mild detergent should do the trick. Once cleaned, let the cabinets dry fully.

Next comes the sanding process. Sanding helps create a surface that the primer and paint can adhere to effectively. Using a medium-grit sandpaper, lightly sand the surfaces you plan to paint. After sanding, wipe down the cabinets with a damp cloth to remove any residual dust.

Applying Primer

Primer serves as a base for the paint, enhancing its durability and vibrancy. It also helps to cover any stains or dark colors on the cabinets, ensuring a uniform finish. Apply the primer using a brush or a roller, and let it dry completely before moving to the next step. If you’re unsure about the type of primer to use, check out our article on painting and decorating for more information.

Painting Techniques for a Professional Finish

When it comes to painting kitchen cabinets, technique matters. Here are some tips to achieve a professional finish:

  1. Use thin coats of paint: Thick coats can lead to drips and uneven texture. Apply thin coats, letting each one dry fully before adding the next.
  2. Use a roller for large flat surfaces: A roller can cover large areas quickly and efficiently. For smaller sections and intricate details, use a brush.
  3. Paint in the direction of the wood grain: This ensures a smooth finish and minimizes visible brush strokes.
  4. Give ample drying time: Patience is key. Rushing the drying process could result in chipping and peeling.

Through careful preparation and the right techniques, painting kitchen cabinets can be a rewarding DIY project. It’s an affordable way to breathe new life into your kitchen, without the need for complete replacement or costly renovations. For more painting and decorating tips, explore our range of articles.

Care and Maintenance of Painted Cabinets

Once you’ve transformed your kitchen by painting your cabinets, it’s essential to know how to maintain them properly. With the right care and attention, your painted cabinets can continue to look great for years to come.

Keeping Your Cabinets Looking New

Ensuring your cabinets stay looking fresh and vibrant is all about regular maintenance. Wipe them down frequently with a soft cloth to prevent dirt and grease from building up. Avoid using abrasive cleaners, which can scratch the paint and dull the finish.

It’s also important to touch up the paint as needed. Over time, the paint may fade due to exposure to sunlight or wear down due to frequent use. Regular touch-ups can help maintain the fresh, newly painted look of your cabinets.

For more tips on maintaining the look of your painted surfaces, check out our article on how often should you repaint your home and why?

Addressing Chips and Scratches

Even with the best care, chips and scratches can occur. When they do, it’s important to address them promptly to prevent them from getting worse. Lightly sand the affected area, then apply a fresh coat of paint. If the chip or scratch is deep, you may need to use a wood filler before painting.

For more detailed information on how to tackle chips and scratches, visit 10 things you need to know before starting your painting project.

Regular Cleaning and Care Tips

Regular cleaning is vital for maintaining the appearance and functionality of your painted cabinets. Use a mild, non-abrasive cleaner and a soft cloth to wipe down the cabinets. Avoid using excessive water, which can seep into the wood and cause damage.

In addition to regular cleaning, it’s important to be mindful of the items you place in your cabinets. Heavy items can cause the shelves to sag over time, while sharp objects can scratch the painted surface.

Remember, keeping your painted cabinets looking new doesn’t have to be a chore. With regular care and maintenance, your kitchen can continue to shine with the beauty of fresh paint. For more tips and tricks on painting and decorating, check out our other articles on painting and decorating.

Elevate Your Decor Game: DIY Painted Mason Jar Ideas for Home Transformation

diy painted mason jar ideas for home decor

Introduction to DIY Painted Mason Jar Decor

Welcome, creative souls! We’re here today to introduce a fun and exciting DIY project that’s perfect for sprucing up your home or office.

What is DIY Mason Jar Decor

DIY Mason jar decor is exactly what it sounds like; it’s the art of decorating and repurposing Mason jars to use as aesthetic pieces in your spaces. One of the most popular ways to take Mason jars from plain to fabulous is by painting them. With a little bit of paint and creativity, you can transform these simple jars into vases, candle holders, storage containers, and so much more. The potential for DIY painted mason jar decor is limitless; you can let your imagination run wild.

Why Choose Mason Jar Decor

So why should you consider incorporating Mason jar decor into your home or office? Well, there are a few reasons:

  1. Versatility: Mason jars can be used in a variety of ways. Whether you’re looking to create a rustic vase for your fresh flowers or you need a chic way to store your pens at the office, a painted Mason jar can do the trick.
  2. Cost-Effective: Mason jars are relatively inexpensive, and you might already have a few lying around your house. With a bit of paint and a few other materials, you can create unique decor pieces without breaking the bank.
  3. Personal Touch: Because you’re doing it yourself, you can customize each jar to match your personal style and the existing decor in your home or office. You can choose the colors, designs, and overall look of your jars.
  4. Eco-Friendly: By repurposing Mason jars, you’re giving new life to an item that might otherwise end up in the trash. It’s a small way to reduce waste and be kinder to our planet.
  5. Fun: Perhaps the best reason to choose Mason jar decor is that it’s simply fun. It’s a chance to get creative, work with your hands, and enjoy the satisfying feeling of creating something beautiful.

We hope this introduction has sparked your interest in exploring the world of DIY painted Mason jar ideas for home decor. Stay tuned as we delve deeper into this topic, sharing tips and tricks to help you create stunning pieces for your space. For more insights into painting and decorating, feel free to explore our other articles like why quality paint is worth the price: an expert’s perspective and the ultimate guide to choosing paint colors for your interior trim.

Preparing Mason Jars for Painting

Before we dive into our DIY painted mason jar ideas for home decor, it’s essential to properly prepare your mason jars. This involves choosing the right jars and ensuring they’re clean and ready for painting.

Choosing the Right Mason Jars

The first step in our mason jar decor project is selecting the right jars. Regular mason jars are the best choice for this DIY project because they’re readily available and affordable. Additionally, their smooth sides are perfect for painting.

You can opt for jars of different sizes depending on your decor needs. Small jars work great for tealight holders, while larger ones can serve as vases or storage containers.

Choosing jars with a wide mouth is ideal if you’re planning to use them for storage. The wider opening allows for easier access to the contents. On the other hand, jars with regular mouths work well for candles or vases.

Cleaning and Prepping the Jars

Once you’ve chosen your jars, the next step is to clean and prepare them for painting. This involves removing any labels or glue residue on the jars. You can soak the jars in warm soapy water to help loosen the labels. Then, use a sponge or scrub brush to remove any remaining glue.

After removing the labels and glue, the jars need to be thoroughly cleaned. This ensures that the paint adheres properly to the glass surface. Rinse the jars well and let them dry completely before proceeding with the painting.

Before painting, it’s a good idea to lightly sand the surface of the jars. This creates a rough texture, which helps the paint stick to the glass better. Use a fine-grit sandpaper and gently rub it on the surface of the jar. After sanding, wipe down the jars with a clean cloth to remove any dust.

Preparing your mason jars properly is the first step to achieving beautiful DIY painted mason jar decor. With the jars ready, we’re set to explore different painting techniques and decor ideas. So, let’s get started! For more tips and tricks on painting and decorating, check out our 10 things you need to know before starting your painting project guide.

Painting Techniques for Mason Jars

Once you have your mason jars cleaned and prepped, it’s time to get creative! Painting is a fantastic way to personalize your jars and give them a fresh new look. Whether you’re a beginner or an experienced crafter, we’ve got some simple and advanced techniques to help you achieve the perfect painted mason jars.

Basic Painting Techniques

If you’re new to the DIY world, don’t worry, you can still create beautiful painted mason jars! Here are a few basic techniques that anyone can master:

  1. Single Color Painting: The easiest way to paint your mason jar is by using a single color. Simply dip your brush into the paint and apply it evenly over the jar. Allow it to dry completely before adding another coat if necessary.
  2. Two-Tone Painting: Want to add a bit more flair? Try the two-tone technique. Choose two contrasting or complementary colors, paint the bottom half of the jar with one color and the top half with the other. Let them dry completely before moving on to the next step.
  3. Sponge Painting: For a softer, more textured look, try sponge painting. Dip a sponge into the paint and dab it onto the jar. This method creates a unique pattern that adds depth and dimension to your mason jar.

Remember, when painting your mason jars, always use high-quality paint to ensure the best results. Check out our article on why quality paint is worth the price: an expert’s perspective for more insights.

Advanced Painting Techniques

If you’re more experienced or just up for a challenge, you might want to try some advanced techniques:

  1. Ombre Painting: This technique requires a bit more skill, but the results are worth it. Choose two or more shades of the same color, starting with the darkest at the bottom and gradually blending into the lightest at the top.
  2. Stenciling: Create intricate designs by using stencils. Simply place the stencil over the jar and paint over it. Once the paint is dry, remove the stencil to reveal a beautiful pattern.
  3. Distressing: This technique gives your jars a vintage, rustic look. Paint your jar with a base color and let it dry. Then, lightly sand the jar to reveal the glass underneath in certain areas.

By mastering these painting techniques, you can create stunning DIY painted mason jar ideas for home decor. With a little practice and creativity, you’ll have unique, personalized mason jars that elevate your home’s decor. For more painting tips and ideas, explore our painting and decorating articles.

DIY Painted Mason Jar Ideas for Home Decor

Now that we’ve covered the basics of preparing and painting mason jars, let’s dive into some creative DIY painted mason jar ideas for home decor. These projects are simple, fun, and can add a personal touch to any space.

Mason Jar Vase

A painted mason jar vase is a charming way to display your favorite flowers. Start by painting your jar in a color that complements your decor. Once the paint is dry, add a layer of clear sealant to protect the paint from water. Fill the jar with water, add your flowers, and voila! You’ve got a unique vase that can brighten up any room. Don’t forget to change the water frequently to keep your flowers fresh and vibrant.

Mason Jar Candle Holder

A mason jar candle holder is another great project that adds a warm and cozy feel to your space. To create this decor piece, paint the outside of the jar with a translucent paint for a frosted look. Once dry, place a tea light or votive candle inside. The translucent paint will allow the candlelight to shine through, creating a beautiful glowing effect. Always remember to never leave burning candles unattended.

Mason Jar Storage

Who said storage can’t be stylish? Painted mason jars make for excellent storage containers. You can use them in the kitchen for storing dry goods like pasta, beans, or coffee. Or, use them in your home office to keep pens, paperclips, and other supplies organized. Paint the jars in different colors to create a vibrant, organized space.

Mason Jar Planters

Bring some green into your home with mason jar planters. Paint the jars in earthy tones, fill them with potting soil, and plant your favorite herbs, succulents, or flowers. This is a great way to create an indoor garden, even in small spaces.

These are just a few DIY painted mason jar ideas for home decor. The possibilities are endless when it comes to mason jar crafts. You can mix and match colors, try different painting techniques, and use them in various ways to spruce up your space. Remember, the key to a successful DIY project is to have fun and let your creativity shine.

For professional painting advice and services, check out our painting and decorating services. We’re here to help you transform your home with color.

Tips for Maintaining Your Painted Mason Jars

Once you’ve created your painted mason jar decor, it’s essential to know how to maintain them. Here, we provide some tips on cleaning, refreshing, and storing your painted mason jars.

Cleaning Your Painted Mason Jars

Cleaning painted mason jars is a delicate task. You want to remove dust and dirt without damaging the paint. We recommend lightly dusting your jars with a soft, dry cloth regularly. If your jar needs a more thorough cleaning, gently wipe it with a slightly damp cloth, then dry it immediately to avoid water marks.

Avoid using harsh or abrasive cleaning products as they can scratch or remove the paint. If the inside of the jar needs cleaning, be careful not to wet the painted exterior. For stubborn stains, a mix of warm water and mild dish soap can be used.

Refreshing Your Mason Jar Decor

If your painted mason jars start to show signs of wear or if you simply want to update your decor, don’t hesitate to give them a refresh. This could involve repainting the jars with a new design or color scheme. Before you start, make sure to clean the jars thoroughly and let them dry.

Remember, the key to a successful painting project is preparation. Check out our article on 10 things you need to know before starting your painting project for more tips.

Storing Your Mason Jar Decor

When not in use, store your painted mason jars in a cool, dry place out of direct sunlight. Sunlight can fade the paint over time, and damp conditions can cause the paint to peel or chip.

Wrap each jar in bubble wrap or a soft cloth to prevent scratching or chipping, and try not to stack the jars on top of each other to prevent pressure damage.

If you’re storing mason jars with lids, make sure the lids are clean and dry before placing them on the jars to prevent rusting or molding.

Maintaining your painted mason jars is an easy task when done correctly. With a little care and attention, your DIY painted mason jar decor can last for many years, providing a unique and personalized touch to your home or office. Now that you have these tips, you’re ready to enjoy your DIY projects for a long time to come.

Elevating Your Decor with Painted Mason Jars

Painted mason jars can be a unique and creative addition to any decor theme. They can add a pop of color and personality to your space, whether it’s your home or office. But how do you incorporate them without it looking out of place? Here are some pointers.

Choosing the Right Decor for Your Space

The first step in elevating your decor with painted mason jars is choosing the right decor for your space. Consider the overall style and color scheme of your room. Is it modern or rustic? Bold or neutral? Your painted mason jars should complement and enhance the existing decor.

For instance, if you have a modern, minimalist room, opt for jars painted in solid, neutral colors. If your space is rustic and cozy, consider jars with a distressed, vintage look. You can even match the colors of the jars to the main color scheme of your room. Here’s a guide to choosing paint colors that may help.

Incorporating Painted Mason Jars into Your Decor

Once you have chosen your painted mason jars, it’s time to incorporate them into your decor. The beauty of these jars lies in their versatility. They can be used as vases, candle holders, storage containers, and even planters.

For a cohesive look, try grouping jars of different sizes and colors together. Place them on a shelf, a windowsill, or a coffee table for a pleasing visual effect. Alternatively, you can spread them out throughout the room to create a sense of continuity.

Remember, the key to effective decor is balance. Don’t overdo it with too many jars. Instead, use them sparingly to create eye-catching focal points in your room.

Changing Your Decor with the Seasons

One of the biggest advantages of painted mason jars is their ability to seamlessly adapt to changing seasons and trends. You can easily repaint your jars to match the colors of the season. For instance, opt for pastels in spring, brights in summer, warm tones in fall, and cool blues and whites in winter.

You can also switch up their use according to the season. Use them as vases for fresh flowers in spring, candle holders for cozy lighting in fall, and storage containers for colorful ornaments during the holidays.

Incorporating painted mason jars into your seasonal decor keeps your space fresh and exciting. Plus, it’s a fun and creative DIY project that you can look forward to each season.

In conclusion, painted mason jars are a simple yet effective way to elevate your decor. With the right colors, placement, and seasonal updates, you can create a space that is truly unique and reflects your personal style. So, get your paint and brushes ready, and let’s transform those jars! For more DIY painted mason jar ideas for home decor, check out our other articles.

The Art of Painting: Exploring the Value of Quality Paint

why quality paint is worth the price: an expert's perspective

The Art of Painting: A Professional Perspective

As seasoned professionals in the painting industry, we understand that painting is both an art and a science. The role of high-quality paint in interior design is significant, and understanding why quality paint is worth the price can help you make informed decisions for your next painting project.

Painting as an Art and a Science

Painting is an art, a creative process that has the power to transform a space. It’s about color, texture, and technique, and it requires a keen eye for detail. Whether it’s painting a wall, a piece of furniture, or an entire house, the artistry involved in painting is what brings a design vision to life.

However, painting is also a science. It’s about understanding the properties of paint, the reactions of different surfaces, and the impact of environmental factors. It involves technical knowledge about paint composition, drying times, and application methods. It’s this scientific aspect of painting that ensures the longevity and durability of a paint job, making your investment worthwhile.

To fully appreciate the art and science of painting, it’s essential to understand the value of quality paint. This understanding will guide you in making the right choices for your painting needs, ensuring you end up with results that are both aesthetically pleasing and long-lasting. For more insights into the painting process, check out our article on 10 things you need to know before starting your painting project.

Understanding the Role of Paint in Interior Design

In the realm of interior design, paint plays a crucial role. It’s more than just a coating on a wall; it’s a tool that can dramatically transform a space. The right paint color can set the mood of a room, influence perceptions of space and light, and complement or contrast with other elements in the room.

Quality paint contributes significantly to the overall look and feel of a space. It provides a smooth, even finish, vibrant and lasting colors, and a durable surface that withstands everyday wear and tear. Investing in quality paint is investing in the longevity of your interior design.

Moreover, the choice of paint can also have health and environmental implications. High-quality paints typically have lower levels of volatile organic compounds (VOCs), making them a healthier choice for indoor environments. They’re also more likely to be environmentally friendly, contributing to sustainable interior design practices.

To fully grasp the impact of paint on interior design, it’s worthwhile exploring the art of color psychology and how it influences our reactions to different spaces. Our article on painting for health: using color psychology in design provides a deeper dive into this fascinating topic.

In the following sections, we’ll delve deeper into why quality paint is worth the price, the composition of high-quality paint, and the benefits of choosing quality paint. We’ll also discuss the cost versus value of quality paint and provide tips for making the right choice for your painting needs. Stay tuned to learn more from our expert’s perspective.

The Value of Quality Paint

When embarking on a painting project, the value of using high-quality paint cannot be overstated. In our many years of experience as professional painters, we’ve seen first-hand the significant difference that superior paint can make to a project.

Why Quality Matters

Quality paint is worth the price for several reasons. Firstly, it offers superior coverage. High-quality paint typically requires fewer coats to achieve a rich, even color, saving you both time and resources. This is due to the higher percentage of pigments and binders found in quality paint, which contribute to its superior color retention and durability.

Secondly, quality paint is more durable and long-lasting. It is more resistant to chipping, cracking, and peeling, which means your paint job will stay fresh and vibrant for longer. This longevity can save you money in the long run, as you won’t need to repaint as frequently. To understand more about the repainting frequency, take a glance at our piece on how often should you repaint your home and why?

Lastly, high-quality paint often comes with lower VOC (Volatile Organic Compounds) levels, making it a healthier choice for your home or office. Lower VOC levels contribute to better indoor air quality, which can be beneficial for those with allergies or respiratory issues.

The Impact of Quality Paint on the Look and Feel of Your Space

Opting for quality paint can have a profound impact on the aesthetics and ambiance of your space. High-quality paint has a richer, truer color that can enhance the appearance of your walls and contribute to the overall design scheme of your room. The right paint can transform a space, making it feel larger, cozier, or more vibrant.

Moreover, quality paint tends to go on smoother, resulting in a more professional-looking finish. It’s less likely to show brush strokes or roller marks, giving your walls a seamless, clean look. This can elevate the overall look and feel of your space, making it more inviting and pleasing to the eye.

In our painting and decorating projects, we’ve seen how the right paint can truly transform a space. For a more detailed guide, feel free to take a look at our article on 10 things you need to know before starting your painting project.

In conclusion, while quality paint may come with a higher initial cost, the value it provides in terms of durability, aesthetics, and health benefits makes it a worthwhile investment. Always remember, the true cost of painting is not in the paint itself, but in the labor and time spent applying it. So, it makes sense to use the best paint you can afford to ensure the job is done right the first time. Your space deserves no less.

The Composition of High-Quality Paint

When it comes to painting, not all paints are created equal. The quality of paint can significantly impact the final result of your project. So, let’s delve into the composition of high-quality paint and understand the role of various ingredients in determining its quality.

Key Ingredients in Quality Paint

High-quality paints are composed of several key ingredients, each playing a crucial role in determining the paint’s performance, durability, and finish. These ingredients include pigments, binders, solvents, and additives.

  1. Pigments: These provide the color to the paint. High-quality paints have premium, finely ground pigments that ensure a richer color and superior coverage.
  2. Binders: Binders are responsible for holding the pigment in place after the paint dries. Quality paints have durable binders that result in a long-lasting finish.
  3. Solvents: Solvents keep the paint in liquid form until it’s applied. Once the paint is applied, the solvent evaporates, leaving behind the pigment and binder.
  4. Additives: These are special ingredients added to improve certain characteristics of the paint, such as drying time, flow, and resistance to mold and mildew.

In a high-quality paint, these ingredients are carefully balanced to provide excellent coverage, a smooth application and finish, durability, and a vibrant color that lasts over time.

The Role of Pigments, Binders, and Solvents

To understand why quality paint is worth the price, let’s explore the role of pigments, binders, and solvents in greater detail.

Pigments are primarily responsible for providing color and coverage. In high-quality paints, a higher volume of premium pigments is used. This ensures that the paint provides excellent coverage in fewer coats and delivers a vibrant, enduring color. This is particularly significant when it comes to bold or dark colors, where achieving a uniform, rich color can be challenging with lesser quality paints.

Binders in the paint determine its durability and finish. The binding agent works by holding the pigment particles together and helping them adhere to the surface being painted. Quality paints use durable binders that withstand the rigors of weather and daily wear and tear, ensuring that the paint stays in place and looks good for longer.

Solvents are the liquids that carry the binder and pigment. As the paint dries, the solvent evaporates, leaving behind the binder and pigment on the surface. In high-quality paints, the type and amount of solvent are precisely calibrated to ensure optimal drying time and a smooth, even finish.

In summary, investing in high-quality paint with a well-formulated balance of these key ingredients ensures superior results, saves time, reduces the need for multiple coats, and provides a durable finish that lasts longer. This makes quality paint a smart investment in the long run. For more insights on the art of painting and decorating, check out our other articles here.

The Benefits of Choosing Quality Paint

As professional painters, we understand the numerous benefits of quality paint. From its durability and superior coverage to its environmental and health benefits, there are numerous reasons to choose premium paint.

Long-lasting Finish

One of the most compelling reasons to opt for quality paint is its longevity. High-quality paint ensures a finish that not only looks aesthetically pleasing but also withstands the test of time. It is more resistant to wear and tear, stands up to cleaning, and does not chip or peel easily. This means that with quality paint, you won’t have to repaint as often, adding to its long-term value.

Superior Coverage and Color Retention

Another significant advantage of quality paint is its superior coverage. This means that you need fewer coats to achieve optimal results. The high pigment content in quality paint ensures rich, vibrant colors that don’t fade over time, providing excellent color retention. This is especially important in spaces where you want to create specific moods or effects. Our guide to choosing paint colors for your interior trim provides additional insight into the role of color in interior design.

Environmental and Health Benefits

Choosing quality paint also has environmental and health benefits. Premium paints are often formulated to have lower Volatile Organic Compounds (VOCs), which are harmful chemicals that can be released into the air as the paint dries. Lower VOC levels mean better indoor air quality for you and your family, and less environmental impact.

Moreover, quality paints are more likely to have antimicrobial properties, resisting mold and mildew, which contributes to a healthier living environment. To further understand how color choices can impact your health and wellbeing, visit our article on painting for health: using color psychology in design.

When considering the value of quality paint, it’s clear that the advantages go beyond the initial application. Aesthetically pleasing, durable, and healthier, high-quality paint is a worthwhile investment for any painting and decorating project.

The Cost Vs. Value of Quality Paint

When it comes to painting projects, one of the most common dilemmas homeowners face is whether to invest in quality paint. Although the initial cost of high-quality paint might be higher, we assert that it offers excellent long-term value. In this section, we will delve into why quality paint is worth the price from an expert’s perspective.

Initial Investment and Long-term Value

High-quality paint typically costs more than its lower-quality counterparts. This is largely due to the superior ingredients used, which result in better coverage, durability, and overall performance. The initial investment in quality paint can range significantly, depending on the brand, type, and specific features of the paint.

However, the long-term value of investing in quality paint far outweighs the initial cost. High-quality paint often requires fewer coats to achieve the desired finish, saving you both time and money on additional paint. Moreover, quality paint is more durable and fade-resistant, meaning it will maintain its fresh-looking appearance for longer periods, reducing the frequency of repaints.

Quality Paint as a Smart Investment

Investing in quality paint is a smart decision for several reasons. First, it enhances the aesthetics of your space, adding value to your property. Second, it provides better coverage and a more uniform finish, reducing the need for multiple coats and saving you time and effort in the painting process.

Third, quality paint is more durable and resistant to wear and tear. This means less maintenance and fewer repaints in the long run, translating into significant cost savings. Lastly, many high-quality paints are environmentally friendly and have low levels of volatile organic compounds (VOCs), promoting healthier indoor air quality.

Here’s a simple comparison table:

Quality Paint Lower-Quality Paint
Initial Cost Higher Lower
Coverage More uniform, fewer coats needed May require multiple coats
Durability Longer-lasting, fade-resistant Less durable, may fade over time
Health & Environment Typically low-VOC May contain higher levels of VOCs

How Quality Paint Can Save Time and Money in the Long Run

Investing in quality paint can result in significant long-term savings. The superior coverage of high-quality paint often requires fewer coats, reducing the amount of paint needed for a project. This not only saves money on paint but also reduces the labor costs associated with applying additional coats.

Furthermore, the enhanced durability of quality paint means less frequent repainting, translating into further savings over time. High-quality paint is also more resistant to common issues like chipping, peeling, and fading, minimizing the need for touch-ups and maintenance.

In conclusion, while the initial cost of quality paint may be higher, the long-term benefits and savings make it a worthwhile investment. By understanding the true value of quality paint, you can make more informed decisions for your painting needs and ensure a successful, long-lasting finish for your project. For more insights on painting and decorating, visit our blog.

Making the Right Choice for Your Painting Needs

Choosing the right paint is an essential step in any painting project. From the color to the finish, every detail matters when it comes to achieving a flawless and lasting result. In this section, we’ll help you understand what factors to consider when choosing paint and provide tips for evaluating paint quality.

Factors to Consider When Choosing Paint

When it comes to selecting paint, multiple elements come into play. Here are some key factors to consider:

  1. Color: The color of the paint should align with your overall design vision. Consider factors like the size of the room, the amount of natural light, and the mood you want to create. For more guidance on selecting colors, check out our ultimate guide to choosing paint colors for your interior trim.
  2. Finish: Paint comes in various finishes, including matte, satin, semi-gloss, and gloss. The right finish depends on the area you’re painting and the look you’re aiming for.
  3. Durability: High-quality paint tends to be more durable and longer-lasting, making it a smart choice for high-traffic areas.
  4. Coverage: Quality paint often has better coverage, meaning you’ll need less of it to cover a given area.
  5. Environmental Impact: Look for paints with low or no VOCs (Volatile Organic Compounds) to minimize environmental impact and maintain indoor air quality.
  6. Price: While price should not be the sole determining factor, it’s important to consider your budget. Remember that investing in quality paint can save you money in the long run since it often requires fewer coats and lasts longer.

Tips for Evaluating Paint Quality

Determining the quality of paint isn’t always straightforward, but there are a few indicators that can help:

  1. Viscosity: High-quality paint tends to have a thicker consistency. If the paint is too thin, it may require more coats for adequate coverage.
  2. Pigment: The richness of the color can also indicate quality. High-quality paint usually has a depth and vibrancy of color that lesser quality paints lack.
  3. Reviews: Check out reviews and testimonials from other customers. Their experiences can provide valuable insights into the performance of the paint.
  4. Brand Reputation: While we’re not endorsing any specific brands, it’s worth noting that companies with a long history and good reputation in the painting industry are often a safe bet.

Remember, investing in quality paint can mean the difference between a paint job that lasts for years and one that requires frequent touch-ups. By considering the factors outlined here and taking the time to evaluate the quality of the paint, you’re more likely to achieve a result you’ll be happy with for years to come. For more expert painting advice, explore our articles on everything from how often you should repaint your home to DIY painted mason jar ideas for home decor.

Painting Magic: How to Transform an Outdated Kitchen – Before and After

transforming an outdated kitchen with paint: a before and after case study

The Charm of a Kitchen Makeover

There’s something magical about seeing an outdated kitchen transform into a fresh, modern space. As a professional painter, I’ve had the pleasure of witnessing these transformations firsthand. For those who are considering a kitchen makeover, let me assure you, the results can be truly astounding, especially when you harness the power of paint.

Why Paint is the Easiest Way to Transform Your Kitchen

Of all the ways to renovate a kitchen, painting is arguably the easiest and most cost-effective. It doesn’t require expensive materials or weeks of construction. Instead, with a few cans of high-quality paint and some creativity, you can dramatically alter the look and feel of your kitchen. This is the story of one such transformation—an outdated kitchen made new again through the power of paint.

When it comes to transforming an outdated kitchen, paint offers endless possibilities. It allows you to change the color palette, hide old and worn surfaces, and even create visual interest with different painting techniques. Whether it’s the cabinets, the walls, or even the ceiling, paint can make a world of difference.

Furthermore, painting is a project that can be done in stages, which is often a relief for homeowners who can’t afford to have their kitchen out of commission for an extended period. And, unlike some other forms of renovation, painting doesn’t produce a lot of waste, making it an environmentally friendly choice.

Lastly, painting offers an opportunity for personal expression. The colors and finishes you choose can reflect your personality and style, making the kitchen truly your own. And if you ever get tired of the look, it’s relatively easy and inexpensive to paint again.

For more insights on the power of paint, check out our articles on painting and decorating, why quality paint is worth the price: an expert’s perspective, and the top 7 interior home painting colors for 2023.

Stay tuned for the ‘before’ and ‘after’ of this kitchen transformation, where I’ll share the process, techniques, and tips that led to this dramatic change.

Tackling an Outdated Kitchen: A Case Study

The journey of transforming an outdated kitchen with paint began with an initial assessment of the space. Following that, I moved on to the critical task of choosing the right paint color and finish.

Initial Assessment: The “Before” Kitchen

Upon entering the kitchen, it was clear that it was stuck in a time warp. The faded wallpaper, outdated fixtures, and dark wooden cabinets gave the room a dull, gloomy feel. The layout was functional, but the aesthetics were far from appealing.

The space lacked natural light, making it appear even smaller and more cramped. The dark cabinets absorbed the little available light, creating a stark contrast with the faded white walls. It was clear to me that a fresh coat of paint could do wonders in breathing new life into this kitchen.

Choosing the Paint Color and Finish

Choosing the right paint color was a critical step in the makeover process. I wanted a color that would brighten up the space, make it feel larger, and complement the existing fixtures. After considering various options from our top 7 interior home painting colors for 2023, I finally settled on a soft, light gray for the cabinets and a crisp white for the walls.

The choice of paint finish was equally important. Given the high-traffic nature of the kitchen, I decided on a semi-gloss finish for the cabinets and a satin finish for the walls. The semi-gloss finish would endure frequent cleaning and resist moisture, while the satin finish would provide a smooth, velvety appearance that’s easy to maintain.

The decision to paint the outdated cabinets instead of replacing them was not only cost-effective but also environmentally friendly. To learn more about the benefits of painting kitchen cabinets, check out our article on painting kitchen cabinets: a smart alternative to replacement.

In the next section, we’ll delve into the makeover process, including how I prepped the kitchen for painting and the techniques I employed for the best results. Stay tuned for the big reveal!

The Makeover Process

Transforming an outdated kitchen requires careful planning and execution. In my case, the makeover process was divided into three main stages: prepping the kitchen for painting, applying the paint, and waiting for the transformation.

Prepping the Kitchen for Painting

Before I could begin painting, I had to ensure that the kitchen was properly prepared. This crucial stage involved cleaning the surfaces to be painted, removing any grease or grime, and lightly sanding the cabinets to ensure that the paint would adhere properly. I also took the opportunity to make any necessary repairs, such as fixing loose hinges or filling in any dents or scratches. For an extensive guide on prepping your space for painting, refer to our article 10 things you need to know before starting your painting project.

All hardware and appliances were carefully removed or covered to protect them from paint splatters. I taped off the areas where the cabinets met the walls to ensure clean lines and prevent any paint from getting onto the walls.

Applying the Paint: Techniques and Tips

Once the kitchen was prepped, it was time to start the actual painting process. I chose a high-quality paint, as I know from experience that it provides better coverage, is more durable, and is easier to work with. For more information on why quality paint is worth the price, check out our article why quality paint is worth the price: an expert’s perspective.

I used a brush for the smaller areas and a roller for the larger surfaces to ensure a smooth, even finish. It’s essential to apply the paint in thin, even layers, allowing each layer to dry before applying the next. This prevents the paint from dripping or appearing too thick in certain areas.

Waiting for the Transformation

After applying the final coat of paint, the waiting period began. Allowing the paint to dry completely is crucial for the longevity and appearance of the final result. During this time, it’s important to avoid touching the painted surfaces or placing anything on them, as this could damage the paint.

While waiting, I cleaned my brushes and rollers and disposed of any used paint cans properly. I also started planning for the final touches I would add once the paint was dry.

Seeing the transformation unfold was incredibly rewarding. The outdated kitchen was slowly but surely turning into a modern and welcoming space, all thanks to the power of paint. The process of transforming an outdated kitchen with paint can be time-consuming, but the result is well worth the effort. For more insights and tips on painting makeovers, visit our painting and decorating section.

The Big Reveal: The “After” Kitchen

After days of hard work, anticipation, and a fair share of paint splatters, the time for the big reveal had finally arrived. The transformation of the outdated kitchen into a bright, welcoming space was nothing short of magical. Let’s explore the changes and improvements.

Observations: Changes and Improvements

The first thing that caught my eye was how the new paint color had completely transformed the overall feel of the kitchen. The previously dull and outdated hues were replaced with a fresh, vibrant color that breathed life into the space.

The cabinets, once a dreary brown, were now a crisp white, highlighting their architectural details. The walls, previously a tired yellow, now sported a warm, inviting shade that complemented the white cabinets perfectly.

Beyond just the aesthetic changes, the new paint had a practical impact as well. The lighter colors reflected more light, making the kitchen feel larger and brighter. The updated color scheme also made the kitchen feel cleaner and more modern, a drastic improvement from the dated look it had before.

How Paint Transformed the Kitchen

The power of paint in transforming an outdated kitchen is truly remarkable. With just a few cans of paint and some elbow grease, I was able to completely alter the look and feel of the kitchen.

The change was more than just visual. The new colors brought a new energy into the space, making it feel more inviting and comfortable. It was as if the kitchen had undergone not just a physical transformation, but an emotional one as well.

The fresh paint also highlighted the kitchen’s best features. The architectural details on the cabinets that were previously lost in the old color scheme were now front and center. The new color on the walls brought out the texture and character of the old plaster, adding depth and interest to the space.

Overall, the transformation was a testament to the power of paint in refreshing and revitalizing a space. If you’re considering a kitchen makeover, don’t underestimate what a fresh coat of paint can do. Check out our painting and decorating services for more information on how we can help you transform your kitchen, or any other room in your home.

Lessons Learned

After completing the task of transforming an outdated kitchen with paint, there are several lessons that I learned along the way. These lessons not only expanded my understanding of painting and decorating, but also provided valuable insights that could be applied to other home improvement projects.

The Power of Paint: What I Learned

The major takeaway from this project was realizing the transformative power of paint. Even in an outdated kitchen, a fresh coat of paint could breathe new life into the space, giving it a modern, fresh, and inviting appeal.

I learned that beyond aesthetics, paint can also influence the mood and overall ambience of a room. In our case, by choosing a bright, welcoming color, we turned a once-drab kitchen into a vibrant and cheerful heart of the home. For more insights into how paint colors can affect mood, check out our article on painting for health: using color psychology in design.

Furthermore, I realized the importance of proper preparation before starting a painting project. The prepping stage, which included cleaning, sanding, and priming, played a key role in the smooth application of paint and the longevity of the finish.

Tips for Those Considering a Kitchen Paint Makeover

For those considering a kitchen paint makeover, I have several tips based on my experience:

  1. Choose the Right Paint: Not all paints are created equal. Some are better suited for kitchens due to their durability and ease of cleaning. Check out our article on why quality paint is worth the price: an expert’s perspective for more information.
  2. Proper Preparation: Spend adequate time preparing the kitchen for painting. This includes cleaning the surfaces, repairing any damages, and applying a suitable primer. Our guide on 10 things you need to know before starting your painting project offers more detailed advice.
  3. Test Colors: Before committing to a paint color, test it in different lighting conditions to see how it looks at different times of the day. Our guide on the ultimate guide to choosing paint colors for your interior trim can provide helpful tips.
  4. Protect Your Belongings: Cover your appliances, countertops, and floor to protect them from paint splatters and spills.
  5. Take Your Time: Don’t rush the painting process. Apply the paint carefully and evenly to ensure a smooth, streak-free finish.

A kitchen makeover with paint is a cost-effective way to modernize your kitchen without the need for extensive renovations. With the right approach and understanding, you can transform your outdated kitchen into a space you love. For more painting and decorating tips, check out our blog.

Unleash Your Inner Pro: 6 Essential Tips for Deck Staining Success

6 essential tips for staining your deck like a pro

The Art of Deck Staining

Deck staining is an essential aspect of maintaining your outdoor living space. Not only does it beautify your deck, it also protects it from harsh weather conditions and prolongs its lifespan. In this section, we delve into the importance of deck staining and provide a brief overview of the process.

Understanding the Importance of Deck Staining

Deck staining serves two primary purposes: aesthetics and protection. A nicely stained deck uplifts the appearance of your home, enhancing its curb appeal. But that’s not all. The stain also forms a protective barrier against the elements, shielding your deck from the harmful effects of sun, rain, and snow.

Moreover, the stain prevents moisture from seeping into the wood, thereby averting issues like wood rot and mold growth. It also helps keep the wood from splitting and cracking, ensuring the structural integrity of your deck. In essence, deck staining is a crucial part of painting and decorating any home with a deck.

Basic Overview of the Deck Staining Process

While the process of staining a deck might seem daunting, it’s quite straightforward when broken down into steps. Here’s a quick outline:

  1. Deck Preparation: This involves cleaning the deck thoroughly to remove dirt, grime, and old stain or paint. A pressure washer can be handy for this job (how to pressure wash your house in 5 simple steps).
  2. Sanding: Once the deck is clean and dry, sand it down to smooth out rough spots and open up the wood pores for better stain absorption.
  3. Stain Selection: Choose a stain that suits your deck’s wood type and your aesthetic preference. Stains come in various types, including clear, semi-transparent, and solid colors.
  4. Stain Application: Apply the stain evenly using a brush, roller, or sprayer. Remember to follow the wood grain for a neat finish.
  5. Drying: Allow the stain to dry completely before using the deck. This typically takes 24 to 48 hours.
  6. Maintenance: Regularly clean your deck and reapply the stain as needed to keep it looking its best.

While staining your deck might seem like a large undertaking, it’s a project well worth the effort. For more insights, check out our article on 6 essential tips for staining your deck like a pro. This will equip you with the knowledge you need to transform your deck into a beautiful and durable outdoor living space.

Essential Deck Staining Tips

Deck staining is an art that requires patience, the right tools, and the right technique. Here are 6 essential tips for staining your deck like a pro.

Tip 1: Choose the Right Time and Weather

Timing and weather play a significant role in the outcome of your deck staining project. It’s best to stain your deck when the weather forecast predicts two to three days of clear skies with temperatures between 50 and 90 degrees Fahrenheit. This allows the stain to dry properly and adhere well to the deck surface. Too much heat can cause the stain to dry too quickly, while high humidity or rain can prevent it from drying properly.

Tip 2: Properly Prep the Deck

Before you start staining, ensure the deck is clean and free from dust, dirt, mildew, and old paint or stain. You might need to sand the surface to remove old finishes and open up the wood pores for better stain absorption. Also, a good wash with a deck cleaner or a pressure washer can help remove stubborn dirt. Check out our guide on how to pressure wash your house in 5 simple steps for more details.

Tip 3: Select the Right Stain for Your Deck

When it comes to choosing a stain for your deck, consider the type of wood, the desired color, and the level of protection needed. Stains come in various types, including clear, semi-transparent, and solid, each offering a different level of color and protection. For more information on selecting the right paint or stain, visit our article on why quality paint is worth the price: an expert’s perspective.

Tip 4: Use the Right Tools

The right tools can significantly improve your deck staining process. Use a high-quality brush or roller for application, ensuring it is suitable for the type of stain you’re using. Additionally, a paint pad applicator can be useful for applying stain evenly on the deck surface.

Tip 5: Apply the Stain Correctly

Apply the stain evenly, working in small sections and maintaining a “wet edge” to prevent lap marks. Always follow the wood grain for the best results. It’s recommended to apply two thin coats of stain rather than one thick one for even coverage and better absorption. For more detailed instructions, visit our article on 5 pro tips for staining your deck.

Tip 6: Maintain Your Deck Regularly

Routine maintenance can prolong the life of your deck stain and keep your deck looking its best. Clean your deck regularly to remove dirt and mildew, and reapply a coat of stain as needed, typically every 2-3 years, depending on the weather conditions and the type of stain used. For more tips on maintaining your deck, refer to our article on how often should you repaint your home and why?.

By following these essential deck staining tips, you can achieve a professional-looking finish on your deck. Remember, the key to a successful deck staining project lies in preparation, choosing the right products, and applying them correctly. Happy staining!

Common Mistakes to Avoid

In the quest to achieve professional-level deck staining, it’s crucial to be aware of some common pitfalls that can hinder your end result. Proper staining is a process that requires patience, attention to detail, and adequate time. Here are three common mistakes to avoid.

Rushing the Process

Staining a deck isn’t a task that should be rushed. Each step, from preparation to application, needs adequate time for optimal results. Hastening through the process can lead to uneven stain application, missed spots, and a subpar finish. Instead, allocate sufficient time to each stage of the process, ensuring that each task is done thoroughly and correctly. Remember, the goal is to enhance your deck’s appearance and longevity, and rushing can compromise these results. For more insights on managing your painting project, be sure to check our post on 10 things you need to know before starting your painting project.

Skimping on Preparation

Proper preparation is a critical component in the deck staining process. It involves cleaning the deck thoroughly, removing any old paint or stain, and ensuring the wood is completely dry before applying the stain. Skipping or skimping on these steps can result in poor stain adhesion, leading to peeling or flaking over time. Not to mention, dirt and old paint can prevent the stain from penetrating the wood properly, affecting the final appearance. For more tips on how to prepare your deck for staining, refer to our 5 pro tips for staining your deck.

Not Allowing Enough Drying Time

Lastly, one of the most common mistakes people make is not allowing enough drying time between cleaning, staining, and using the deck. The stain needs time to penetrate the wood and dry completely to provide a durable finish. Using the deck too soon can lead to smears, smudges, or even tracking the stain into your home. Each type of stain will have different drying times, so it’s essential to read the manufacturer’s instructions and allow your deck ample time to dry. To learn more about the importance of drying times in painting projects, check out our article on painting and decorating.

By avoiding these common mistakes, you’re one step closer to achieving professional-level deck staining. Always take your time, prepare adequately, and allow for complete drying to ensure your deck looks great and lasts for years to come.

The Professional Approach to Deck Staining

Deck staining can be a complex process, requiring proper knowledge and technique to achieve the desired results. While DIY methods can work for some, hiring a professional for the job can provide a high-quality, long-lasting finish.

Why Hire a Professional?

Hiring a professional for deck staining brings multiple advantages.

  1. Experience and Expertise: Professionals have the necessary experience and expertise to handle the intricacies of deck staining. They understand the right techniques, the best stains for different types of timber, and how to avoid common pitfalls.
  2. Time-Saving: Deck staining is a time-consuming process. A professional can complete the job efficiently, saving you time that can be used for other activities.
  3. Quality Results: A professional will ensure a high-quality finish. Their expertise helps avoid streaks or uneven staining, which can mar the appearance of your deck.
  4. Longevity: Proper deck staining can extend the life of your deck. A professional can help prevent issues like mould, rot, and damage from UV rays, ensuring your deck lasts longer.
  5. Advice and Guidance: A professional can provide valuable advice on maintaining your stained deck, helping to keep it in top condition.

If you are considering a professional for your deck staining needs, check out our painting and decorating services.

What to Expect from a Professional Deck Staining Job

When hiring a professional for deck staining, here are some things you can expect:

  1. Inspection and Preparation: The professional will first inspect the deck to assess its condition. This includes checking for any rot, loose nails, or splintered wood. The deck will then be thoroughly cleaned and prepped for staining.
  2. Stain Selection: The professional will help you select the right stain for your deck, considering factors like the type of wood, the climate, and your personal preferences.
  3. Application: The professional will apply the stain using the right tools and techniques. This includes ensuring an even application and paying attention to detail for a high-quality finish.
  4. Clean-Up and Final Inspection: After the job is done, the professional will clean up the area and conduct a final inspection to ensure the quality of the work.
  5. Maintenance Advice: The professional will provide advice on how to maintain your newly stained deck, including how often to re-stain and how to clean it.

Remember, a beautifully stained deck not only enhances the aesthetic appeal of your outdoor space but also increases its lifespan. So, consider availing professional services for the best outcome. For more information on deck staining and other painting projects, refer to our articles 10 things you need to know before starting your painting project and 5 pro tips for staining your deck.

DIY vs Professional Deck Staining

Deciding between staining your deck yourself or hiring a professional can be a challenging task. Both options have their pros and cons. Let’s explore the benefits and drawbacks of each to help you make an informed decision.

Pros and Cons of DIY Deck Staining

Taking the DIY route for deck staining can be a rewarding experience, as it gives you complete control over the project. However, it’s not without its challenges.

Pros

  • Cost-effective: Doing it yourself can save you labor costs associated with hiring a professional.
  • Control: You have full control over the project, from choosing the stain to deciding when to work on it.
  • Satisfaction: There’s a sense of accomplishment that comes from completing a home improvement project on your own.

Cons

  • Time-consuming: Deck staining is a labor-intensive task that requires considerable time, especially if you’re new to it.
  • Quality: Without the right experience and skills, the final result may not be as polished as a professionally done job.
  • Potential for mistakes: There’s a risk of mistakes that could end up costing more in the long run. A common mistake is failing to properly prep the deck, which could affect the longevity of the stain.

If you’re considering the DIY route, check out our 5 pro tips for staining your deck to ensure you’re well-equipped for the task.

Pros and Cons of Professional Deck Staining

Hiring a professional for deck staining can ensure a high-quality finish. However, it comes with its own set of considerations.

Pros

  • Expertise: Professionals have the skills and experience to deliver high-quality results.
  • Efficiency: A professional can complete the job faster than a DIYer, thanks to their expertise and specialized tools.
  • Less hassle: Hiring a professional saves you from the physical labor and time involved in a DIY project.

Cons

  • Cost: Professional services come with a cost. Depending on the size and condition of your deck, this can be significant.
  • Availability: You’ll need to schedule the job according to the professional’s availability, which might not always align with your preferred timeline.

Before you decide to hire a professional, make sure to check out our article on painting and decorating to understand what to expect from a professional painting and staining job.

In conclusion, both DIY and professional deck staining have their merits. Your choice would depend on your budget, time availability, and comfort level with DIY projects. Whether you decide to do it yourself or hire a pro, the key is to prepare well and follow the right staining procedures to ensure a beautiful and long-lasting finish for your deck.

The Ultimate Guide: How to Pressure Wash Your House in 5 Simple Steps

how to pressure wash your house in 5 simple steps

Understanding Pressure Washing

Pressure washing is a method of cleaning that can drastically improve the exterior appearance of your house. Before delving into the steps on how to pressure wash your house, it’s essential to understand what pressure washing entails, why it’s beneficial, and the safety precautions to keep in mind.

What is Pressure Washing?

Pressure washing, also known as power washing, is a cleaning process that uses high-pressure water spray to remove grime, dust, mud, mold, and dirt from surfaces and objects such as buildings, vehicles, and concrete surfaces. It’s a popular method of cleaning because it’s efficient, effective, and can reach areas that are difficult to clean with traditional methods.

Why Pressure Wash Your House?

Pressure washing your house can have several benefits. First, it can significantly enhance the curb appeal of your home by removing accumulated dirt and grime. This is particularly beneficial if you’re planning to paint your home or put it on the market.

Second, pressure washing can help preserve the value of your home by preventing the long-term effects of dirt buildup and mold growth. It also helps prepare surfaces for painting by providing a clean, smooth surface for the paint to adhere to.

Lastly, pressure washing can help improve the health and safety of your home by eliminating mold, mildew, and other allergens.

Safety Precautions for Pressure Washing

While pressure washing can be highly beneficial, it’s crucial to keep safety in mind. The high-pressure water spray can cause injury or damage property if not handled correctly. Here are some safety precautions to keep in mind:

  • Always wear protective clothing, including gloves, long pants, and safety goggles.
  • Never point the pressure washer at people, animals, or plants.
  • Keep a safe distance from the surface being cleaned to prevent damage.
  • Always hold the spray gun with both hands for control.
  • Do not use the pressure washer while standing on a ladder. The force of the spray can cause you to lose balance.
  • Avoid spraying water directly onto electrical outlets, fixtures, or windows to prevent damage or injury.

Understanding pressure washing is the first step in learning how to pressure wash your house in 5 simple steps. It’s an effective way to clean your home’s exterior and prepare it for painting or other decorating projects. However, it’s crucial to prioritize safety and use the equipment correctly to prevent injury or property damage.

Step 1: Preparing Your House for Pressure Washing

Before learning how to pressure wash your house in 5 simple steps, it’s crucial to prepare your home correctly. This initial phase involves safeguarding doors and windows and removing any obstacles or outdoor furniture that might hinder the washing process.

Protecting Doors and Windows

When pressure washing your house, doors and windows can be vulnerable to the high-pressure water spray. Therefore, they need to be adequately protected to prevent any potential damage.

Start by closing all doors and windows to avoid any water seeping into your home. For an extra layer of protection, consider covering them with waterproof plastic sheets or tarps. Secure these covers with strong tape to ensure they stay in place during the washing process.

If there are any cracks or gaps around your doors and windows, you might want to seal them using a waterproof caulk. This will help prevent any water from entering your home and causing potential damage.

Removing Obstacles and Outdoor Furniture

Next, move any obstacles or outdoor furniture away from your house. This includes items such as potted plants, patio furniture, grills, and kids’ play equipment. By providing a clear path around your home, you can ensure a more efficient and safer pressure washing process.

In addition to moving these items, it’s also important to cover any electrical outlets or exterior lights to prevent any water-related issues. Use waterproof covers for this purpose and secure them tightly.

Remember, preparing your house for pressure washing is a crucial step in maintaining the structural integrity of your home. By taking the time to protect your doors and windows and remove any obstacles, you can ensure a smooth and effective pressure washing process.

For more tips on preparing your house for a painting project, check out our article on 10 things you need to know before starting your painting project.

Step 2: Choosing the Right Pressure Washer

Once your house is ready for pressure washing, the next crucial step in the process is choosing the right pressure washer. There are two main types of pressure washers, gas and electric, each with their own unique benefits and drawbacks. In addition, understanding the power measurements used for pressure washers, PSI and GPM, will aid you in making an informed decision.

Gas vs. Electric Pressure Washers

Gas pressure washers are known for their power and mobility. Since they run on gasoline, they do not require an electrical outlet, providing more freedom to move around large properties. These machines can generate higher pressure, which is ideal for removing stubborn dirt and stains.

On the other hand, electric pressure washers are generally smaller, quieter, and easier to maintain. They are perfect for smaller tasks, such as cleaning patio furniture, vehicles, or small deck areas. However, they must be connected to an electrical outlet, which can limit mobility.

When choosing between a gas or electric pressure washer, consider the size of your property and the level of dirt or grime you need to remove. For larger properties or more challenging tasks, a gas pressure washer may be more beneficial. For smaller tasks or properties, an electric pressure washer should suffice.

Understanding PSI and GPM

When selecting a pressure washer, you will often see two measurements: PSI (Pounds per Square Inch) and GPM (Gallons per Minute).

PSI measures the pressure of the water created by the pressure washer. A higher PSI means more power, which is useful for removing tough grime.

GPM, on the other hand, measures the volume of water delivered by the pressure washer. A higher GPM can clean a larger area in less time.

Here’s a general guide to what you can clean with various PSI levels:

PSI Level Cleaning Task
Under 2000 PSI Vehicles, outdoor furniture
2000 – 3000 PSI Siding, decks
Over 3000 PSI Stubborn stains, paint removal

Before choosing a pressure washer, consider the type of tasks you plan to perform. For example, if you’re pressure washing your house as part of a painting and decorating project, you’ll want a pressure washer with a higher PSI to effectively remove old paint.

By understanding these factors, you can choose the right pressure washer for your needs and successfully pressure wash your house in 5 simple steps.

Step 3: Preparing the Pressure Washer

Before you start pressure washing your house, it’s important to prepare the pressure washer correctly. This involves connecting it to a water source and setting the correct pressure.

Connecting to a Water Source

A pressure washer requires a steady stream of water to operate effectively. To connect the pressure washer to a water source, follow these steps:

  1. Locate an outdoor water faucet and attach a garden hose.
  2. Connect the other end of the hose to the water inlet on the pressure washer.
  3. Make sure both connections are secure to prevent any leaks during operation.

Some pressure washers have a built-in reservoir for detergent. If you plan to use a cleaning solution, fill the reservoir according to the manufacturer’s instructions. Remember to use only detergents designed for pressure washers to avoid damaging the machine or your property.

Setting the Correct Pressure

Setting the correct pressure is crucial to ensure effective cleaning without causing damage to your house. The pressure setting depends on the type of siding on your house and the level of dirt or grime.

Here’s a general guideline on the pressure settings for different surfaces:

Surface Type PSI (Pressure in Pounds per Square Inch)
Vinyl siding 1300 – 1600
Brick and concrete 1500 – 2000
Wood siding 1200 – 1500

Remember that these are just guidelines. Always start with a lower pressure and gradually increase it until you find the optimal setting for your surface. Avoid using high pressure on soft materials to prevent damage.

Understanding how to set up and use a pressure washer properly can make the task of house cleaning more efficient. Be sure to read the manufacturer’s instructions and safety precautions to ensure a safe and successful pressure washing experience.

For more tips and advice on house painting and maintenance, check out our painting and decorating articles.

Step 4: Pressure Washing Your House

Now that the pressure washer is set up and ready to go, it’s time to start the actual washing process. This step in ‘how to pressure wash your house in 5 simple steps’ is where the real transformation begins.

Starting from the Top

When pressure washing your house, always start from the top and work your way down. This ensures that any dirt or debris that is dislodged from the upper levels does not dirty the already cleaned lower sections.

Consider dividing your house into sections and focus on one section at a time. This approach makes it easier to keep track of the areas that have already been cleaned. Remember to keep a steady hand for even application of pressure and to prevent any potential damage.

Techniques for Effective Washing

For an effective washing experience, there are certain techniques that can be adopted. Here are a few tips:

  1. Keep the Nozzle Moving: To avoid damaging the surface, never focus the high-pressure water jet in one area for too long.
  2. Maintain a Consistent Distance: A consistent distance of about 12 to 16 inches should be maintained between the nozzle and the surface being cleaned.
  3. Use a Sweeping Motion: Clean with a smooth, sweeping motion, moving the spray in an overlapping pattern to avoid lines of dirt being left behind.
  4. Adjust Pressure as Needed: Different surfaces may require different pressure settings. Be ready to adjust the pressure as per the needs of the surface you’re cleaning.
  5. Use Detergents: For stubborn dirt or stains, consider using a house wash detergent. Apply the detergent at a low pressure and then rinse it off at a higher pressure.

With these techniques in mind, the process of pressure washing your house becomes easier and more effective. Always remember to take your time and not to rush the process. This will ensure a cleaner result and can prevent potential damage to your home’s exterior.

For those considering painting their home after a thorough wash, check out our article, 10 things you need to know before starting your painting project. It provides insightful information about the painting process, which can prove helpful in your home transformation journey.

Step 5: Post-Washing Clean Up

After successfully pressure washing your house, there are a few final steps to ensure everything is clean and in good condition. This involves proper care of the pressure washer and a thorough check of your house for missed spots.

Rinsing and Draining the Pressure Washer

To prolong the life of your pressure washer and keep it in good working order, it’s essential to rinse and drain it properly after use. Start by disconnecting the water source and turning off the pressure washer. Then, run the machine until all the water is expelled from the system. This helps to prevent any build-up or blockages within the equipment.

Next, disconnect the high-pressure hose and gun, and drain any remaining water. Wipe the machine down with a clean, dry cloth and store it in a cool, dry place. This will help to prevent any rust or damage occurring between uses. Always refer to your pressure washer’s manual for specific cleaning and storage instructions.

Checking Your House for Missed Spots

Once you’ve taken care of your pressure washer, it’s time to inspect your house for any missed spots. Walk around your property, paying close attention to the walls, windows, doors, and any other surfaces that were washed. If you notice any areas that still seem dirty or didn’t get cleaned properly, you may need to do a quick spot clean with the pressure washer or a scrub brush.

Checking for missed spots is especially important if you’re planning to paint your house after pressure washing. A clean, smooth surface is key for a high-quality, long-lasting paint job. If you’re in need of painting tips or inspiration, be sure to check out articles such as how often should you repaint your home and why? or exterior painting mistakes every homeowner should avoid.

With the completion of these post-washing steps, you can confidently wrap up your pressure washing task. Not only will you have a clean and fresh-looking house, but you’ll also be ready for any next steps, such as painting and decorating or other home improvement projects.

Homeowners Beware: Steer Clear of These Exterior Painting Pitfalls

exterior painting mistakes every homeowner should avoid

The Art of Exterior Painting

Exterior painting is an art that goes beyond simply applying a new coat of paint. It involves careful planning, selection of the right materials, and execution of techniques to ensure a result that not only enhances the aesthetic appeal of the property but also offers long-term protection.

Importance of Exterior Painting

Exterior painting plays a critical role in home maintenance. A well-executed paint job does more than boost curb appeal. It serves as a primary line of defense against various elements such as sun, rain, and pests, contributing to the longevity of the building structure. Moreover, a fresh coat of paint can significantly increase property value, making it an investment that often yields high returns. For more insights on the frequency of repainting and its benefits, explore our article how often should you repaint your home and why?

Factors Involved in a Successful Exterior Painting Job

Achieving a successful exterior painting job involves several key factors.

Preparation: This is a crucial step that directly impacts the outcome of the painting job. It includes cleaning the surface, fixing any damages, scraping off loose paint, and priming, among other tasks. Ignoring proper preparation can lead to common exterior painting mistakes every homeowner should avoid. For a comprehensive guide on getting started with your painting project, refer to our article 10 things you need to know before starting your painting project.

Quality of Materials: The durability and finish of the paint job largely depend on the quality of materials used, including the paint and tools. High-quality paint provides better coverage, lasts longer and withstands weather conditions more efficiently. Check out our article why quality paint is worth the price: an expert’s perspective to understand the importance of investing in good quality paint.

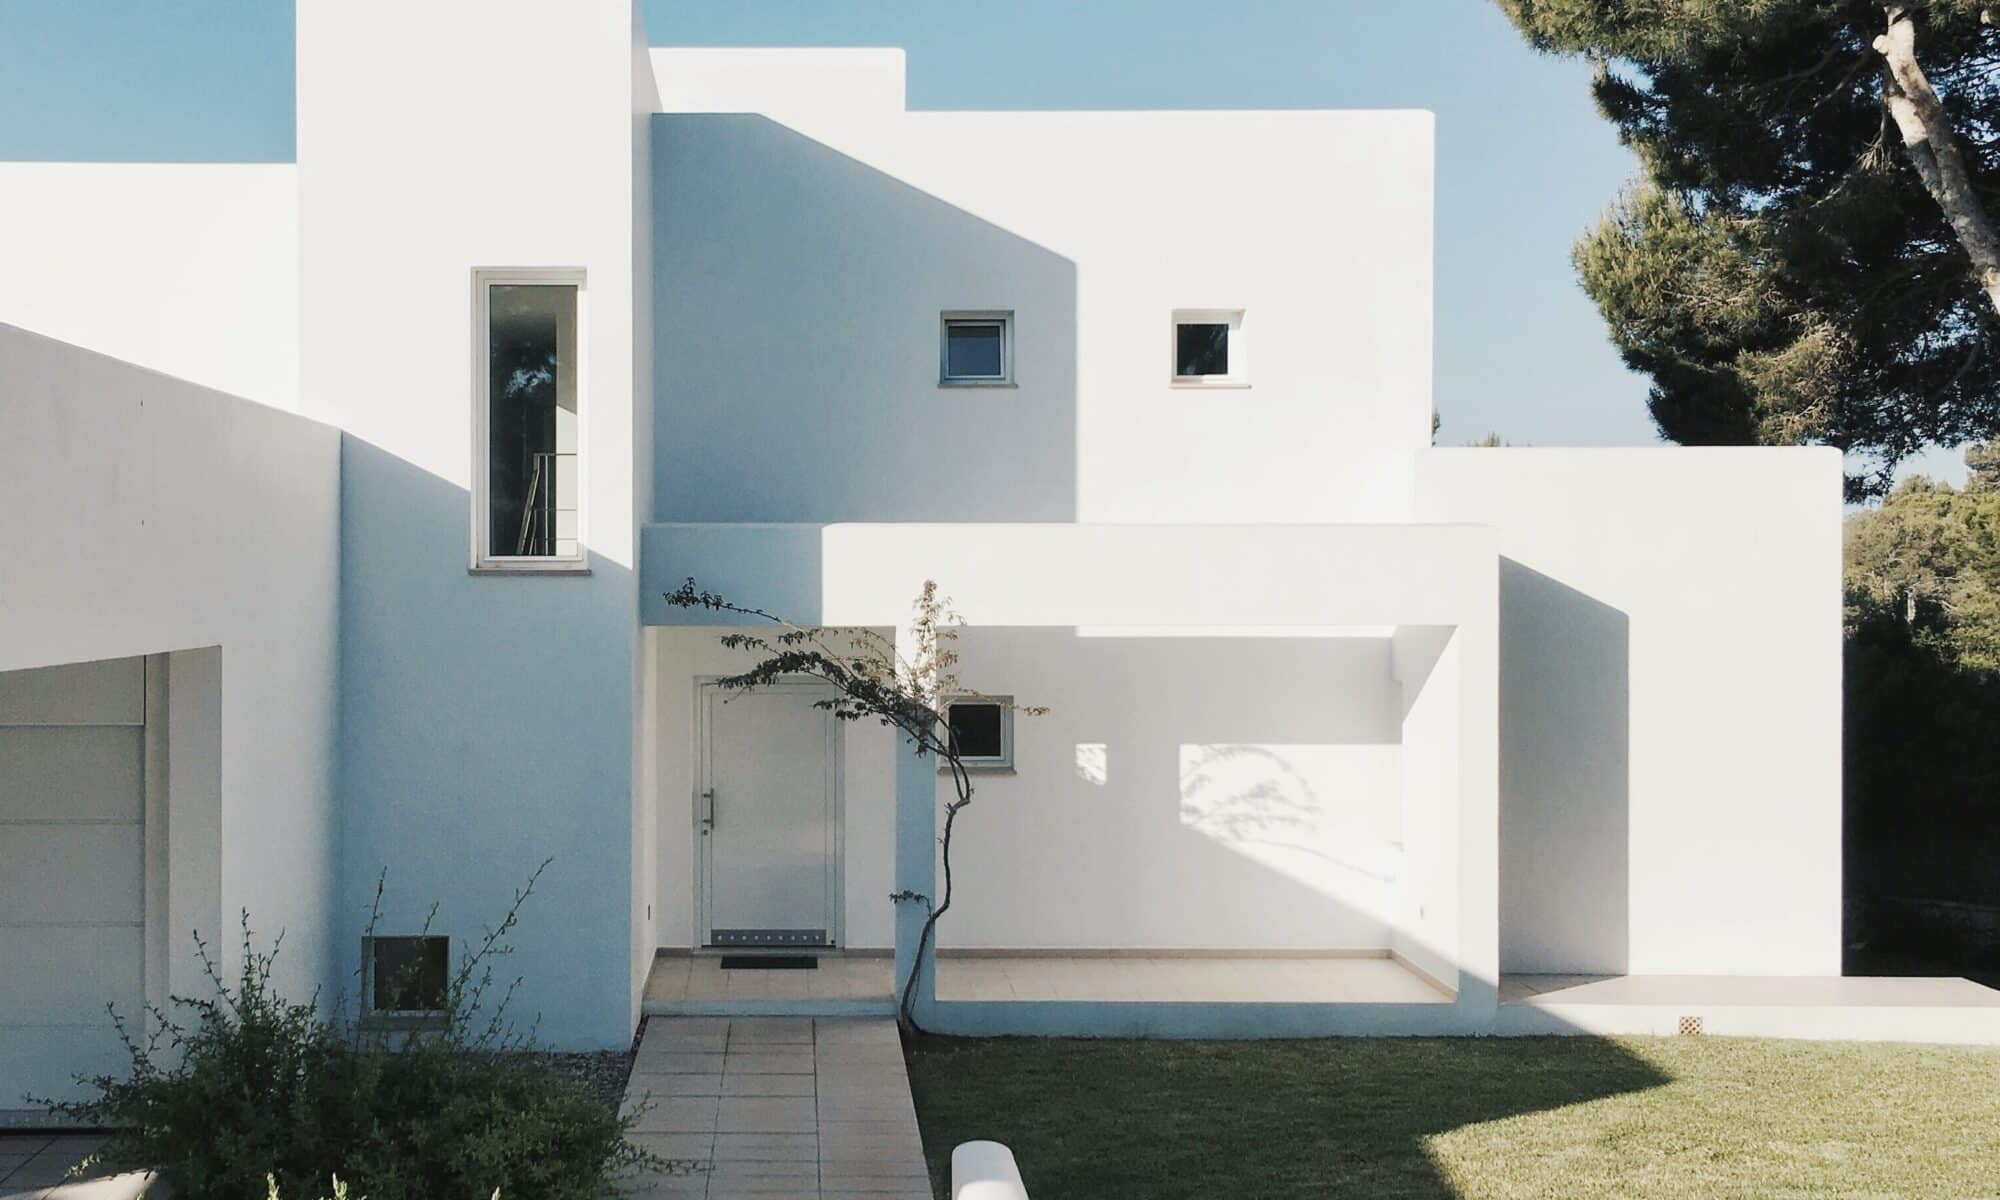
Color Selection: The choice of color can significantly influence the aesthetic appeal of your home. It’s important to consider factors like architectural style, surrounding environment, and personal preference while making a decision. For the latest trends in home painting colors, visit the top 7 interior home painting colors for 2023.

Proper Application: Consistent application of paint ensures an even finish. This requires skill and patience, especially when dealing with complex structures and patterns.

Maintenance: Regular maintenance helps to keep the paint looking fresh and extends its lifespan. This involves routine cleaning, touch-ups, and timely recoating.

By understanding these factors, homeowners can navigate the process of exterior painting with ease and avoid common pitfalls, ensuring a result that is both visually pleasing and durable.

Common Exterior Painting Mistakes

The process of exterior painting can be quite complex, involving a host of factors that, if overlooked, can result in less than stellar results. Here are some common exterior painting mistakes every homeowner should avoid.

Insufficient Preparation

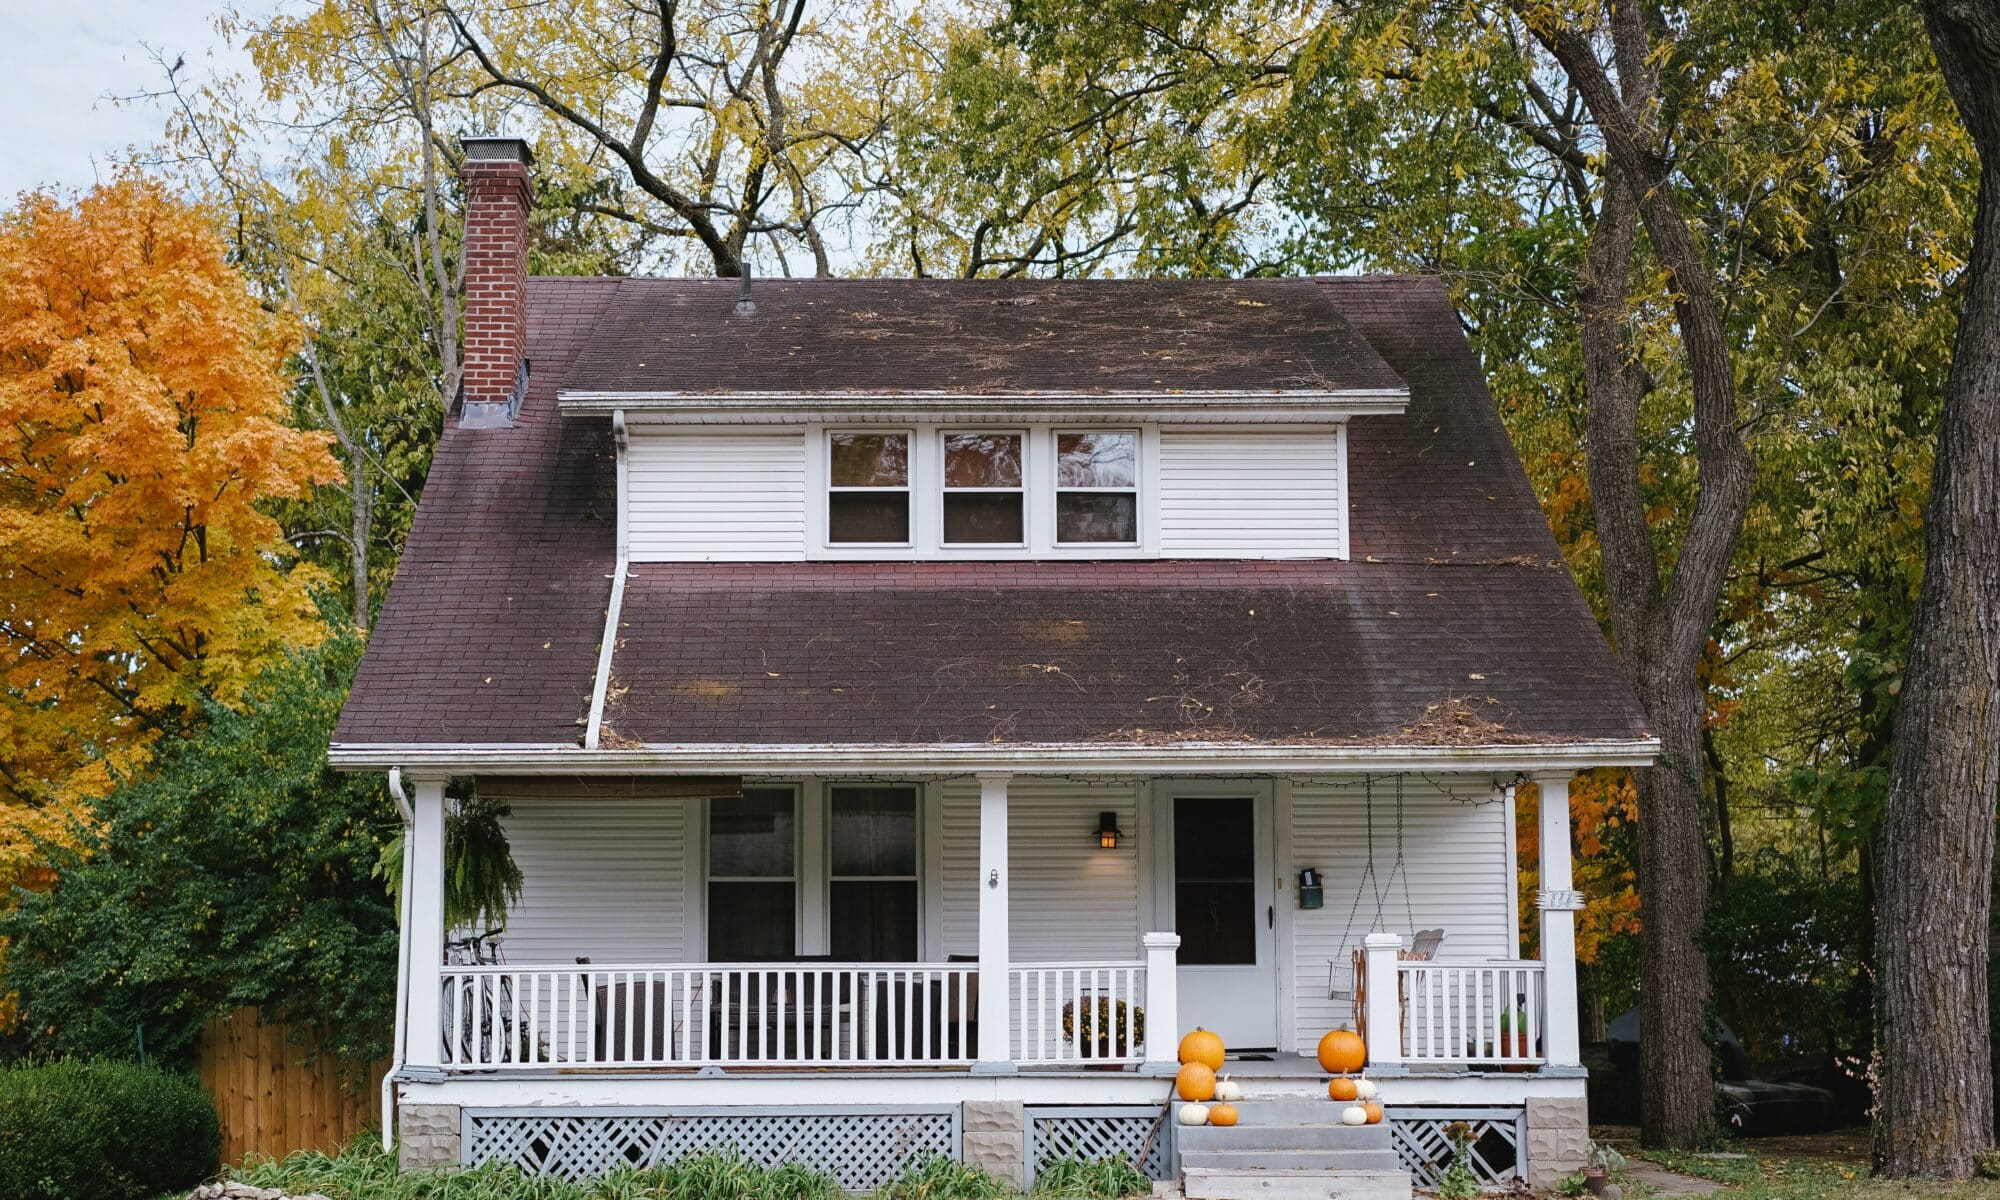
One of the most common pitfalls in exterior painting is insufficient preparation. This can involve anything from failing to thoroughly clean and prime the surface to skipping essential repairs. A well-prepared surface is critical for paint adhesion and longevity. Failing to properly prepare the surface can result in an uneven paint job, peeling paint, or visible imperfections. To avoid this mistake, ensure to dedicate sufficient time to prepare the surface, including cleaning, sanding, and priming as necessary. Learn more about proper preparation techniques in our article on 10 things you need to know before starting your painting project.

Neglecting Weather Conditions

The impact of weather on an exterior painting project can’t be overstated. Painting in extreme temperatures, high humidity, or even windy conditions can negatively affect the application and drying process of the paint. For instance, painting in direct sunlight can cause the paint to dry too quickly, leading to brush marks and clumps. On the other hand, rain can wash away wet paint and ruin your hard work. Therefore, always consider the weather forecast before starting your exterior painting project.

Choosing the Wrong Type of Paint

Another common mistake is choosing the wrong type of paint for the job. Not all paints are the same, and using the wrong one can result in poor coverage, fading, or peeling. For example, latex-based paint is typically a good choice for exterior painting because it expands and contracts with the siding, but oil-based paint might be needed for surfaces like iron railings. Additionally, the finish of the paint (gloss, semi-gloss, satin, flat) can also affect the appearance and durability of the paint job. Remember to consider the type of surface you’re painting and the expected wear and tear when choosing your paint. For a deeper understanding of why quality paint is worth the price, read our expert’s perspective here.

By being aware of these common exterior painting mistakes, homeowners can ensure that their next painting project is a success. Proper preparation, attention to weather conditions, and selecting the right paint are all crucial steps in achieving a professional-looking finish.

Avoiding Painting Pitfalls

Exterior painting can appear deceptive in its simplicity, but many homeowners learn the hard way that it’s easy to fall into common traps. With proper knowledge and preparation, these exterior painting mistakes can be avoided for a successful painting project.

Proper Preparation Techniques

Preparation is a key aspect of any painting project. One common mistake is rushing through or skipping the preparation stage. This includes cleaning the exterior, patching holes or cracks, sanding rough spots, and applying primer if necessary.

Before painting, the exterior should be thoroughly cleaned to remove dirt, mildew, and loose or peeling paint. A pressure washer can be used for this task, but be sure to use a gentle setting to avoid damage. For more on this, visit our guide on how to pressure wash your house in 5 simple steps.

Patching and sanding are crucial for a smooth surface, ensuring the paint adheres properly. Any bare wood should be primed before painting to seal the wood and prevent the paint from soaking in.

Understanding the Impact of Weather

Weather conditions can significantly impact the success of an exterior paint job. Painting in extreme temperatures, whether too hot or too cold, can cause paint to dry too quickly or not at all. Highly humid or wet conditions can prevent paint from adhering properly, leading to peeling or blistering.

It’s crucial to monitor the weather forecast before beginning a painting project, and avoid painting in adverse conditions. The ideal conditions for exterior painting are mild temperatures, low humidity, and little to no wind.

Selecting the Right Paint for Your Home’s Exterior

Choosing the right paint is crucial to the longevity and appearance of your paint job. Not all paints are created equal, and the type of paint you select should be compatible with your home’s exterior material.

There are two main types of paint to choose from: oil-based and water-based (latex) paint. Oil-based paint is durable and resistant to wear and tear, making it a good choice for high-traffic areas or surfaces that come in contact with water. However, it’s more difficult to work with and requires a special type of primer.

Water-based paint, on the other hand, is easier to work with and clean up, dries quickly, and is less prone to cracking. It’s also more environmentally friendly than oil-based paint.

When choosing your paint, also consider the finish. Gloss and semi-gloss finishes are durable and easy to clean, making them a good choice for areas that are exposed to the elements or prone to dirt and grime. Flat finishes, while less durable, can hide imperfections in the surface.

Remember, quality matters when it comes to paint. High-quality paint will provide better coverage, last longer, and resist fading and weather damage. For more on this, check out our article on why quality paint is worth the price: an expert’s perspective.

By properly preparing the exterior, understanding the impact of weather conditions, and selecting the right paint, homeowners can avoid common pitfalls and achieve a successful exterior painting project. For more tips, check out our article on 10 things you need to know before starting your painting project.

Mistakes with Color Choices

A critical aspect of exterior painting involves the selection of the right color. There are several pitfalls homeowners fall into when it comes to color choices, leading to unsatisfactory results. This section will examine these common mistakes and provide insights on how to avoid them.

Disregarding the Home’s Architecture and Surrounding Environment

One common mistake is ignoring the architectural style of the home and the surrounding environment when choosing paint colors. The architectural style of the house can significantly influence the color palette that will work best. For example, a Victorian-style house may look best with a more traditional color scheme, while a modern home might be suited to bold, contemporary colors.

Similarly, the surrounding environment should be taken into consideration. The colors of the neighboring houses, the natural landscape, and the overall vibe of the neighborhood can all influence the choice of exterior paint color. By disregarding these factors, homeowners risk choosing colors that clash with the environment or fail to highlight the home’s architectural features.

Ignoring Color Trends and Combinations

Another common pitfall is ignoring current color trends and combinations. While it’s not necessary to strictly follow trends, they can provide inspiration and ideas for color schemes. This is especially important when considering the resale value of the house; a fresh, trendy paint job can enhance curb appeal.

Furthermore, it’s essential to consider color combinations and how different colors will work together on the home’s exterior. Homeowners often make the mistake of choosing colors in isolation, without considering how they will look when paired together. For more guidance on current color trends and combinations, check out our article on the top 7 interior home painting colors for 2023.

Failing to Test Colors Before Full Application

Perhaps the most common mistake homeowners make is failing to test colors before applying them to the entire exterior of the home. Paint colors can look dramatically different under varying lighting conditions and against different materials. What looks good in the store under fluorescent lighting might not look the same in natural light or against the material of your home.

To avoid this pitfall, it’s recommended to test the chosen colors on a small, inconspicuous area of the exterior before proceeding with the full application. This allows for any necessary adjustments to be made before it’s too late.

Remember, avoiding these common color choice mistakes can significantly impact the success of your exterior painting project. Take the time to make thoughtful decisions about your color choices and test them thoroughly before application. And for more tips and advice on exterior painting, visit our painting and decorating page.

Application Errors to Avoid

Executing an exterior painting project flawlessly requires attention to detail at every stage. There are several common application errors that homeowners make, which can lead to unsatisfactory results. Let’s explore these mistakes and how to avoid them.

Rushing the Painting Process

A common exterior painting mistake every homeowner should avoid is rushing the painting process. Painting is not just about applying a coat of paint on the walls. It involves careful preparation, application, and drying time.

Rushing through these steps can result in a subpar finish with visible brush strokes, drips, and an uneven coat. Allow adequate time for each step, and remember that patience is key to achieving a professional-looking finish. Check out our guide on the 10 things you need to know before starting your painting project for more details.

Inconsistent Paint Application

Inconsistent paint application is another mistake that can detract from the final appearance of your home’s exterior. This usually happens when the paint is applied unevenly, resulting in areas that are lighter or darker than others.

To avoid this, it’s essential to mix your paint thoroughly before starting and to continue stirring it periodically during the application process. Additionally, apply the paint in a consistent manner, working in small sections at a time to ensure an even coat.

Remember to keep a wet edge while painting to avoid lap marks. This involves overlapping the wet paint onto the dry sections to ensure a seamless appearance.

Neglecting Proper Cleanup and Maintenance

After the painting project is completed, it’s crucial to clean up properly and maintain your newly painted exterior. Neglecting this step can lead to premature peeling and fading of paint.

Clean your brushes and rollers thoroughly, and store them properly to ensure their longevity. Seal your paint cans tightly to prevent the paint from drying out and to keep it ready for touch-ups in the future.

Moreover, regular maintenance of your home’s exterior, such as cleaning and minor touch-ups, can extend the life of your paint job. Our article on how often should you repaint your home and why? provides valuable insights into maintaining your home’s exterior paint.

By avoiding these application errors, you can ensure a successful exterior painting project that enhances the aesthetic appeal and value of your home. Remember, a well-executed paint job is not just about the final result but also about the process involved. Take your time, pay attention to detail, and use quality materials to achieve the best outcome.

Expert Tips for Successful Exterior Painting

To avoid the common exterior painting mistakes every homeowner should avoid, it’s vital to approach your painting project with a well-thought-out plan, use high-quality tools and materials, and commit to maintaining your home’s exterior after painting.

Planning Your Painting Project

A well-planned painting project is often a successful one. Before starting, take the time to assess the size and scope of your project, and identify any potential challenges you may encounter. This includes considering factors such as the weather conditions, the type and condition of your home’s exterior, and the color and type of paint you intend to use.

Do your research or consult with a professional painter to understand what the project entails. This will help you establish a realistic timeline and budget for your project. For additional tips on planning your painting project, check out our article on 10 things you need to know before starting your painting project.

Understanding the Importance of Quality Tools and Materials

Using high-quality tools and materials is key to achieving a professional-looking finish and ensuring the longevity of your paint job. While it may be tempting to save money on cheaper products, it’s important to remember that the quality of your tools and paint can significantly impact the final result.

Invest in a good-quality paint that is suitable for your home’s exterior and designed to withstand the elements. Similarly, choose brushes, rollers, and other tools that are appropriate for your specific project. For more information, check out our article on why quality paint is worth the price: an expert’s perspective.

Maintaining Your Home’s Exterior After Painting

After investing time and effort into painting your home’s exterior, it’s crucial to maintain it to ensure the paint job lasts as long as possible. Regularly inspect your home’s exterior for any signs of damage or wear and make any necessary repairs promptly.

Clean your home’s exterior periodically to remove dirt and other debris that could damage the paint. You can do this by using a pressure washer or a soft brush with mild detergent. For more detailed information on maintaining your home’s exterior, check out our article on how to pressure wash your house in 5 simple steps.

By following these expert tips, you can avoid common painting pitfalls and ensure your home’s exterior looks great and stands up to weather and time.

Call Now Button