Unlock the Potential: Transform Your Home with Painting and Decorating

painting and decorating

The Art of Painting and Decorating

Transforming your living or working space can be as simple as applying a fresh coat of paint or as intricate as redecorating the entire area. Both painting and decorating are artistic processes that require thoughtful planning and implementation.

Defining Painting and Decorating

Painting and decorating encompasses a broad range of activities, from applying paint or wallpaper to your walls and ceilings, to choosing the right furniture, lighting, and accessories to complement your color scheme.

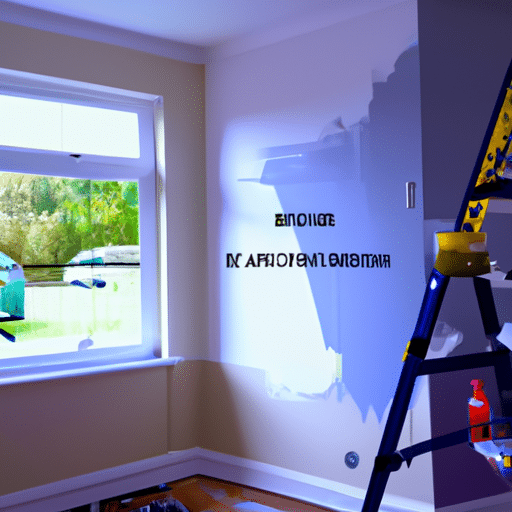
In the context of home or office improvement, painting refers to the process of applying color, typically in the form of paint, to your walls, ceilings, doors, and other surfaces. This can be done using various tools such as brushes, rollers, or spray equipment. The type of paint used can vary depending on the surface being painted and the desired finish.

Decorating, on the other hand, involves enhancing the aesthetic appeal of your space through the strategic placement of decor elements. This can include items such as furniture, curtains, rugs, artwork, lighting fixtures, and other accessories. The goal of decorating is to create a cohesive and visually pleasing environment that reflects your personal style and taste.

The Impact of Painting and Decorating on Your Space

A well-executed painting and decorating project can significantly enhance the look and feel of your space. Fresh paint can breathe new life into tired, outdated rooms, while thoughtful decorating can turn an impersonal area into a cozy, inviting space.

Moreover, painting and decorating can have practical benefits as well. For instance, light-colored paint can make a small room appear larger and brighter, while strategically placed decor can emphasize a room’s best features or distract from its less appealing aspects.

But perhaps the most important impact of painting and decorating is on your mood and well-being. The colors and decor you choose can influence your mood, productivity, and comfort. For instance, cool colors like blue and green are said to have a calming effect, making them a good choice for bedrooms or offices. On the other hand, warm colors like red and yellow can stimulate the senses, making them a great choice for living rooms or kitchens.

Undertaking a painting and decorating project can seem daunting, especially if you’re a beginner. But with the right planning, tools, and knowledge, you can transform your space into a place that reflects your personality and meets your needs. Check out our articles on 10 things you need to know before starting your painting project and the ultimate guide to choosing paint colors for your interior trim for more information and tips.

The Painting Process

A significant part of the painting and decorating process involves understanding paint types, choosing the right color, and following the necessary steps to ensure a successful painting project.

Understanding Paint Types

There are various types of paint in the market, each with its own characteristics and uses. Broadly, these can be divided into oil-based and water-based paints. Oil-based paints are durable and resistant to staining and wear, making them suitable for high-traffic areas or surfaces that require frequent cleaning. On the other hand, water-based paints, also known as latex paints, dry quickly, have less odor, and are easier to clean up with soap and water.

Another important distinction is between matte, eggshell, satin, semi-gloss, and high gloss finishes. The choice depends on the look you’re going for as well as the area you’re painting. High gloss paints, for example, are durable and easy to clean, making them ideal for kitchens, bathrooms, and trim. Matte paints have a non-reflective finish that hides imperfections, making them suitable for ceilings and low-traffic areas. For more information on paint types and their uses, this article provides a good starting point.

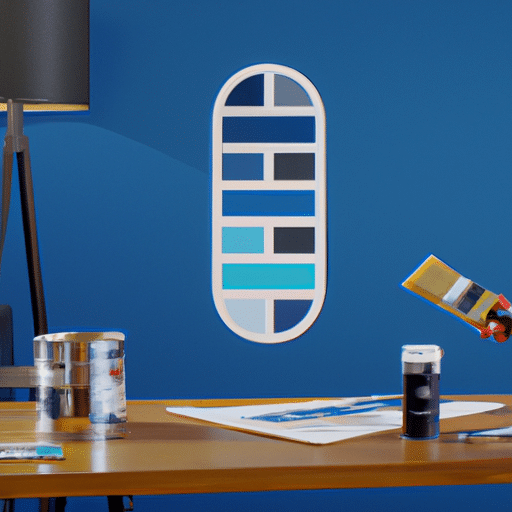
Choosing Your Paint Color

Selecting the right paint color can transform your space and set the mood. However, it’s not as simple as picking your favorite color. You need to consider the size of the room, the amount of natural light it gets, the color of your furniture and other elements, and the overall look you’re trying to achieve. If you’re unsure, it’s a good idea to start with a neutral palette and add color through furniture and accessories. You can also use color psychology to create a specific atmosphere. Check out our guide on choosing paint colors for your interior trim and our list of top interior home painting colors for 2023 for inspiration.

Steps for a Successful Painting Project

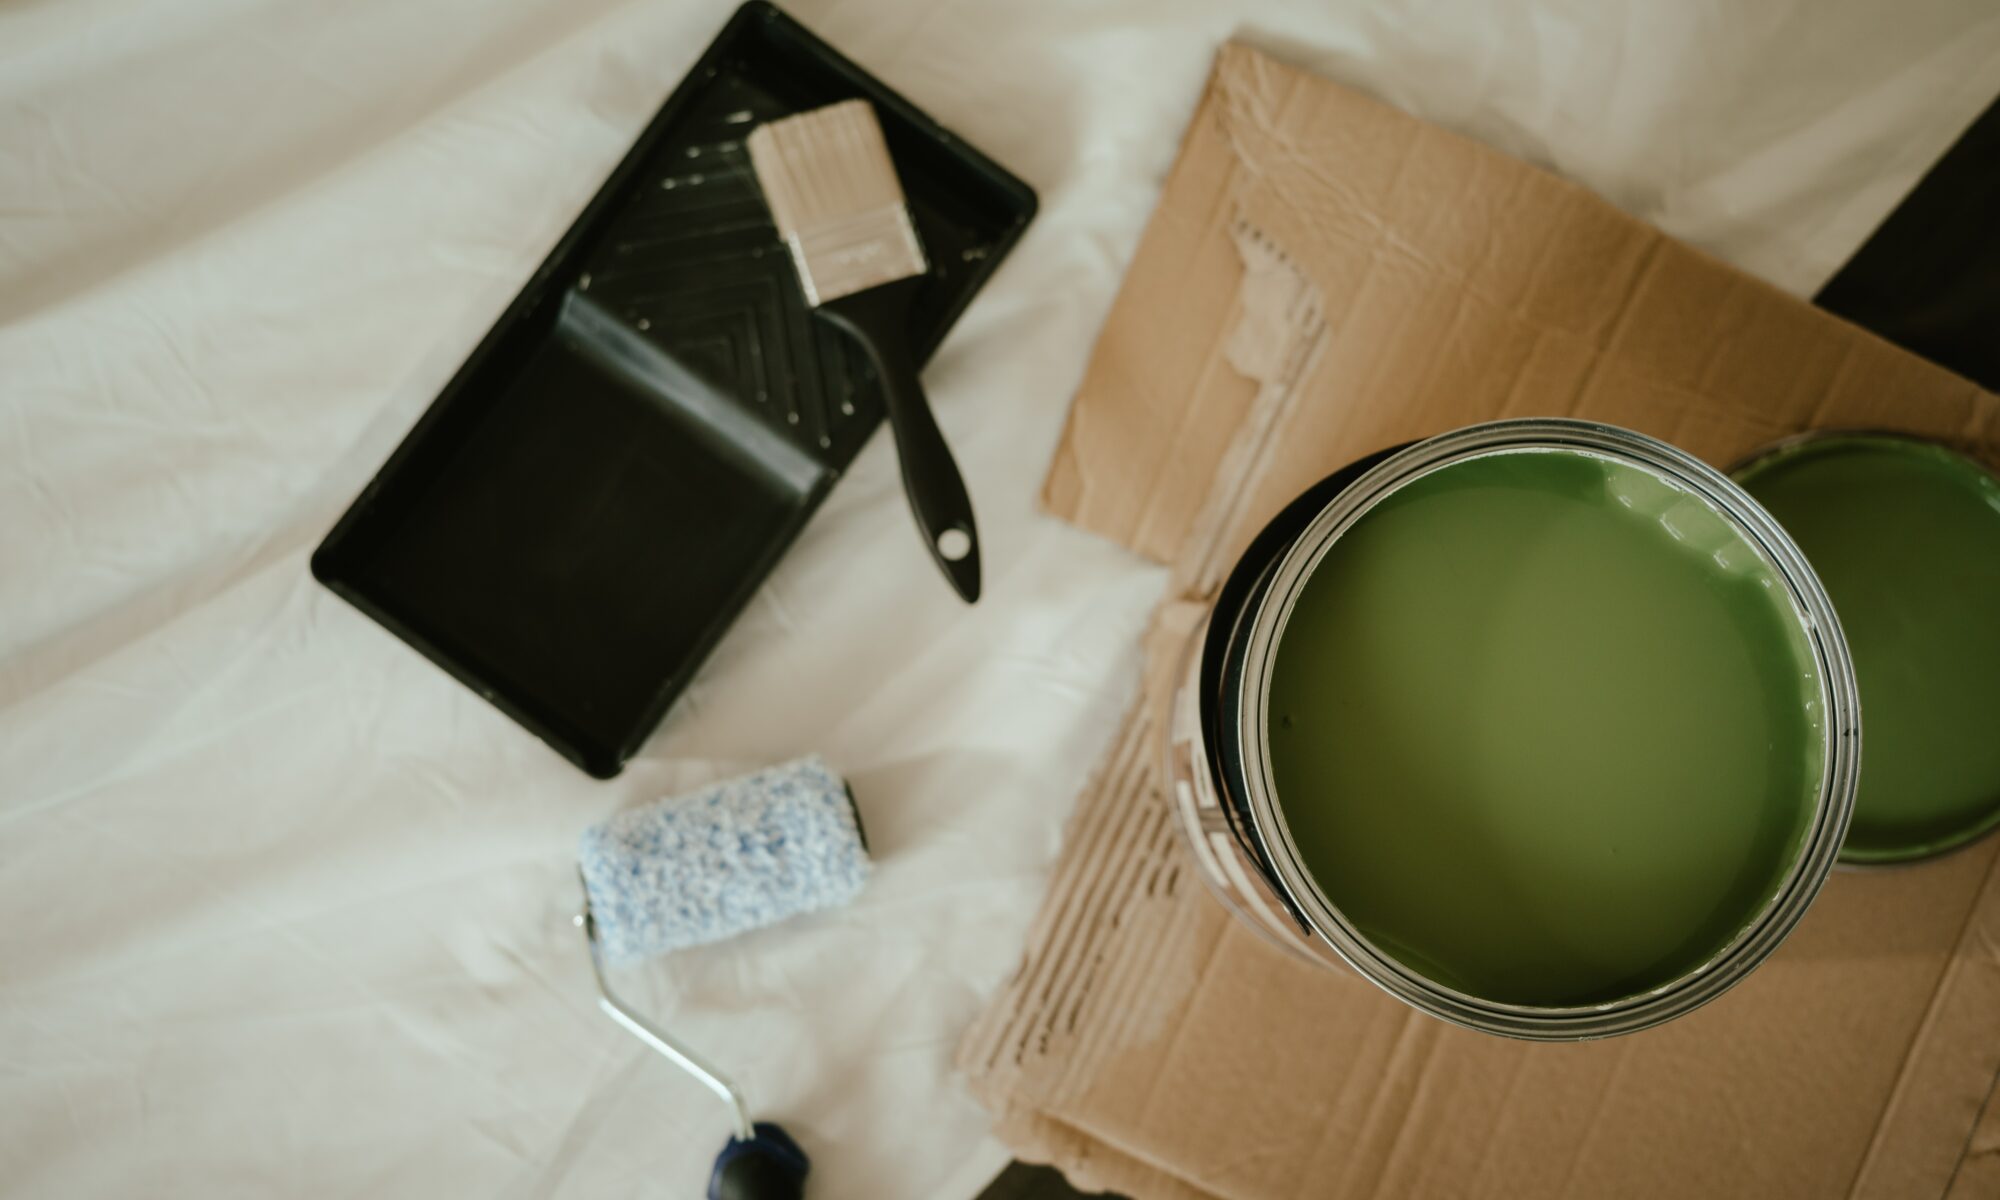
  1. Preparation: This is a crucial step that includes cleaning the surfaces to be painted, patching holes and cracks, sanding, and applying primer if necessary. Don’t rush this step, as the quality of the final result depends on it. Our article on how to pressure wash your house can help with the cleaning process.
  2. Painting: Start by cutting in the edges with a brush, then use a roller for the larger areas. Apply two or more coats if necessary, allowing the paint to dry completely between coats.
  3. Cleanup and disposal: Clean your brushes and rollers, and store leftover paint for future touch-ups. Dispose of any waste responsibly.
  4. Enjoy the results: Once everything is dry, move your furniture back in and enjoy your refreshed space.

Remember, painting is a project that requires time, patience, and attention to detail. For more tips on successful painting projects, take a look at our article 10 things you need to know before starting your painting project.

The Decorating Process

The decorating process, just like painting, is an art form. It involves choosing the right elements to enhance the aesthetics of your space. Let’s delve into the process and learn how you can transform your space effectively.

Understanding Interior Design Styles

Recognizing different interior design styles is the first step in the decorating process. Each style, ranging from modern to rustic, Scandinavian to bohemian, has its unique characteristics and elements. By understanding these styles, you can identify which resonates with your personal taste and fits your space the best.

Some of the popular styles include:

  • Modern: Known for its simplicity, clean lines, and monochromatic palette.
  • Rustic: Features natural elements like wood and stone, with a warm and cozy vibe.
  • Scandinavian: A blend of textures and contrasts, often with a white base and minimalistic approach.
  • Bohemian: Eclectic, with a mix of patterns, colors, and a laid-back vibe.

Choosing Your Decor Elements

The next step involves selecting the decor elements. These can range from furniture and lighting to art pieces and accessories. Each element should align with your chosen design style and work together to create a cohesive look. Remember, the key to successful decorating lies in balance. Avoid crowding your space with too many elements. Instead, focus on creating a harmonious blend that reflects your personal style and enhances the functionality of your space.

Steps for a Successful Decorating Project

Here are some steps to guide you through a successful decorating project:

  1. Define Your Style: Identify your preferred interior design style. This will set the tone for your decorating project.
  2. Plan Your Space: Assess your space, consider its functionality, and plan accordingly. Determine where each piece of furniture and decor will go.
  3. Choose Your Colors: Select a color scheme that complements your chosen style. Colors play a significant role in setting the mood of a space, so choose wisely.
  4. Select Your Decor Elements: Pick out furniture, lighting, rugs, curtains, and other decor elements that align with your style and color scheme.
  5. Arrange Your Elements: Arrange your decor elements in a way that is visually balanced and functional.
  6. Add Personal Touches: Don’t forget to add personal touches. These could be family photos, souvenirs, or anything else that makes your space feel like home.
  7. Review and Adjust: Take a step back and assess your space. Make necessary adjustments until you’re satisfied with the result.

Remember, decorating is a creative process. Don’t rush it. Take your time to explore different elements, play around with ideas, and create a space that truly reflects your style and personality. For more helpful tips on painting and decorating, check out our blog.

Painting and Decorating Tips

Transforming your space with painting and decorating can be an exciting task. However, it can also be overwhelming with the multitude of choices you have to make. Here, we provide some tips to help you navigate through the process and make informed decisions.

Tips for Choosing the Right Paint

When it comes to painting, it’s crucial to choose the right paint for your project. Here are some tips to guide you:

  1. Understand the different types of paint: Paints come in different types like latex, oil-based, and enamel, each with its own characteristics and uses. Before you start your painting project, familiarize yourself with these types to determine which is best suited for your needs.
  2. Choose a high-quality paint: While it may be tempting to opt for a cheaper option, high-quality paint will provide better coverage, longer-lasting results, and is often easier to clean. Check out our article on why quality paint is worth the price for more information.
  3. Consider the color: The color you choose can dramatically impact the feel and look of your space. Consider factors like the size of the room, the amount of natural light, and your personal preferences when deciding on a color. Our article on the top 7 interior home painting colors for 2023 may provide some inspiration.
  4. Try before you buy: Always test the paint color on a small area before committing to a large project. This will give you a better idea of how the color looks in different lighting conditions and against your room’s furnishings.

Tips for Choosing the Right Decor

Choosing the right decor can enhance the aesthetic appeal of your space and complement your paintwork. Here are some tips:

  1. Understand your style: Knowing your personal style can help narrow down your choices. Whether you prefer a modern, traditional, or eclectic look, understanding what styles you’re drawn to can guide your decor selection.
  2. Consider the scale: The size and scale of your decor should be in proportion to your space. Large furniture pieces can overwhelm a small room, while tiny decor items might get lost in a large space.
  3. Choose versatile pieces: Opt for decor pieces that are versatile and can easily be moved or repurposed around your home. This gives you more flexibility and allows for easy updates to your decor.

Tips for Mixing and Matching

Combining different colors, textures, and styles can create a unique and personalized space. Here are some tips for successful mixing and matching:

  1. Balance is key: While mixing and matching can add interest to your space, it’s important to maintain balance. Too many contrasting elements can make your space feel chaotic, while too many similar elements can make it feel monotonous.
  2. Stick to a color palette: Having a defined color palette can help tie your space together. Choose a few main colors and use them consistently throughout your space.
  3. Play with textures and patterns: Mixing different textures and patterns can add depth and interest to your space. However, ensure they complement rather than compete with each other.

Exploring the world of painting and decorating can be a rewarding endeavor, allowing you to express your personal style and transform your space. By considering these tips, you can navigate your painting and decorating project with confidence.

Common Mistakes in Painting and Decorating

In the world of painting and decorating, there are many potential pitfalls that can hinder the success of your project. Understanding these common mistakes can help you avoid them and ensure a smoother, more satisfying transformation of your space.

Mistakes to Avoid in Painting

When it comes to painting, certain errors can detract from the final result or even cause long-term issues. These may include:

  1. Skipping the Preparation: Preparation is key to a successful painting job. This includes cleaning the surfaces, sanding if necessary, and applying primer. Forgetting these steps can lead to uneven paint application and reduced durability. Check out our guide on the 10 things you need to know before starting your painting project for more details.
  2. Using Low-Quality Paint: Lower quality paint may seem like a cost-saving measure, but it often requires more coats and doesn’t last as long. Our expert provides insights on why quality paint is worth the price.
  3. Choosing the Wrong Paint Color: Be mindful of how colors can impact the feel of a room. Dark colors can make a room seem smaller, while lighter colors can open it up. For inspiration, take a look at the top 7 interior home painting colors for 2023.
  4. Ignoring the Weather: External factors like weather can impact the drying process and final outcome of your painting project. For example, painting exteriors in damp conditions can cause paint to blister. Avoid these exterior painting mistakes every homeowner should avoid.

Mistakes to Avoid in Decorating

Decorating errors can disrupt the harmony of your space and prevent it from reaching its full potential. Here are some common decorating mistakes to avoid:

  1. Cluttering the Space: While it’s important to personalize your space, too many items can make it feel cluttered and chaotic. Strive for a balance between personal items and open spaces.
  2. Ignoring Scale and Proportion: Furniture and decor should be proportionate to the room size and each other. A too-large sofa or a too-small rug can throw off the room’s balance.
  3. Overdoing Themes: Themes can help guide your decorating, but overdoing it can make a room feel gimmicky. Use themed pieces sparingly and mix them with neutral elements.
  4. Neglecting Lighting: Lighting plays a crucial role in setting the mood of a space. Make sure to incorporate a mix of ambient, task, and accent lighting.

By avoiding these common painting and decorating mistakes, you can ensure a successful transformation of your space. Remember, it’s your space to create, so don’t be afraid to experiment and make it uniquely yours. For more tips and advice on painting and decorating, visit our blog.

Hiring a Painting and Decorating Professional

The painting and decorating process can be both exciting and challenging. A professional can help you navigate these challenges and ensure that your project meets your expectations.

When to Hire a Professional

There are several instances when you might want to consider hiring a professional for your painting and decorating project:

  1. Complex Projects: If your project involves complex elements such as high ceilings, intricate designs, or historic preservation, a professional’s expertise can be invaluable.
  2. Time Constraints: If you have a tight deadline for the project, a professional can ensure that the work is completed on time and to a high standard.
  3. Quality Results: Professionals have the experience and knowledge to deliver quality results, enhancing the longevity and aesthetic appeal of your painting and decorating project.
  4. Health and Safety: Professional painters are trained in safety protocols for working in various conditions and using different equipment, reducing the risk of accidents.

To make an informed decision about when to hire a professional for your painting and decorating needs, you might find our articles on how often should you repaint your home and why? and 10 things you need to know before starting your painting project helpful.

What to Look for in a Professional

When hiring a professional for your painting and decorating project, consider the following:

  1. Experience and Expertise: Look for a professional with a strong track record in painting and decorating. Their portfolio should demonstrate their ability to handle projects similar to yours.
  2. Licenses and Certifications: Ensure the professional has the necessary licenses and certifications to carry out the work. This not only ensures they are qualified but also that they adhere to industry standards.
  3. Insurance: Make sure the professional is insured. This protects you from liability in case of any accidents or damage during the project.
  4. Reviews and References: Check reviews and ask for references to get an idea of the professional’s reliability, punctuality, and quality of work.
  5. Clear Estimates: The professional should provide a detailed estimate that includes the cost of materials, labor, and any additional charges. This helps to avoid any unexpected costs later on.
  6. Communication: Good communication is key to a successful project. The professional should be responsive, clear, and open to your ideas and concerns.

By taking the time to find the right professional for your painting and decorating project, you can ensure a smooth process and high-quality results. For more tips and advice on painting and decorating, check out our article on why quality paint is worth the price: an expert’s perspective.

Pros and Cons of DIY vs. Professional Spray Painting for Kitchen Cabinets

In the heart​ of every home beats‍ the rhythm of daily⁢ life, orchestrated in the⁤ space ⁣where ⁣meals are ⁢crafted and memories simmer–the kitchen.​ The cabinets‌ in‌ this culinary haven bear witness ⁤to the ebb and flow⁣ of family life, often​ demanding a ⁢facelift to​ keep pace with the ‌pulse of ​the home. Enter the world of kitchen cabinets ​spray painting, a transformative process⁤ that⁢ promises⁢ to breathe ‍new life into weary ‍woodwork,⁣ offering ⁢the gleam of rejuvenation to⁣ the ‌most frequented room in ⁤the ⁤house. Yet, ​as many ⁤homeowners ​stand at the​ crossroads of innovation, a dilemma whispers from⁣ the ‍shadows of the pantry:‌ to embark‌ on the adventurous path ⁣of do-it-yourself ⁤(DIY) or to entrust this ‌transformative journey to the steady ⁢hands of a ⁣professional.‍ In this article, ​we’ll‍ artfully strip away ​the‌ layers ‌to reveal‌ the pros and cons of‌ both approaches, helping you‍ discern⁤ the best route for your ‍kitchen cabinets’⁣ forthcoming revival. Whether you’re wielding the⁤ spray ‌gun with the⁢ pride of a DIY maestro ⁣or seeking the finesse of a skilled⁤ artisan,​ the quest for a picture-perfect kitchen is a tale as timeless as the recipes passed down through generations.

Table of Contents


The Art​ of Transformation: Choosing ⁣Between DIY and Professional‌ Kitchen Cabinet⁢ Painting

Embarking on⁢ the ⁣journey of ⁤rejuvenating your kitchen cabinets presents you with a ​choice‌ that feels as‌ weighty as selecting the perfect ‌shade of ‍white⁢ –⁣ should you⁣ brandish the paintbrush yourself in⁤ a‍ testament to DIY spirit, or entrust ​your culinary haven ⁤to the steady hands⁢ of a professional? To steer you⁤ through‌ this decision-making‌ labyrinth, let’s explore the‍ merits and challenges associated with ⁢each approach.

DIY Kitchen Cabinet Painting: For the DIY enthusiast, the allure of‍ undertaking cabinet painting is ‍as rich as a well-applied finish.⁣ The benefits⁢ are numerous:

  • Cost Efficiency: ⁤Often less expensive⁢ than hiring professionals,⁤ the DIY ‌path ‌can⁢ lead‌ to significant savings if ⁢you’re comfortable with ⁣your skills.
  • Personal ⁢Satisfaction: ​There’s an unparalleled joy in standing‍ back ‌and admiring your handiwork, knowing each stroke‍ reflects ‍your personal effort.

However, such‍ an endeavor is not without⁤ its pitfalls:

  • Time​ Investment: DIY ‌projects may extend over several weekends, testing your ⁣patience and ⁢schedule.
  • Risk of ⁤Mistakes: Without ⁢professional⁤ experience, the risk of errors‍ in ⁢application⁣ and finish ⁣can lead to less than ⁢desirable results, or worse, a do-over.

Professional Cabinet‍ Painting: On the flipside,​ professional⁤ cabinet painters bring a wealth of⁤ expertise to the table (or to the counter, if⁢ you will). Their approach offers:

  • Pro⁢ Grade Equipment: With⁢ access to⁣ top-tier tools and sprayers, professionals achieve‌ an even, durable finish.
  • Time Efficiency: Experts can complete ⁣the job ​in a ‌fraction of the time it would ‍take a DIYer, ⁢minimizing disruption ‌to your daily life.

However, ‌enlisting the pros comes ‌with considerations:

  • Higher Cost: The price tag for such skilled labor is understandably⁤ steeper, but ⁣for many, the investment equals peace‌ of mind.
  • Less Control: ⁢While ⁤professionals handle ⁤the⁤ nitty-gritty, those who revel in⁣ the DIY process may ⁣miss the intimate ⁣connection with the​ transformation.

Aspect DIY Painting Professional Painting
Cost Lower Higher
Time Taken Longer Shorter
Risk Level Higher‍ (Mistakes) Lower (Expertise)
Satisfaction Personal Achievement Professional Finish
Control Full Less (Relinquish to‌ Pros)

Whether you decide to ‍wield⁢ the brush yourself⁣ or⁤ call in the cavalry, ⁤the right⁣ path is one that aligns with your time, budget, and personal preference. Remember, the art​ of ‍transformation is not just about a fresh coat of‍ paint but also about the ​experience and ‌satisfaction⁣ derived from the process itself.

Unveiling the Appeal ‌of​ DIY: When ⁢to Pick Up the ​Spray Gun ​Yourself

Unveiling the Appeal of DIY

So, the kitchen ⁤cabinets are looking a bit drab, and ‍you’ve got that‌ itch—a⁣ desire to spread your creative wings and ⁢take‌ control ⁢of ‌the transformation. Picking up a spray gun​ yourself can be empowering. It’s the ⁢Saturday morning of‌ home improvement; brimming with potential and that infectious, can-do spirit. There’s something to be ⁤said‍ for the satisfaction⁣ that comes from executing‌ a vision with your own hands—brushstrokes and all. Tackling spray ⁤painting on your own offers a ‍myriad of advantages:

  • Cost ⁣Reduction: Professional services ​come with professional fees. ⁤Going DIY slims down your expenses to materials and tools.
  • Complete ⁢Control: Every ‍inch of the ‌finish‌ is yours to command, from ​the choice of paint color and texture ‌to ⁢the thickness ⁢of each ⁤coat.
  • Flexibility: Work on your⁢ own timeline. Take ‌a break, blast ⁢your⁤ favorite playlist, ‌and ‌wear your pajamas—no‌ one will know.

However, ⁣what glistens under a‌ coat ⁤of primer may not be gold. Taking on the task of spray painting kitchen cabinets⁤ is not without its potential pitfalls. It requires‌ patience, preparation, and a bit of skill ⁤to achieve that professional sheen. Missteps can be costly, both in ⁣time and material, and can lead to results ⁢that‌ are less than satisfactory. Consider these ‍ drawbacks:

  • Learning ‌Curve: ‌If you’re not already handy⁢ with a⁣ spray gun, expect a few hiccup—err, paint drips—along your journey to a⁣ flawless finish.
  • Equipment Investment: To do the job ‌right, you’ll need ‍more ⁣than just paint. ⁣Ensuring you have the⁢ right ⁣tools⁢ can add to your ‍upfront costs.
  • Time Commitment: ​ Unlike professionals who can⁣ breeze through ⁤with experience,⁣ your ​DIY project might need more⁢ dedication and leisurely weekends‍ than anticipated.

Attribute DIY Professional
Cost Lower Higher
Control Complete Limited
Time Spent Longer Shorter
Finish Quality Variable Consistently High
Skill Level Required Moderate to High Not Applicable
Equipment Needed Purchase/Rent Provided

In the battle of the brush ⁢and the can, ‍deciding to take up arms yourself‌ or to enlist the services⁣ of a painting ⁤squadron is a matter of weighing the ​pros against the cons. If you’re ‌up for the challenge,⁤ DIY spray painting​ can be a deeply personal‌ and rewarding endeavor. Just remember to strap on⁤ that paint‍ mask tight—it’s going to be​ a colorful ‍ride!

As you embark on the journey to⁤ refresh your kitchen⁢ ambiance, the call of spray⁢ paint can be enticing. One must ⁣weigh‍ the ‍choice between grabbing those cans for a ‌DIY weekend project or bringing in a squadron​ of ⁤professionals​ to tackle ⁤your cabinetry. Here lies a craft ‌demanding more than just a steady hand and an eye for color -​ **precision spraying** is a ‍must for that‌ flawless,‍ factory-like ⁢finish. The world of‌ DIY painting welcomes the⁣ dauntless​ with the promise of a personalized touch, ​but the devil is in the⁢ details.

With DIY, there’s room‍ for flexibility and a sense of pride in one’s creation. However, the list of **challenges** is⁢ not ⁣short:

– **Consistency of Application**: Achieving even coats and the correct thickness require ⁤practice.
– **Equipment and Environment**: Proper ventilation and high-quality sprayers are non-negotiable for a ​professional look.
– **Time Investment**: Preparation,‍ painting, and curing take ‌significant time; a rushed job⁢ is a ⁢recipe for⁤ disappointment.

In contrast, entrusting your kitchen’s transformation to the pros brings‍ its⁢ own set‍ of ‍**advantages**:

– **Skillful Execution**:⁤ They‍ come armed with the expertise and proper techniques.
– **Advanced Equipment**: Professionals have access to top-tier‍ sprayers and employ ‍methods that mitigate⁢ overspray.
– **Assured ⁤Quality and Efficiency**: Jobs are completed swiftly with⁢ a guarantee of durability.

DIY Approach Professional Touch
Creative⁣ Control Quality Assurance
Potential ⁣Cost Savings Speed‍ and Convenience
Sense of Achievement Professional-grade‍ Equipment
Risk of ‌Imperfections Guaranteed Expertise

However, the **drawbacks** of professional services cannot ‍be⁣ shrugged off:

– **Cost**: Arguably the most significant ‍obstacle, ​professional painting can be a considerable ⁣financial commitment.
– **Scheduling Constraints**: ⁢The timeline​ is at the mercy of someone else’s schedule.
– **Less Personal Involvement**:⁤ Some may find‌ the hands-off ​approach disappointing,‍ missing ‌out on the ⁢DIY​ learning experience.

Each choice spins a unique web of pros and cons. Whether it’s the empowerment of ‍DIY ⁣or the serenity that comes ​with professional reassurance, ⁤your kitchen ‍awaits its ⁤next ⁤chapter. ⁤Ponder these nuances, for they hold ‌the power‌ to ​uplift or undermine ⁤your spray painting quest.

Cost Considerations: Weighing Your Wallet ⁢in ‌the​ DIY versus Pro‍ Painting Arena

Embarking on a kitchen cabinet transformation involves a⁤ critical ⁢look at your budget. In the DIY‍ corner, you can‍ hear‍ the coins clinking in your pocket as⁣ the ⁢foremost ‌advantage is cost ‍savings.⁤ Typically, aside from the ⁣spray paint, ⁢you’ll need to invest in primer, sealant, and perhaps a reliable ‍spray gun if you don’t already⁤ own ‌one. Below is a breakdown of potential costs:

  • Primer: $20 ​- $30
  • Paint: $30 – $50⁣ per gallon
  • Topcoat/Sealant: $20 -⁤ $40
  • Spray ⁤Gun Rental/Purchase: $20 – $100 (rental per day)⁣ or $70⁢ – $200 (purchase)
  • Supplies &‌ Misc.: $50 – $100 ‍(tape, cleaners, sandpaper, etc.)

However, expenses can ⁢spiral if‌ multiple coats or unforeseen complications ⁢arise, not​ to mention the value of your time spent laboring on the task.

Switching to the professional league, costs ‌are higher upfront⁤ but come with the peace of mind that includes expertise, guaranteed outcomes, and often⁢ warranties. The investment​ goes⁢ beyond just buying paint; it’s ‍a transaction for skill, ‌equipment, and the‍ luxury of being hands-off. Here’s a comparative table with indicative‍ pricing:

Service Cost ‍Range
Professional ​Painting $1,000 – $3,000+
Longevity & Quality Assurance Included
Time Commitment 0 Hours ‌(Your Time)
Warranty Varies

Factor in the likelihood ⁤of‌ a professionally done job ‍lasting​ longer with potentially more ​premium materials and​ you may⁤ save more in the long⁤ run, despite⁣ the ‌initial heftier sum.​ The⁢ old adage stands‍ true: sometimes, you need to spend⁣ money to ‍save money.

Finish Finesse: Ensuring Longevity and Aesthetics⁢ in Your Cabinet ‌Makeover

When breathing‌ new life into your ⁤kitchen cabinets, the final touches you ⁣apply can⁢ drastically influence both their visual appeal ‌and ⁣durability. Spray painting ‍ your cabinets might sound straightforward, ⁢but robust protection against the daily kitchen activities ​and a⁤ flawless‍ finish require more than just a paintbrush or a visit to ‌the paint ⁣store. Opting to ⁣go DIY or hiring ⁤a professional merits consideration on several ⁤fronts.

For those wondering about the merits‌ of DIY spray‍ painting,‌ it offers the satisfaction of ‌personal accomplishment⁣ and⁢ may be ⁣easier on the purse strings. However,‌ unless you have a⁣ steady ​hand and experience, it may ⁢be⁣ challenging ‍to achieve that silky-smooth finish. Consider these⁤ points:

  • Cost-Effective: You’ll save on labor costs, ‌which can be ⁤significant.
  • Personal Satisfaction: Completing a project on your own can lead to‍ increased satisfaction ⁣with ⁣your living space.
  • Risks ⁣of Imperfection: ⁤Without professional equipment and experience, drips and⁤ uneven⁣ coats ⁢are more likely.
  • Time Commitment: Prepping, painting, and cleaning ​up will demand ⁢a ‌substantial amount of your time.

Investing in a professional spray painting service, ‍meanwhile, brings a level of expertise that significantly impacts the end result. ​Professionals ​are equipped with advanced tools and techniques‍ to deliver a uniformly coated, durable finish. Let’s consider the pros and cons of⁢ professional​ services⁣ as summarized in ⁣the following table⁣ with a touch of WordPress styling for ‌clarity:

Advantages Disadvantages
Quality Finish Higher Cost
Professional Equipment Potential for Overlooked​ Personal Preferences
Quick Turnaround Need to Vet Contractors
Durability ⁣Guaranteed Less Involvement in Process

Professional service might require a bigger budget but offers peace ‍of ⁣mind regarding the finish’s longevity and aesthetics, taking off the pressure and letting you‍ focus ⁢on other home⁢ projects or relaxation.

Final Verdict: Recommendations for Making the Best Painting Choice ⁣for⁢ Your​ Kitchen Cabinetry

When you reach the crossroads of deciding between picking up a brush yourself or calling ⁣in a ⁣professional to spray ⁣paint your kitchen cabinets, ⁢it can be tough to weigh the pros and ⁤cons.‍ However, ⁤the right ‌choice hinges on your expectations,​ skill​ level,‍ and budget.

DIY Approach: If you’re ready⁢ to roll up ‌your sleeves and take on the project, the ‍DIY route‌ could⁢ be⁢ for you. This ⁢option is typically⁤ more cost-effective and gives you complete control over the project timeline. Plus, there is a sense of pride that comes with transforming your space with your own two ​hands. ​However,⁣ remember that it ⁢requires a significant time investment and your ‌final result may not⁣ have that‌ professional ⁢finish ⁤- inconsistencies in paint ​application and coverage are common pitfalls.⁤

Aspect DIY Consideration Professional Consideration
Cost Lower upfront, potential for extra due to mistakes Higher upfront, ‍less ​likely to incur‌ additional‌ costs
Time Flexible, ‍but lengthy Quicker, but requires scheduling
Finish‌ Quality Varies​ based on skill Consistently high-quality

Professional Spray Painting: On the other hand,⁤ hiring a professional team will ​almost guarantee a sleek, even finish with ⁣the durability ⁢to‍ match. You’ll benefit from​ their expertise, high-quality equipment, and the ability to sit back and relax⁤ while the ⁣work ⁣is done ‍efficiently. But ⁢this comes ⁣at a premium cost‌ and you ⁤may have​ less ⁣flexibility in‌ project‌ timing.‌ When ⁣it comes‍ down to making the final call, consider how much you value your time and the importance of a‍ professional finish.

Whether you decide on a DIY ⁤adventure or a professional makeover, ⁤ensure you choose the right paint and primer for⁢ your kitchen cabinets—this will affect the durability and look ⁤of your‍ paint⁤ job. Lastly, ⁣while the ​DIY route can be alluring⁢ in⁣ terms of‌ savings, never underestimate the ⁣long-term value⁣ a professional touch ⁣can‍ bring to your home’s‌ heart. Choose wisely and​ your kitchen will thank‌ you with a ​fresh look that stands the‌ test of time.

Q & ​A

Why might someone consider DIY spray‍ painting for their ⁤kitchen cabinets?

DIY, or ⁤Do-It-Yourself, projects can be an appealing option ⁤for many ⁣homeowners, and spray‍ painting your kitchen‍ cabinets can ‍be a ‌rewarding‌ venture. Here​ are some reasons why some might go the DIY⁢ route:

  • Cost Savings: You avoid professional labor costs, ‌which can⁣ be considerable.
  • Personal Satisfaction: Completing⁢ the job yourself can provide a ​sense of accomplishment.
  • Control: You have full ​control over the timeline and methodology of your project.
  • Customization: DIY ‌lets you ⁢experiment with colors and finishes⁢ that you may not find with standard professional options.

What are the ⁣downsides of DIY spray painting kitchen cabinets?

While DIY spray painting can seem⁢ advantageous, there are drawbacks to consider:

  • Time⁤ Investment: It can be⁣ a ⁣time-consuming process, ⁤often taking⁣ longer than ⁢anticipated.
  • Skill Level: Without the proper experience, results⁢ might not be ‍as professional-looking.
  • Equipment: Purchasing or renting the right equipment‍ can⁤ be ⁣expensive.
  • Risk of Mistakes: Mistakes⁣ can ⁤be costly in terms ‌of both materials and time.

What are the benefits of hiring a ⁤professional for spray ‌painting kitchen⁢ cabinets?

Bringing in an expert can ​streamline your kitchen makeover, with several benefits to consider:

  • Quality Workmanship: ⁣ Professionals bring experience and​ skill ​to ‌the​ job.
  • High-Grade Equipment: They use ‍industry-grade ‌sprayers for ‍an even, durable finish.
  • Swift Completion: Pros can complete the job quicker due to their expertise and focus.
  • Guaranteed ‌Service: ⁤ Most professionals offer a guarantee⁤ for​ their work.

Are​ there ‍any disadvantages to professional spray painting services?

  • Cost: Professional services are generally more expensive than DIY.
  • Less Involvement: You have less ‍hands-on ⁢involvement in‌ the ​process.
  • Scheduling: ⁣ You ​may⁣ need to work⁤ around ​the professional’s schedule.

Could you provide a cost comparison of⁣ DIY versus‌ professional spray painting?

Certainly, here’s⁤ a simple‌ table⁢ showing a‍ basic ‍cost comparison ​between DIY and ‍professional ⁣services:

Cost ⁣Type DIY Professional
Materials​ &‌ Equipment $100-$500 Included​ in service
Labor Your time $500-$2000
Time to ‌Completion Variable Typically faster
Guarantee None Often included

What⁢ tips can experts share for those who ⁤wish to attempt DIY spray painting?

Experts would ⁣likely recommend the following ‌tips for a successful‍ DIY project:

  • Preparation is Key: Clean and sand your cabinets thoroughly before painting.
  • Invest in Quality Paint: It can make ⁤a significant difference ‌in durability and finish.
  • Practice ⁢Makes​ Perfect: ‌ Try your‍ technique⁣ on a piece of ​cardboard first.
  • Stay Safe: Ventilate your space well⁤ and wear protective gear.

Can a ⁢professional finish​ be achieved with DIY methods?

While challenging, ​a professional finish ​is ‌possible​ with DIY‌ methods if ⁣you’re meticulous. Here are several factors to ensure⁢ a finer finish:

  • Detailed Surface Prep: ​ The ⁢surface must be ​properly ⁤prepared and primed.
  • Quality Tools and Paint: Don’t skimp on the quality ⁤of your equipment and​ materials.
  • Plenty of Patience: Rushing the ⁢job can lead to a less-than-professional finish.
  • Learning Curve: Be⁢ prepared⁣ to learn⁣ and adapt your technique as you ‍go.

Closing ⁤Remarks

And so we reach the end ‌of our ⁣colorful journey,⁣ having brushed up against the pros and cons​ of the‌ DIY approach and the professional finesse in the world of kitchen cabinet makeovers. Whether you’re a hands-on homeowner with an eye for detail⁢ and‌ a passion for personalized projects, ⁤or you ⁢prefer to lean ⁤back ⁣and let the skilled ⁤hands of⁣ an expert ⁣craftsman ⁢transform your⁢ culinary space, the choice ultimately resides within⁤ the ‌bounds of ⁤your needs, desires, and circumstances.

In the DIY realm, the satisfaction of self-accomplishment lingers sweetly, ⁣along ‍with‍ the perks ⁢of cost-saving ⁤and the liberty​ of‌ timing. Yet, the caveats of time ‌investment perhaps, uneven finishes, ​and the⁤ learning curve associated with ⁣the do-it-yourself⁤ approach can be ​deterrents ‍for‍ the faint of heart or⁢ the time-strapped ‌individual.⁢

On⁢ the flip side, ‌the ‍realm ‌of professional spray painting offers a glossy world of expertise, durability, and‌ an unmatched‍ level ‌of polish that can only come from years of honed ⁣skill. It’s a stress-free ticket to exceptional results—though ‍one must be prepared ⁢to invest​ a​ bit more financially and ‍relinquish personal control over the⁣ process.

Your kitchen cabinets stand at‍ the crossroads between‍ practicality and artistry, yearning for a touch of refreshment. Weigh ⁣the scales of personal⁤ involvement against‌ the allure of professional ⁣quality. ​Whichever⁣ path you ⁢choose, let your vision for ⁤your home’s ⁣heart guide you⁤ to the right ⁤choice. May⁣ your kitchen’s transformation be⁤ as rewarding as ⁢the memories you will create within its ⁣newly revived walls.

As we close ⁣the cabinet ​doors on this discussion, remember that ‌the true essence of any ⁢home improvement project is⁢ the ⁤joy and ​fulfillment it brings ​you. Happy painting!

Transforming Your Kitchen: Before and After Spray Painting Cabinets

Introduction:

Picture the heart of ‌your home—your ⁣trusty kitchen—currently‌ clad in cabinets that whisper ​tales of ⁢bygone⁢ styles or the marks of ​time’s relentless march. Now,‌ envisage awakening those silent⁤ sentinels with a symphony of color and texture,⁣ all through the alchemy of spray painting. This​ is not just a makeover; it’s a renaissance of your culinary sanctuary. Kitchen cabinets spray painting, a humble ​yet transformative art form, ⁤can whisk away the old and welcome a stunning new ⁣era for your kitchen’s aesthetic without the upheaval of a complete renovation.

Embark on an inspiring journey with us as ⁣we delve ‌into the world of kitchen revitalization. ‌We’ll chronicle the adventures of cabinetry that has ‌undergone the ​remarkable transformation​ from​ tired and faded to vibrant and⁣ renewed—all⁢ with ⁤the swish and‌ finesse⁤ of ​expertly applied spray⁤ paint.⁢ With meticulous preparation, a keen eye for ‌color, and a touch of professional skill, we will reveal how the ordinary can ‌become extraordinary.

As we set the stage for this transformative tale, remember that every cabinet, ⁤every kitchen, every swatch of paint has ‍a story waiting to⁣ be told. Let’s explore the before and after of kitchen cabinets‌ spray painting, and how it ‍can turn ⁢the pages‌ of your kitchen’s story to an exciting new chapter of form, function, and beauty.

Table of Contents


Assessing⁤ Your Kitchen’s Potential:‌ The Pre-Painting Audit

Before diving⁤ into the ​transformation journey, it’s imperative to do a thorough ‌evaluation of your kitchen space. The⁣ state of your current cabinets will dictate the ‌preparation and materials needed, ensuring a flawless finish.‍ Start by inspecting each cabinet surface for wear and tear such as chips, warping, or water⁣ damage. This initial scrutiny helps in identifying areas that require extra attention or repair before the painting ‌process ⁤begins. Additionally, assess the hinges and hardware;‌ they might need​ a refresh or replacement to match ‍your new aesthetic. Here’s ‍a checklist to⁣ guide you:

  • Surface⁤ Condition:⁣ Look ⁤for damage, peeling, or cracks.
  • Hardware Integrity: Check if handles and knobs are outdated or⁤ loose.
  • Cleanliness: Ensure cabinets are free of grease and dirt that can affect paint adhesion.
  • Material: Identify if your cabinets are wood, laminate,⁤ or ‍another material.

Next, consider the practicality and functionality ⁤of your kitchen space. Will ‌the new color ⁢scheme enhance the room’s brightness, or do you need to incorporate additional ‌lighting? Use a table to outline the ⁢proposed changes ‍and their⁣ impact‍ on your kitchen’s overall feel. Here’s an example ​of‍ how​ you ‌can⁤ visually organize ‌your pre-painting audit findings:

Aspect Current State Post-Painting Goal
Color Brightness Dull and dated Lively and radiant
Hardware Worn out Modern​ and sleek
Lighting Inadequate Improved and ⁢layered
Space Efficiency Cluttered Optimized and spacious

Paying attention to these details sets ⁢the stage for a stunning kitchen revival​ that not only looks good​ but functions beautifully for daily use. The audit is a vital step that shouldn’t be overlooked if⁢ you’re aiming ‌for that remarkable ‘before and after’ transformation.

Choosing Your Palette: Tips for Selecting Cabinet Spray ‌Paint Colors

The heart of your home deserves a palette ⁤that not only reflects your⁢ personal style but also complements the functionality and mood of the space. When⁣ selecting⁣ the right hue⁢ for ​your cabinet spray⁤ paint, consider the ambiance you‌ want to achieve. For a ‍bright and airy feel, lighter⁣ shades like eggshell or muted pastels can open up the space. If you’re looking to create a cozier⁤ atmosphere, opt for deeper tones such as navy or forest green. Keep in mind that the color will interact with the light throughout the⁣ day, so think about the ⁢natural and ⁢artificial lighting ⁤in your kitchen.

Complementing your countertops and backsplash is another element to ‌consider.​ Here’s​ a quick guide:

  • Neutral⁤ Countertops: Feel free to‍ play with color! You can go bold with your cabinets or ⁤keep it sleek‌ with‍ shades ‌of gray or blue.
  • Patterned Backsplash: Choose a color from‍ the pattern as your guide. A ‍monochromatic scheme ⁤can also‍ work wonders.

Before finalizing your decision, test out your top ‍color choices. ⁢Purchase ‌sample cans and create large swatches on ⁢a section of your cabinets or on a spare ‌piece of wood.‍ Live with‍ them‍ for ‌a few days, ⁢observing how different lighting conditions⁣ affect ⁢the‌ appearance.

Sample ⁤Color Mood Setting Ideal For
Whispering Ivory Bright ⁤and Welcoming Smaller Kitchens
Misty Aqua Calm and Soothing Kitchens with Natural ⁤Light
Spiced Honey Warm and Inviting Open Concept Spaces
Slate ‍Grey Modern ⁣and Sophisticated Larger Kitchens with Stainless Steel ‍Appliances

The⁤ Prep Work Manifesto: Getting ⁢Your Cabinets ‌Ready for Transformation

Before⁤ you witness⁣ the breathtaking reveal ‌of a kitchen made anew, let’s roller-coast through the twists​ and turns of pre-painting cabinet‌ preparation. It’s not just about picking a paint ⁢color;‌ it’s about laying the groundwork for a flawless finish that’ll have your cabinets⁢ screaming “chic”⁢ louder than a runway at Fashion Week.

First, equip yourself ⁤for success. Clear your cabinets of‌ their‍ contents—**every spice jar and cereal ⁢box** must vacate ​the premises. Next,‍ give your cabinets a thorough cleaning; we’re talking soap, water, and maybe a dash of ⁤elbow‍ grease to banish‌ years of ⁣kitchen sins. This isn’t just tidiness, it’s crucial; your paint⁤ needs a squeaky-clean canvas‍ to ⁢adhere to. ⁤Moving on, unscrew and remove‍ hardware. Keep screws and ‍hinges organized—ziplock bags‌ are your friends here—as you’ll need them post-transformation. Ready for sanding? ⁤It’s time to smooth things over—literally. Sand away imperfections with a fine-grit⁣ paper, then ⁣wipe down with​ a tack cloth ​to ensure not ⁤a speck of dust ⁢remains⁣ to spoil your masterpiece.

Now, let’s get down to ⁤details—the tape​ measure is your​ ally. Protect your walls, ⁣countertops, and floors with precision; **painter’s tape** is your shield against stray sprays. Lay down drop⁤ cloths for ⁣an extra layer⁢ of defense⁤ because, let’s be honest, gravity‌ has a way with drips.‌ If ⁢your kitchen is‌ a⁢ stage, ‍then lighting, too, needs to ⁤be spot on. Good lighting isn’t just⁢ ambiance; it’s a necessity for even paint application. And finally, but no less pivotal, is primer—your unsung​ hero. A coat or two ensures⁤ that your new color doesn’t play second fiddle ⁤to the old one peeking⁢ through.

Take a ‍glimpse at​ the table below for a quick checklist that‍ sums up the genesis of your cabinet ⁣transformation:

Task Tools Details
Clean Cabinets Soap, water, sponge De-grease and cleanse
Remove Hardware Screwdriver, bags Label &⁢ store
Sand Surfaces Fine-grit sandpaper Smooth finish
Tape Off Areas Painter’s tape Protection from paint
Prime Surfaces Primer Base coat
Inspect Lighting Lights, bulbs Ensure ⁢visibility

Steeped in these rituals ⁢of readiness, your kitchen cabinets will be primed for​ the‍ beauty that is to come.⁣ Epoch-making ‍transformations aren’t born from lackluster prep work; let’s ⁢do the groundwork and watch as your kitchen becomes ⁤not just a room,‌ but a revelation.

Going Beyond Color: Advanced Techniques for a Professional Finish

Mastering ⁢the art of‍ cabinet transformation goes beyond the mere selection of colors. To achieve a truly professional finish when spray painting⁣ your‌ kitchen cabinets, one must employ advanced techniques that elevate the end result.‌ Grain filling is one such technique, especially crucial⁣ when working ‌with‌ wood cabinets that have an open grain. By ⁤applying ‌grain filler before painting, you ensure a super smooth finish that’s‍ free from the textural imprints of the wood’s‍ natural pattern. This extra step may ⁣take more time but the flawless outcome is worth the effort.

Another game-changer in the quest ⁢for perfection is the use of ⁤ high-performance ⁤sealants. After⁣ meticulously ‍spray⁣ painting your cabinets to the desired⁤ hue, sealing them with a top-quality ⁢clear coat not only protects the ⁢paint from the ⁣wear and tear of kitchen life but also adds a luxurious sheen that resonates with ⁢professional workmanship.⁣ To guide your product choice and application technique, consider the table⁢ below, showcasing⁢ the comparison between matte, satin, and high-gloss finishes.

Finish‍ Type Durability Visual Impact
Matte Medium Subtle, Modern
Satin High Balanced Luster
High-Gloss Very High Reflective, Dramatic

Whether​ opting ⁤for a ⁤muted elegance or a bold statement, the final sealant ⁤dictates not only the look but the longevity‍ of your cabinet’s fresh‍ coat. Combining grain filling with strategic ‌sealant selection manifests a professional and lasting finish—setting the scene for the⁤ most⁤ stunning⁢ of kitchen transformations.

From Drab to Fab: A Glimpse into Stunning Kitchen Makeovers

The once lifeless kitchen spaces are⁢ now brimming ‍with charm, ⁤all ⁢thanks ⁣to the ⁤power of⁢ spray ‌painting ⁢cabinets. The transformation ⁣is more than just a⁢ paint job;⁣ it’s a complete rebirth of‌ the room’s aesthetic. Imagine opening ⁤your eyes​ to cabinets that were⁢ once ⁣a dull, ‍forgettable hue, now ⁢radiating with‍ a ⁢sleek ⁤and contemporary finish. Whether opted for a velvety matte or a glossy sheen,⁣ the‍ result is undeniably remarkable. Here’s⁢ a peek at ​what was achieved with a simple yet impactful makeover:

– **Revitalized Color Palette**: From a faded ‍yellow that screamed outdated, to a​ sophisticated charcoal that exudes modern luxury.
– **Smooth Finish**: Gone are the⁣ days of the wood grain texture, replaced with a flawless, smooth surface that’s ​both beautiful⁤ and easy to clean.
-​ **Hardware Update**: With the paint rejuvenated,⁢ original hardware seemed out of place, so it was swapped⁣ with sleek, modern handles and⁣ knobs that transformed the ​look completely.

In ⁢addition to these visual elements, there’s ‌also the functionality that improved significantly. ​Take a‌ look at this concise table demonstrating the before and after of ‌the organizational aspects:

Feature Before After
Storage Efficiency Cluttered Shelves Optimized Dividers
Cleanability Difficult due to ⁤texture Wipeable Flat Surfaces
Visibility Poorly lit Under-Cabinet ‌LED lighting

The‌ cabinets have now ‌become a seamless blend of form and function. The subtle⁣ shift in layout, alongside strategic ‌placement‌ of new lighting,⁤ brings forth a kitchen that is not only pleasing to ⁤the‍ eyes but also magnificently efficient.​ Who knew ⁣that such a simple ⁤switch⁣ could lead to a⁢ heartening episode of culinary bliss? The‌ answer lies in this‍ extraordinary fusion ⁤of ⁣artistry and practicality that has unleashed kitchens from the shackles of mediocrity.

Q & ⁢A

Why should someone consider⁤ spray painting their kitchen cabinets?

There⁣ are several compelling reasons to choose spray painting for your kitchen cabinets. Here are a ⁢few:

  • Durability: ⁢Professionally sprayed cabinets ‍are more durable and less prone to chipping compared to brush-painted ⁤cabinets.
  • Smooth Finish: Spray painting gives you a smooth, brush-mark free finish that truly⁤ rejuvenates the look of your kitchen.
  • Cost-Effective: ⁤It’s ‌a more ‍affordable⁤ alternative to ⁢a complete kitchen remodel or‌ replacing all of⁤ your cabinetry.
  • Quick Transformation: This⁣ method is generally faster, meaning you can⁤ enjoy ⁢your new kitchen aesthetic ‍sooner.

What preparations should be done before spray painting cabinets?

For ​the best results, it’s important to⁢ properly prepare your cabinets ‍for spray painting. Here’s what you need to do:

  • Cleaning: Begin ‍by thoroughly cleaning all surfaces ⁤to⁣ remove grease and grime.
  • Sanding: Sand the cabinets lightly to ‌help the primer and ⁣paint adhere better.
  • Priming: Apply⁢ a primer⁢ to ensure the paint⁤ sticks ⁢and to provide a uniform surface.
  • Protecting: Make sure ‍to‍ cover surrounding areas​ to protect from overspray.

What type ​of paint and equipment ‌is​ recommended for cabinet⁢ spray ⁤painting?

The​ type ⁢of paint and equipment you ⁢use can greatly affect the ​outcome of your ‌project. Professionals typically‌ recommend:

  • Paint: High-quality ⁢acrylic or oil-based ​paint formulated for cabinetry.
  • Sprayer: An HVLP⁢ (high-volume, low-pressure) sprayer for a fine, even ​coat.
  • Other Materials: Quality primer, tack cloths, and masking tape​ for preparation and ⁣finish.

Can​ spray painting kitchen ​cabinets increase home value?

Yes, updating your kitchen cabinets with ⁢a⁢ fresh coat of paint can significantly improve⁤ the overall appearance‌ of‍ your kitchen, thus potentially increasing your home’s value. Aesthetics play a‍ major role in home valuation, and an improved kitchen can be a major selling point.

Do I ​need a ‍professional to spray ‍paint my ⁢kitchen cabinets or can I DIY?

While DIY is an option, hiring a professional offers numerous advantages:

  • Quality: Professionals have the expertise, equipment, ‌and techniques to deliver a top-notch finish.
  • Time-Saving: An expert can complete ⁢the job faster⁤ and‌ with greater efficiency.
  • Longevity: ⁤A professional ⁤job often lasts longer, requiring fewer touch-ups over time.

If⁤ you’re someone who is quite handy and has experience with spray​ painting, you might consider​ a DIY ⁢project. However, for most, the benefits ‌of a professional’s touch outweigh⁢ the satisfaction of DIY.

What is the estimated cost for spray painting kitchen cabinets?

The ‌cost can vary widely ​depending on several factors such as the ⁤size of your kitchen,⁣ the condition of your cabinets, and the type of paint used.‍ Here’s a basic cost outline:

Size of Kitchen Estimated Cost Range
Small $1,000 – $3,000
Medium $3,000⁢ -‍ $5,000
Large $5,000 ⁢- $7,000+

For a more accurate⁣ quote, ⁣it’s best to consult with local professionals who⁣ can​ assess your specific situation.

How long will ⁤spray painted cabinets last before needing ​a touch-up or repaint?

With proper preparation and high-quality materials, professionally spray painted ⁢cabinets can last​ 10 to 15 years before ⁣requiring a touch-up or fresh ​coat. The longevity of⁢ your cabinets will⁢ also depend on their usage and how well they are⁢ maintained ​over the years.

What are ‌some post spray painting ​care tips to ensure the ⁣longevity of the cabinets?

To ⁤keep your newly spray painted cabinets looking ⁤great, follow these care tips:

  • Gentle Cleaning: Use a soft cloth and mild‍ cleaner to avoid scratching the paint.
  • Avoid Moisture: Wipe up spills immediately and‍ avoid ⁤using excessive water ‌when ​cleaning.
  • Use ​Protective Liners: ​ In ‌cabinets and drawers, use​ liners to ​prevent scratching and ‌damage.
  • Regular ⁤Maintenance: Check for signs of wear routinely and address them promptly.

Final Thoughts

As the final brushstrokes fade into the background and the ‌aroma of fresh paint lingers in the air, it’s clear that the⁣ journey from the mundane ⁢to the magnificent can be as‍ simple as ‌a can of ⁤spray paint. Your kitchen, once a relic of bygone styles, now stands​ boldly as a testament to transformation—its ⁤cabinets revived and ⁤invigorated with vibrant color and a newfound zest.

As we draw the curtain‍ on this tale of reinvention, let‌ the stunning before⁤ and after visuals of your kitchen cabinets serve as a beacon of​ inspiration for all your future home improvement endeavors. May the transformative power‌ you⁣ harnessed⁣ through spray ⁤painting lead you to discover ⁢the untapped potential ⁤lurking in every corner of your⁣ dwelling.

We’ve ​explored the preparations, ⁣techniques, and meticulous touches that make such a metamorphosis​ possible. Now, with your kitchen gleaming as a‍ centerpiece⁤ of innovation and style, walk forward with the confidence that the heart of your home beats stronger and more stylishly⁢ than ever.

Remember, every artistic journey begins‍ with ⁤a‍ single stroke, and your culinary sanctuary⁢ has just begun⁣ to tell‍ its new story. May your freshly painted cabinets be⁣ the canvas upon which countless memories will be crafted, and may every glance at⁢ their ‍lustrous surfaces remind you of the joy that lies in the power of transformation.

Thank you for allowing us to guide ⁢you through the striking​ evolution of your kitchen​ cabinets. As⁤ you​ close this ​article, may you carry ⁣with ⁣you the creative​ spirit‍ that ‌stirs⁤ within, beckoning you ever ⁤onward to your next home project adventure.

How to Achieve a Professional Finish When Spray Painting Kitchen Cabinets

Introduction:

Imagine ⁢stepping‌ into a kitchen where the cabinets gleam with such a‍ flawless finish,‌ they could have‍ been⁤ plucked straight ⁣from the glossy​ pages​ of ​a home design magazine. This ⁣is ⁣the power ‍of a professional spray-painted finish – a ⁤transformative‌ touch that infuses elegance into the heart of your home. But⁤ achieving this ⁢level⁤ of perfection doesn’t require the magic touch ​of a professional hand. With ‍the right ⁣techniques, ​tools, and a sprinkle ​of patience, kitchen ⁤cabinets spray painting can ⁢elevate your⁣ culinary haven to a⁢ realm of refinement and style.

In this‍ article, ​we‌ will embark on​ a journey to ⁣demystify the nuanced art of​ kitchen‌ cabinets⁤ spray painting. From⁤ the ​delicate⁢ preparation of surfaces to the final⁣ graceful movements of the spray‌ gun, ‍we’ll take you through ‍each meticulous step towards attaining that covetable professional⁣ finish. Whether you ⁢are looking to rejuvenate ⁢dated cabinetry or customize your kitchen’s palette ⁢to match your unique taste, the secrets ⁣to a stunning​ transformation are​ at your fingertips. Prepare to arm⁢ yourself with ⁤the insights needed to turn your kitchen into a masterpiece of do-it-yourself prowess and‌ visual‍ delight.

Table ‍of Contents


Understanding the Basics of⁤ Spray⁢ Painting Techniques

Spray painting⁤ your kitchen cabinets can breathe new‌ life into your ⁤kitchen, transforming it into a space that‌ feels brand new. ⁢To ⁢start, you’ll ⁤need ​to master a few core ‍techniques that ⁤professional painters use to achieve ⁣a smooth⁤ and even finish. The key is in the preparation ​and the application. Begin by ensuring that all cabinet​ surfaces‌ are clean,⁣ sanded, and free of any grease or dust.‌ Then, when you’re ready to⁣ paint:

  • Adjust ‍and⁣ Test: Before you aim ⁢the nozzle at your cabinets, fine-tune the spray gun’s settings on a⁤ piece of cardboard. ⁤Tweak⁣ the​ pressure ​and​ spray⁣ pattern until you achieve⁣ consistent coverage with minimal overspray.
  • Motion Matters: Use a steady, sweeping motion as ​you spray, keeping ​the nozzle⁣ an even distance from the surface. This will help avoid drips⁤ and uneven layers. Overlap each ​pass by about 50% to⁤ ensure full coverage without⁤ heavy buildup.
  • Layering ⁣It Right: Light coats are your ⁣friend. Aim for several thin layers rather ​than one thick one. This⁤ method reduces ‍runs and allows for quicker drying times,⁤ making for⁤ a⁣ more professional finish.

As you progress, ‌maintaining a ⁣consistent technique is ​just as crucial as ⁤the preparation work. ​Each layer should be⁢ applied with the‌ same care and⁢ attention to detail as the last. Below is⁤ a brief table capturing the essence of the process:

Stage Task Tips
Prep Cleaning,⁣ Sanding Imperfections will‌ show through⁣ the ​paint, so be‍ thorough
Primer Foundation layer Essential⁢ for smooth adhesion and color truest
Topcoat Application of paint Several⁣ thin ‌coats ⁣are better than one⁣ thick coat
Finishing Drying & Reassembly Let paint cure fully before ⁣reassembling

Remember,‍ spray painting is​ as much about patience and technique as it ⁤is about ‌the⁢ right equipment. Take‌ your ​time at each stage, and you’ll be ⁤rewarded with cabinets that look ‍as‍ though⁣ they’ve‌ been finished by a seasoned pro.

Selecting‍ the Right Primer‌ for a Flawless‍ Foundation

Before you unleash your spray painter and revive those tired cabinets, the secret lies ⁢in⁣ the undercoat. A top-quality primer will ensure your kitchen cabinets not only look professional but also‍ last through the daily⁣ opening and closing, the steam from your‌ morning⁢ coffee, and the inevitable ‍splatters from your latest culinary exploits. ​Begin with a clean surface, free of grease and dust, and then choose a‍ primer that suits your cabinet’s material.⁤ Whether you’re dealing with wood, MDF, or metal,‌ there’s a specific​ formula designed ‍to create ⁣the perfect​ canvas for your paint.

  • Wood Cabinets: ⁤Opt for‍ an ⁤oil-based or a ⁤shellac-based ⁤primer. ⁢Both ⁤are excellent at sealing⁣ the wood ​and providing ​a solid base for ‌the ​topcoat.
  • MDF Cabinets: A water-based primer works best⁢ here, as it ‍prevents‌ the fibers from swelling and smooths out​ the surface.
  • Metal‍ Cabinets: ‌Consider using a primer that prevents rust, ensuring the durability and longevity of ⁢your paint job.

Consult the table ‍below that simplifies​ the selection process, linking the type of cabinet you’re‍ updating with the⁤ recommended primer to​ use:

Type of Cabinet Recommended‍ Primer Qualities
Wood Oil-based or ‌Shellac-based Sealing, ⁣Durability, Smooth Finish
MDF Water-based Non-swelling, Smooth Surface Prep
Metal Rust-preventative Durable, Rust-resistant

Preparation is⁣ pivotal in painting,‍ so don’t skip ⁢on ​quality or compatibility. And remember, allowing the⁤ primer to properly dry ‍and cure‍ before ​applying your‌ color coats is just⁢ as critical⁣ as the primer selection‌ itself. Follow the manufacturer’s recommended drying times​ for the best​ results, ensuring you’re on your⁢ way ⁤to a professional‍ finish.

Mastering the Art of the Spray: Technique and⁢ Equipment

Achieving the‍ Perfect Stroke

Nailing the technique ⁢for spray painting can be the ‍difference⁤ between ⁢a bumpy finish and silky-smooth cabinets. Start with⁣ the basics – keep the spray nozzle‌ about 6 to 8 inches away ​from the surface and ⁤maintain this distance consistently. Motion is‍ key; ‌always keep ​your arm moving in a steady, horizontal motion, overlapping each ⁤pass by​ about⁤ a third to avoid ⁢striping. Practicing ⁤on ‌a​ piece of‌ cardboard can help you master your movement before you take on‌ the ⁤cabinets. Remember, multiple thin​ coats trump⁣ a single ‍thick⁢ layer – ​patience ​is‍ your ally here.

Adjusting the⁣ pressure is another‍ crucial aspect. Too high, and ‍you’ll‌ get a⁢ rough texture; too low, and you’ll‌ have drips. Always test⁣ your settings on ​a practice⁤ surface before proceeding. Use a​ progressive spray‍ technique: start spraying before the stream hits the surface and release after you’ve passed the edge ⁣to prevent buildup at the ends. Aim for uniform coverage, and let each‌ coat dry thoroughly.

The Right Equipment Makes All the Difference

  • High-Quality Sprayer: Investing ‍in a ⁤professional-grade sprayer is paramount⁣ for a ⁣flawless finish. HVLP (High Volume Low Pressure) sprayers are a ⁤popular ‌choice‌ due to their efficiency and control.
  • Appropriate Tip Size: The nozzle tip ⁣size ‍should‌ suit the viscosity of your paint. Use ​a smaller tip for thin⁢ paints⁢ and a larger one for thicker materials.
  • Proper⁣ Filtration: Always use a filter when​ filling your sprayer to eliminate ⁤contaminants that could clog your equipment or​ mar your finish.
Essential Spray Tip Sizes for Different ⁤Materials
Material Tip Size ‌(inches)
Stains 0.009 – 0.013
Lacquers/Sealers 0.013 – 0.015
Oil-Based Paint 0.015 – 0.019
Latex‍ Paint 0.017 -⁣ 0.021
Primer 0.021 – 0.025

Once you have the right sprayer and tip, it’s ‌time to⁢ don your safety gear. Never neglect goggles, masks, and gloves – spraying can ‍be a messy job and‌ the fumes are no joke.‍ Finally,‌ a well-ventilated workspace is not just⁢ comfortable, it’s crucial for the safety‍ and curing of your paint. ​If you can’t ‌ventilate the area, consider using a respirator designed for⁣ paint fumes.

Layering Paint Like a Pro:⁢ Timing⁣ and ​Application⁣ Tips

Transforming ‌your kitchen cabinets with ‍a ⁤fresh coat of spray paint can be a truly rewarding DIY project. However, achieving that seamless, professional finish hinges on your ability ⁣to ⁤master the artistry of layering paint. ⁤If​ you’re new⁣ to ‌this, don’t fret—I’ve got you covered with some fool-proof timing ⁢and application tips ⁤to ensure⁢ your kitchen cabinets come out looking like they ⁣were gussied up ⁤by ⁣a seasoned pro.

The ⁤secret to professional-looking⁤ cabinets lies‍ in ‌the fine balance of patience and precision. Start with a meticulously‍ prepped ⁢surface; cleanliness and⁣ a smooth base are paramount. Once your cabinets​ are prepped and ready, consider the‌ following guidelines:

  • Thin Layers: When spraying, opt for multiple thin coats rather than one thick layer. This avoids drips and ensures even coverage. Begin with a‌ light primer coat to aid the paint’s​ adhesion, followed by your chosen color.
  • Timing Between Coats: ‌ Allow each coat to dry according ​to the manufacturer’s ⁤recommendations—an average⁣ of​ 15-30 minutes for touch-dry is typical, but thorough drying can take longer.‍ Remember, rushing can ​lead to‌ tackiness​ and visible flaws.
  • Final Coat: After ⁣the​ last color⁤ coat, a protective clear⁣ topcoat is‍ recommended for durability and that‌ luxurious, gleaming finish. Ensure the final layer is perfect, as it seals your hard work.

During this‍ transformative process, keep an ⁢eye on‍ the environmental conditions. Humidity ‍and temperature can significantly impact drying times ⁢and the final finish. The below table provides a ⁤snapshot of ideal⁤ painting conditions:

Condition Ideal Range
Temperature 65 – 75°F (18 – 24°C)
Humidity 40% – 70%

Remember to work in a ventilated space and keep consistent with your spraying technique—maintain a ⁣steady hand⁢ and a ⁣smooth, side-to-side motion. The distance between ⁤the nozzle and the surface should be steady, typically around⁤ 6-8 inches. With these pro tips at your fingertips, your ‌kitchen⁣ cabinet makeover is guaranteed to be ⁤not ​only successful but spectacularly polished!

The Final ​Touch: Ensuring Durability with Top Coats⁢ and Finishes

Upon completing the meticulous ​process of spray painting your⁣ kitchen cabinets, protecting your​ hard-earned ⁣masterpiece ‌is⁢ crucial.​ The final step—applying a top coat‌ or finish—is the⁢ unsung hero of ​durability and​ resilience. ⁢This defensive​ layer shields your cabinets from the ⁣scratches, dings, and everyday wear that can tarnish‌ their ⁣appearance over time. ‌Think of it as the invisible, protective armor​ for your cabinetry.

Firstly,⁢ you‍ must ‍select⁣ the appropriate type of⁣ finish for your kitchen environment. Options generally fall⁢ into two categories:

– ‍ Water-based polyurethane: This ‍eco-friendly choice emits fewer odors and volatile organic ‌compounds (VOCs), which makes it safer for indoor application. It’s also known for maintaining ⁤the true color of the paint over time, resisting yellowing.
Oil-based polyurethane: ⁤Renowned ‍for its ​robust layer of protection, this ‍variant adds a⁢ warm‍ amber ⁤glow to your cabinets ⁢but can be accompanied ​by a stronger odor ‌and ‍higher levels of ‍VOCs.

Once you’ve honed in on the⁤ right finish, applying it correctly ensures the ⁤longevity of your paint job. Use ‍these steps for a seamless ⁢application:

1. Prepare your workspace: Ensure ​good ventilation and use protective gear such as gloves and a‌ mask.
2. Apply thin⁢ coats: Use a high-quality synthetic brush or‍ a sprayer to apply ​thin, even ⁢layers of the ⁤topcoat. This ⁢helps prevent drips and allows for ​quicker ⁤drying times.
3. Sand between coats: With a fine-grit sandpaper, ​lightly sand the surface after each coat has dried to achieve​ an ​ultra-smooth finish.
4. Allow adequate drying ⁣time: ‍ Patience is paramount—give each layer enough time to dry⁣ fully before applying the next.

For a quick⁣ reference, here’s a comparison table using​ the standard WordPress ​table classes:

Finish Type Pros Cons Drying Time
Water-based ​polyurethane Eco-friendly, non-yellowing Less durable than oil-based 2-3 hours per coat
Oil-based polyurethane Highly durable, adds warmth Stronger odor, longer drying time 6-8 ⁤hours ‍per coat

This table could ‌serve as a guide when deciding on the right finish ​but remember that real-world application might vary⁢ based on ⁣brand, environmental factors, and⁣ the specifics ⁤of⁣ your ⁢cabinet ⁤material. With these⁤ final touches of⁢ finesse, your transformed kitchen⁢ cabinets⁣ will not ⁣only shine with ⁢professional-grade ⁤quality but also⁤ stand the test⁣ of⁢ time, ⁤radiating their‌ beauty for years ​to ⁤come.

Q ‍& A

Why is spray painting a preferred method for kitchen cabinets?

Spray painting is ‌often⁢ chosen for kitchen cabinets because it provides⁤ a:

  • Smooth Finish: ⁣ Eliminates ⁣brush or roller ‍marks ​for a⁤ sleek look.
  • Even Coat: Uniform application, even on ⁣intricate designs and grooves.
  • Time-Efficiency: ⁢Covers large areas quickly compared to ⁤traditional⁣ methods.
  • Durability: ‌Professional⁣ spray paints are typically more durable and resistant.

What preparation is necessary before spray painting⁤ cabinets?

Proper⁣ preparation ‌is crucial for‌ a⁤ professional finish:

  • Clean ​Surfaces: Wipe all surfaces to remove ‍grease and dirt.
  • Sand: ‍ Lightly sand to help the paint ⁣adhere better.
  • Remove Hardware: ‌Take off handles, knobs, and hinges.
  • Protect ⁣Surroundings: Use masking tape ⁤and drop cloths ‌to⁢ protect walls ‍and countertops.
  • Prime: Apply a quality⁣ primer suited for the material ⁢of⁢ the⁤ cabinets.

What⁤ type of paint should be used when spray⁤ painting kitchen cabinets?

Select‍ a paint that is:

  • High-Quality: Invest in commercial-grade paint for durability.
  • Appropriate Sheen: Semi-gloss ⁢or satin finishes ​are typically‌ preferred⁢ for‌ kitchens.
  • Oil or Acrylic: Based​ on expert⁤ recommendation, considering the cabinet’s material and desired durability.

Can ⁤you​ outline ‌the steps to achieving a professional spray paint finish on cabinets?

Step Description
1. Prep⁢ Work Perform thorough cleaning, sanding, ‍hardware⁢ removal, and area protection.
2. Priming Apply a smooth⁢ coat of primer, suitable for ⁢the cabinet’s material.
3. Sanding (Again) Lightly sand the primed surface for ⁢a flawless ⁤base.
4.‍ Painting Apply multiple thin coats⁢ of spray paint,⁣ allowing sufficient drying time between ‍coats.
5. Finish Inspect for any ‌missed spots or uneven areas, and ⁣touch⁢ up if necessary. Seal⁤ with‍ a clear⁢ topcoat for protection, if⁣ desired.

What safety measures should ⁣be taken⁣ when‌ spray⁤ painting cabinets?

Safety during the process ​is essential:

  • Ventilation: Ensure the working⁤ space is ‌well-ventilated to avoid⁢ inhaling ⁣fumes.
  • Protective ‌Gear: Use masks, safety glasses, and gloves.
  • Fire Safety: Keep paint and related materials away from heat sources and flame.
  • Follow Instructions: ⁣Always read and adhere ​to the paint‌ manufacturer’s safety guidelines.

Can ​a DIY enthusiast achieve a professional finish, or should they hire an expert?

While a DIY​ enthusiast can achieve⁤ a good ‍finish, a professional comes with:

  • Experience: Knowledge of materials and techniques.
  • Equipment: Access to commercial-grade tools ‌and paints.
  • Consistency: Expertise ⁢leads to‍ even, durable⁢ results.
  • Warranty: ​Some professionals ⁣offer service warranties.

If quality and long-term durability are priorities, ​hiring an expert is advisable for the best results.

What maintenance tips⁤ are there for newly spray-painted ⁤cabinets?

To⁣ maintain⁤ the‌ lustrous finish:

  • Regular⁣ Cleaning: Wipe surfaces with a gentle cleaner; avoid‌ harsh chemicals.
  • Immediate ‍Spill Cleanup: To prevent staining or damage ‌to the⁢ finish.
  • Touch-Up ⁤Kit: Keep leftover paint for easy touch-ups as required.

What​ is ⁤the cost of ⁢hiring⁣ a professional to spray paint kitchen cabinets?

The cost ⁢may vary ‌according to:

  • Size of ​Kitchen: The number and‌ size ⁤of‌ cabinets ‍will affect the price.
  • Material and ⁢Condition: Different materials and the pre-existing condition of ​the cabinets can impact cost.
  • Location: ‍Prices can‌ vary depending⁢ on regional labor rates.

For an accurate estimate, it’s best to consult with⁣ a few professionals and obtain detailed quotes.

Final Thoughts

As ‍our exploration ⁢of the fine art of spray⁢ painting⁢ kitchen ⁢cabinets draws to a close, we are left ⁣with ⁢a kaleidoscope of tips and⁤ techniques swirling in our minds like the finest mist⁤ of paint. Armed ​now ⁢with the knowledge of the‌ right‌ tools, the nuances of preparation, and the precision required for that flawless professional finish, your kitchen awaits ​its transformation. The path to mastery is splattered with the promise ⁤of a bespoke‍ culinary ⁣haven that ⁤reflects your dedication to ​craft⁢ and style.

So, embrace the symphony ​of hissing nozzles and the choreography of steady hands and‍ even strokes. Let the anticipation of the⁢ reveal fuel⁢ your focus as ‍you‍ apply each layer with⁣ confidence,‌ ensuring every corner gleams with​ your effort ⁢and attention to detail. May the cabinets you’ve‌ lovingly rejuvenated stand as a ⁤testament to your skill,⁤ each opening and closing a ​whisper of the artistry bestowed upon them.

Remember, perfection lies⁤ not only​ in the outcome ‍but also in the⁤ journey of creation. With ‍patience, practice, ⁣and a⁣ dash of creativity, ‍the cabinets you’ve envisioned⁣ will‌ materialize before your eyes,​ layer by delicate​ layer, until your kitchen is ⁢no longer just a place of⁢ meal preparation but ⁢a⁣ gallery ⁢of your⁤ own craftsmanship. ‌

Step back,⁣ admire your work, and bask in the glow of a​ job brilliantly executed. Your kitchen now speaks volumes of elegance—a⁤ professional finish that’s⁢ well within reach, achieved through the knowledge you’ve‌ harnessed and the passion⁤ you’ve poured into‍ every press of the nozzle. ‍Until ​our next creative encounter, may your ‍hands be steady, your coats‌ even, and your results nothing short of spectacular.

The Essential Guide to Priming Kitchen Cabinets Before Spray Painting

Imagine you’re about the embark on a culinary symphony, but instead of orchestral instruments, your kitchen cabinets are your ensemble, waiting‍ for their cue to shine⁤ anew. Picture the smooth, ⁣flawless⁤ finish ⁣of freshly sprayed cabinets setting the stage for your kitchen’s revival. Yet, a successful encore demands meticulous preparation. This is where the critical act ⁢of priming takes ‌center stage.

Welcome to the world of transformation where the Essential Guide to Priming Kitchen Cabinets Before Spray Painting awaits‍ you. This guide serves as your backstage‍ pass to the techniques and secrets that ⁢ensure a performance⁢ worthy of a⁣ standing ovation ‌for your kitchen‍ overhaul. Whether you’re a DIY maestro or​ a novice tuning up for your first performance, understanding​ the art of priming will elevate‍ your kitchen cabinets from functional storage to ⁤stunning showpieces.

Join⁤ us on this ⁣enriching journey as we delve into the ⁣harmonious balance between science and art, ensuring that your kitchen cabinets’ spray ‍painting is not merely a fleeting intermission,⁤ but an enduring overture to your home’s beauty and functionality.

Table of Contents


Preparing Your Workspace: The Foundation for ‍Flawless Spray Painting

Before diving ⁣into the transformative act of ‌painting, take a crucial moment to transform⁢ your workspace into a temple of organization and efficiency. It’s a space where every tool and material has its ‍place, poised for action. Entering such⁤ an arena, you’ll ‌find ⁤yourself not just prepared, but propelled by your environment to achieve pristine and even coats on every inch of your ⁣cabinets.

Clean and Clear: The Preliminaries

First and foremost, cleanliness is ⁢next to flawlessness ⁣when ⁣it comes to ⁤prepping ⁤your painting area. Begin ​by thoroughly cleaning the space. Remove any dust or debris, as these unwelcome⁢ guests could cling to your freshly sprayed surfaces and ⁢invite imperfections. Once ‌clean, ⁣proceed to clear everything non-essential from the area to ensure⁤ freedom of movement and minimize potential contamination.

  • Dedicate a shelf or table to organize your painting tools and⁢ materials.
  • Keep a‍ clean, damp rag handy for unexpected spills or splatters.
  • Use painter’s tape to⁢ cover any immovable objects that might be subject to overspray.

Streamlining Efficiency: The Set-Up

Now,‌ let’s layout the sacred ground. Tools and ⁢materials should be​ positioned for streamlined access; ⁤the less time you spend searching for what you need, the more⁣ focused you’ll be on the task at hand. Utilize​ mobile tool carts ‌or portable caddies to keep everything within arm’s reach, and consider the‌ workflow—arrange​ everything in the order it​ will be used.

Tool/Material Location
Primer Left​ table edge
Spray​ Gun Top of ⁤tool cart
Cleaning ‌Solvent Bottom shelf, tool cart
Protective Equipment Designated safety station
Painter’s Tape and Paper Near the spray‍ area

With⁣ this temple of creation now⁤ set, the foundations are laid for the transformation⁤ your kitchen cabinets are about to ⁤undergo.

Selecting the Right Primer for Your⁤ Kitchen Cabinets

Embarking ⁤on a spray painting journey for your⁣ kitchen⁤ cabinets begins with the pivotal choice of primer. This undercoat is crucial ‌as it forms a foundation that ensures your topcoat adheres smoothly and lasts⁤ longer. Picking the ideal primer depends on the material of your ⁣cabinets and the type ⁣of paint you intend to use. If your cabinets⁤ are crafted from wood or veneer, an oil-based primer is immensely effective due ⁢to its filling properties which minimize the grain’s visibility. ⁣Conversely, if you’re⁢ working ​with ⁤ laminate surfaces, a shellac-based primer makes a reliable pick, adhering to ⁣the slick surface ⁢and preventing ⁢the paint ‍from peeling off.

Here’s a quick⁣ guide to narrow down your primer options:

  • Oil-Based⁢ Primers: Rich in adhesion quality, splendid for wood cabinets, and great for a high-level ​finish.
  • Latex Primers: Eco-friendlier and easier to clean up, yet⁣ may raise the grain of the wood, ⁤requiring additional sanding.
  • Shellac Primers: The gold-standard for blocking stains and odors and perfect for laminate and previously painted surfaces.
  • Hybrid Primers: Combinations of oil‍ and latex​ that offer a middle ground‌ with good adhesion and⁣ easier cleanup.

Additionally, consider the⁢ color of your primer. A tint closer to your topcoat color can deepen the color​ saturation and‍ reduce the number of coats required for full coverage. Look ⁢closer at how these ‌primers​ match up with different cabinet materials‍ using the ⁤following table,‌ styled with ⁤ the WordPress table class ⁣”wp-list-table widefat⁤ fixed ⁢striped”:

Primer Type Best Used On Odor Level Drying Time
Oil-Based Wood, ​Veneer High Longer
Latex Most Surfaces Low Shorter
Shellac Laminate, ‍Stained Surfaces High Moderate
Hybrid Versatile Use Moderate Varies

By aligning your primer selection⁣ with the specific requirements ⁤of‍ your cabinetry, ‍you set the stage for a flawless and durable finish. Now that you’re equipped ⁤with the knowledge of ⁤which primer pairs ⁣best with your cabinets, you’re one step closer to achieving that picture-perfect kitchen aesthetic.

The Step-by-Step Process ‌to Prime Cabinets Like a Pro

Transforming⁤ your kitchen cabinets doesn’t require ⁣a magic wand—just a⁤ bit ‌of elbow grease and the know-how to prime ⁤them to perfection.⁤ Begin by ‍conjuring up ‍a smooth, clean surface: remove ​doors, drawers,⁢ and hardware. Then, ⁢levitate any grease​ or grime away by scrubbing every nook ‌with a degreasing ⁤agent. Once dry, it’s time to make any imperfections disappear by⁣ filling ⁤holes or dents with wood putty and sanding the​ cabinets until they feel as smooth as glass. A‌ tack cloth works wonders as your final act to banish dust, leaving behind ‌a pristine canvas ready for your priming prowess.

With your cabinets ⁢prepped, it’s⁢ time to wield your⁤ brush—or ‌roller—with confidence. Before you do, ⁤make sure to protect your countertops and floors with​ drop cloths; even wizards of the spray‌ can make mistakes. Now, ​ apply a coat of high-quality primer designed for⁢ the type of cabinets you⁢ have—be it wood, laminate, or metal. Use long, even strokes, or roll in one direction to avoid ⁣summoning unwanted texture. ‍Once your first magical layer is complete, allow it ​to‍ dry completely. Depending on ​your potion—er,⁣ primer—of⁢ choice, consult ⁤the drying ⁣time ⁢instructions vigilantly. A second coat ⁢may be necessary for optimal coverage, repeating the ‍same patient ⁣and precise technique.⁤ Remember: The key to a smooth ⁤finish lies​ in the‍ bewitching⁣ combination of​ patience and precision.

Pro Tip: For the ultimate⁤ enchantment, consider lightly sanding ‍between primer ​coats once dry. This abracadabra act with fine-grit sandpaper keeps the ​surface‌ spellbindingly smooth and ensures maximum adhesion for your topcoat.

Troubleshooting Common Priming Problems for a Superior Finish

Even the most seasoned DIY aficionados can encounter hiccups when priming kitchen cabinets.‌ If⁤ you find your primer not adhering properly⁤ or you’re encountering an uneven texture, it’s crucial to step back and troubleshoot. One common remedy to adhesion issues is to ensure that your‌ cabinets‍ are pristinely clean. Remember, any grease, dust, or residual cleaning agent can impede ⁢the adhesion of primer. Use a degreaser and ‍follow up with a ‍clean water wipe-down for‌ an ⁣impeccable surface. If you’re facing ‍texture problems such as streaks or brush marks, consider⁣ the application tool. ​While brushes can leave marks, foam‌ rollers or HVLP (High⁢ Volume Low Pressure) ⁣sprayers offer a smoother finish.

In certain cases,⁣ you may discover that the ‍primer isn’t drying to the hard, durable surface you’re expecting. Temperature can play a ⁢significant‌ role here. Primers typically require an optimal temperature range for curing, usually between 65​ and ‌75 degrees Fahrenheit. ​Check the product label for specific guidance, and if‍ needed, adjust the room temperature accordingly. ⁤Another troubleshooting​ tip is to inspect the ‍primer consistency.⁣ If it’s too thick, it may not⁤ level out properly on‍ the surface. You can thin oil-based ⁤primers with a suitable solvent, as directed by the manufacturer’s instructions, for a consistent application.

Let’s take a‌ look ‌at a​ quick reference table to summarize some potential priming ‍pitfalls and their ‍quick fixes:

Issue Potential Cause Quick Fix
Poor Adhesion Inadequate cleaning Thoroughly degrease and⁣ rinse ⁢cabinets
Uneven‍ Texture Wrong applicator Switch⁣ to foam rollers​ or HVLP sprayers
Non-Drying Primer Improper‌ Temperature Adjust room temperature to primer specifications
Thick Application Primer Consistency Thin⁢ the primer following manufacturer’s guidelines

Armed with these insights, you’re now equipped ⁢to tackle the​ priming stage like⁣ a pro, ensuring a flawless base for that ⁤glossy new ‍coat of spray paint. Remember, the extra attention to ​detail during priming‌ will pay dividends when you ‌pull off the painter’s ⁢tape‌ and‍ step back to admire a job impeccably⁤ done.

Finishing Touches: Ensuring Longevity and Durability in ‌Your Cabinet Paint‍ Job

Once the paint has been ⁤sprayed​ on ⁤and your kitchen ⁤cabinets are looking fresh and new,‌ you’re‍ not quite at the finish line yet. Protections and ⁣preparations before you started painting played‌ a significant role, but ensuring the longevity and durability of your paint job is a final,‌ pivotal step. In this phase, you⁢ need ⁤to treat your work as a piece of functional art that demands ⁢preservation. Here are a couple of trusted⁣ techniques to shield your work from the​ wear and ⁤tear of kitchen⁤ life:

Protective Top Coats

  • Apply a topcoat:‌ An appropriate topcoat seals your paint and provides⁤ a scratch-resistant layer. Options vary from matte ⁢to high gloss finishes depending on your aesthetic preferences. Water-based polyurethane is a great choice for a ⁣clear finish that won’t yellow over⁣ time.
  • Be patient​ between coats: For each layer of topcoat, allow it to ⁢dry‌ thoroughly. Rushing this process ​can ‌cause cloudiness or brush strokes to appear, tarnishing ‌the ​sleek look of‌ your cabinets.
  • Practice ‌the right ‍technique: Use a fine bristle brush or a low nap roller to apply the topcoat. This careful application⁤ will ⁤help you⁢ avoid air bubbles and achieve ‍a smooth finish.

Maintenance Tips

  • Regular ⁤cleaning: Use a gentle cleaner and a soft cloth to clean cabinet‌ surfaces. Harsh scrubs and chemicals can strip away the ‍protective ⁤layers, so avoid these.
  • Touch-up paint: Keep⁢ a small⁢ amount⁤ of your paint and topcoat stored away for touch-ups. Even with the most careful use,‍ cabinets can get dinged ‌or scratched. ⁢Prompt touch-ups will keep them looking⁣ new longer.

For a quick guide on ⁤the best ⁤practices for topcoats and cabinet maintenance, here’s a streamlined table to keep‍ handy:

Protection Product Recommendation Maintenance Tip
Top Coat Water-based Polyurethane Gentle cleaner⁢ +⁢ soft cloth
Drying Time 2-4 hours between coats Room for touch-up paint
Application Tool Fine brush‌ or low nap roller Quick, light strokes

With these techniques in your arsenal, your freshly sprayed kitchen cabinets will stand the test ​of time, reflecting your hard work and‍ diligence for years to come.

Q & A

The Essential Guide to Priming Kitchen Cabinets Before Spray Painting

Why is it important to prime kitchen cabinets before spray painting ​them?

Priming kitchen cabinets ⁣is a ‌crucial step in the spray painting process. It ensures:

  • Adhesion: Primer provides a surface to which paint‍ can firmly stick.
  • Uniformity: It creates a consistent base for even paint coverage.
  • Longevity: ⁢A primed surface will help⁤ the paint last longer.
  • Protection: Primer seals the ⁣surface, protecting the‍ wood from moisture and stains.

What ​types of primer ⁤should be used for ‍different cabinet materials?

Material Recommended Primer
Wood Oil-based or ‌shellac-based primer
Laminate Bonding primer
Metal Epoxy primer

How⁣ should the cabinets ‌be‌ prepared before priming?

Before you begin priming, ensure the cabinets are:

  • Clean: Remove all dirt and grease with a degreaser and a sponge.
  • Sanded: Lightly sand the surfaces with‌ fine-grit sandpaper.
  • Repaired: Fill nicks or holes with wood⁢ filler and ‍sand smooth.
  • Dust-Free: Wipe‍ down‌ with a tack cloth to remove sanding ‌dust.
  • Detached: Remove doors, drawers, and hardware for even ⁣coverage.

Can I use a water-based primer on ⁢my kitchen cabinets?

Yes, water-based primers can⁢ be used, especially if you’re looking for a low-odor ‌option. However, make sure it’s suitable ⁤for the material ⁢of your cabinets and​ the type of⁤ paint you plan to use.

How many coats of primer are necessary?

Typically, apply ​ one to two coats of primer. Check the primer’s instructions to determine the⁣ optimal number of coats and ​drying time between applications.

What safety precautions‌ should I take when spray painting cabinets?

When spray ⁣painting, always:

  • Work in a ventilated area: Open windows and doors ‌or use fans.
  • Wear ⁣protective gear: Don ⁤a mask, gloves, and safety glasses.
  • Keep a fire ⁤extinguisher handy: Be prepared for any accidental fires.
  • Cover ‌surfaces: Use ⁢drop cloths to protect countertops and‌ flooring.

Should I hire‌ a professional to prime and ‍spray paint my kitchen ‍cabinets?

If you lack the experience, equipment, or ⁤time,⁢ hiring a professional can ensure a high-quality finish. ​Experts can also offer advice on ‍colors and finishes‌ to complement your kitchen’s style.

In Retrospect

As we draw‍ the curtain ⁣on our colorful journey through the essential guide ⁣to⁣ priming kitchen cabinets before spray painting, ⁢it’s time to ⁤step back and envision the transformation that awaits your culinary‍ space. Like the skilled artist diligently ‍preparing their ⁣canvas, you’ve equipped yourself with⁤ the ‌knowledge to lay the foundation for a masterpiece. Your cabinets, once mere wooden sentries, are primed to blossom under the misty ⁤veil of ​paint that will soon envelop them.

Remember, patience and precision are the true ‍companions to your undertaking. Do not hasten the process, for the art of rejuvenation is as much about the⁣ preparation as it is about the final stroke ‍of color. ‌With your primer‍ perfectly applied and your methodology‍ carefully honed, the stage is set for ⁣the spray paint to dance across ⁤the​ surfaces⁤ of your cabinets.

As you set​ forth, sprayer in hand, ⁣may your motions be guided by the assurance that your ⁢diligent prep work has ​set the scene for a⁣ lasting finish. ‌May the cabinets you revitalize serve as a testament to the‍ meticulous care you’ve invested.⁤ And as ⁢the fresh paint settles and the new-look kitchen emerges, may you take pride in the knowledge that beneath every expertly applied layer lies the silent sentinel of⁣ a job well done—your primer.

We wish you all the success in your‍ kitchen cabinet makeover, and we hope this guide has illuminated the​ path to creation that lies within ⁤the cans of primer and paint awaiting ⁤your ‌command. Go forth and rejuvenate with ⁤confidence, knowing that⁣ the perfect canvas you’ve prepared will result in​ a finish‍ that is not only beautiful but enduring.

As always, safety is paramount and joy resides in the journey. Happy painting! ‍

How to Spray Paint Cabinets: A Tutorial for Beginners

Spray painting⁤ your kitchen‌ cabinets⁤ may sound like a‍ formidable ⁣task to ‍the uninitiated—it’s a journey ​laden with the⁢ promise of‌ transformation and⁣ a touch of ‌trepidation. Imagine peering into the ​pioneering ​world​ of⁤ home improvement, where⁣ a simple action can breathe new​ life into a space ⁣that is ⁢often the heart of the home. Kitchen cabinets,⁢ those ⁢silent ⁢guardians of ​your ⁤culinary tools and treasured snacks, stand ⁤on the cusp of reinvention, all⁢ with ⁤the power ⁤of spray paint.

Embarking on the quest ​to revitalize your cooking​ haven does not ⁣require the ‍skills of a seasoned ‍craftsman ⁤or ‌the budget of a ‌lavish remodel. All it ⁤takes​ is an eager ⁢spirit ready to‍ learn ‍the ropes of‌ kitchen cabinets spray painting—a‌ skill ⁤that is both art and science.

In this ⁣tutorial designed​ for beginners, we’ll guide you ⁤through the sweeping motions of the spray paint dance:‍ a ⁣choreography of preparation, execution, and‌ finishing touches.⁣ By‌ the end of⁣ this ‌journey,⁢ not only ⁢will‍ your​ cabinets wear a⁢ new coat with pride, but you’ll‌ also ​stand ‌back with ⁢a sense of accomplishment, beholding a kitchen reborn ⁤through the ​mist of paint particles, all thanks to the can in your hand and the ⁤creativity in your heart.

Table of ⁢Contents


Preparing Your Cabinets for ⁣a Flawless Finish

Embarking on ⁤the journey of ⁢repainting your ‌cabinets‌ calls⁢ for meticulous prep work to ensure⁤ a seamless ‍and durable finish. The transformation begins with a thorough cleaning.​ Start ‍by removing ‌all hardware—hinges,​ handles, and knobs—setting them aside, or⁢ plan to update these pieces as well to complement your fresh, new look. Next, use a degreasing cleaner to wipe away years ‌of ⁤kitchen grime. ⁣This⁢ step is crucial; ‌any‍ lingering oils ⁤or dirt can⁣ prevent⁣ your new paint‍ from adhering correctly.

Once your cabinets are squeaky clean, it’s time ⁢for a bit of elbow grease. Smooth the surfaces by sanding with⁣ fine-grit sandpaper ⁤or a sanding block. Remember to sand in‌ the direction of ‍the grain to avoid unsightly scratches. ‍After the sanding is complete, remove all dust ‍with a tack cloth or a ⁣damp rag—our goal is a spotless canvas for​ the paint.​ Now, if⁤ any repairs are necessary, such ‍as filling ‌nail holes ‌or correcting blemishes,⁢ use‌ wood filler⁢ and sand again once it’s dry. These extra steps pave the way toward a flawless finish, where every detail matters.

  • Remove all cabinet hardware
  • Thoroughly⁣ clean⁤ surfaces ⁤with⁤ a degreaser
  • Sand surfaces using fine-grit sandpaper‌ in the direction ⁤of the‌ wood grain
  • Wipe down all surfaces with a​ tack cloth ⁢to remove dust
  • Repair ‍imperfections ‌with wood filler and sand again ⁢once dry
Step Material/Tool Action
1. Degreasing Cleaner Clean
2. Sandpaper (Fine-Grit) Sand
3. Tack ​Cloth Remove Dust
4. Wood Filler Fill and Repair

Choosing the Right Spray Paint ⁢for Your Cabinets

When ‌venturing into the realm of DIY cabinet transformations, ⁤the ⁢plethora of paint‍ options ⁣can make your head spin ⁣faster than a carousel.⁤ Fret not,⁢ as your⁣ choice boils down⁢ to two key factors: durability ‌and finish. Your kitchen acts as the heart of your home, where‌ cabinets endure frequent ​assault ‌from grubby​ hands, moisture,​ and heat.​ Therefore, **oil-based** spray paints are valiant warriors, resistant ⁣to such‌ foes but demand a well-ventilated ⁢battlefield due to their strong odor. On the svelte end,‌ **water-based** (latex) ⁣spray paints, while‍ not​ as tough as their oil-based counterparts, ⁤provide ‍easier cleanup and a quicker drying time, befitting the impatient artist.

For those ‌seeking⁢ a sleek, modern‍ sheen, the ⁣**high-gloss** finish will be your companion, ⁢reflecting light⁢ magnificently‌ and allowing⁣ easy stain wipe-downs. If​ you’re on ⁤the quest​ for a middle ⁤ground,⁢ **semi-gloss**‍ or‍ **satin** ⁢finishes offer a ⁤subtler ⁣reflection while⁣ still permitting sanitation. Should your​ taste⁤ lean toward the concealed ‍charm of imperfections or the ⁢soft ‌touch of antiquity, **matte** paint ⁣plays⁤ this role to⁢ perfection but be forewarned, it may require a ⁢tad more elbow grease when cleaning time​ comes. Below⁤ is a‍ table featuring‍ a curated selection of spray ​paints suitable for the budding home improver:

Brand Type Finish Drying Time
Rust-Oleum Painter’s Touch Oil-based HIGH-GLOSS 20 min to touch
Krylon ColorMaster Water-based SATIN 10 min to touch
Behr Premium Plus Water-based MATTE 30 min ‌to‌ touch
Montana Gold Acrylic-based SEMI-GLOSS 15 min to touch

Remember ‌that⁢ choosing the right spray paint will be the ⁣cornerstone of your project’s ⁢success. ‍Opt for⁢ a brand that ⁢has proven⁤ its mettle‌ in the cabinet ⁤refinishing⁣ arena and don’t cut ⁣corners on quality. A flawless, lasting finish on cabinets begins with the perfect can ⁣of paint. Happy spraying!

Mastering ​the Technique: Spray Painting Made Easy

Understanding ​how ⁢to wield your paint delivery ⁣device effectively⁣ can‍ make or break the‌ finish​ of your freshly coated cabinets. Begin by **practicing your technique on⁣ scrap material** before ‌committing to your​ actual cabinets—consistency is key!‍ When you’re ready to ⁣start, hold⁣ the spray can or gun **about 6-10 inches away from the ⁢surface**‌ and use ⁢a **steady, sweeping motion**, ⁢moving ⁣across the surface ​at a ‌consistent ⁤pace. ‌Aim ​for each pass to overlap the previous one by about a third to‌ ensure full coverage without heavy buildup. It’s crucial to avoid⁣ lingering in one spot, as this can cause the paint to ⁣run⁢ and create an uneven finish.

Proper preparation ⁢and execution are the hallmarks of⁢ a successful project, and when it comes to spraying, **controlling the environment** is part of the secret. ⁢Dust, debris, and wind can ruin a ⁤perfectly good finish, so work in a **clean, well-ventilated ‍area**,‍ and when possible,⁤ indoors. ⁣Humidity and temperature can⁣ also affect the drying process, ‌so aim for ⁣a day with a **relative ⁤humidity below 50% and⁢ temperatures between 65-85°F**. Here’s‍ a ⁢quick reference⁢ table ​for setting up your workspace:

Parameter Specification
Distance from‌ Surface 6-10 ⁢inches
Motion Technique Steady,⁣ Sweeping
Overlapping Passes 1/3 Previous⁤ Pass
Workspace Cleanliness Dust and ‍Debris-Free
Ventilation Good Airflow, Indoors Preferred
Temperature ⁢for ⁣Painting 65-85°F (18-29°C)
Humidity <​ 50%

Remember to respect the drying times for both your primer and paint. Rushing the process‍ can lead to a less-than-satisfactory finish and potential peeling in the ‍future. Allow each coat to **dry completely** before applying ⁤the ​next, and be patient—it ⁢will be worth it for the professional-looking results!

Ensuring Long-Lasting Results with​ Proper Sealant Application

Applying a sealant is the protective ⁤armor for⁤ your newly spray-painted cabinets, safeguarding against ‍scratches, wear,‌ and the inevitable kitchen spills. Think of ​it as the invisible shield that‌ will maintain the vibrance and ⁢durability of your efforts. ⁣To start, select a sealant​ that complements your paint type; ‌water-based‍ polycrylic for water-based paints and oil-based​ polyurethane for ​oil-based‍ paints. Use a high-quality synthetic‌ brush or a ⁢low nap roller ‌to apply the sealant. Start with a thin coat, ensuring full coverage with smooth, even⁢ strokes to minimize ⁢brush‍ marks and bubbles.

After the first coat has dried, which typically takes about two hours, assess the surface for imperfections. If you find any dust nibs or brush strokes, lightly sand the surface with ‍a fine-grit sanding sponge‌ and wipe‌ it‍ clean with a‍ tack cloth. ⁣Then,⁣ apply a second coat following the same ​method. Wait for another couple⁤ of hours, and repeat the ⁢process if necessary. Below is​ a handy table to keep track of your work:

Task Tool Coat Drying Time Sanding
Apply Sealant Synthetic⁣ Brush/Roller 1st 2 Hours No
Inspect ⁤& Sand Sanding ‍Sponge 2nd 2 Hours Yes
Repeat ‌if Needed Synthetic Brush/Roller 3rd 2 Hours As Needed

Maintaining a ‌dust-free​ environment during​ application not only aids ‌in achieving a flawless finish but also extends⁣ the life‍ of the⁤ sealant. Make sure to let ⁤each coat cure completely before ⁣adding the next, as⁢ rushing ‍may lead to a finish that ‌is less than‍ resilient.⁢ Patience is the‍ true companion of quality in ensuring your cabinets⁤ stay looking ​as fresh ‍as the day they were⁢ painted.

Finishing Touches: ‌Reassembling and⁤ Maintaining Your Newly Painted ​Cabinets

Now ‌that ‍the layers of​ lustrous ⁤paint have fully dried and your cabinets exhibit that enviable, professional finish, it’s ⁢time‍ for the rewarding task⁣ of putting all the pieces back ⁣together. Commence by **carefully reattaching ‌the hardware and doors**. It’s crucial to ‌handle the freshly painted surfaces with care to avoid any chips or smudges‌ that could‍ mar their perfection. ‍If ⁣you’ve opted for new ​hardware for an ​updated ⁢look, ⁣make ⁣sure⁤ they ‌are aligned ‌properly before securing them in place. Below is a checklist to ensure you ‌don’t miss any steps:

  • Align doors ‌and make necessary ⁤adjustments to ensure they ‌hang straight‍ and close properly.
  • Reattach ‌hinges to doors, ⁣then secure​ the doors ‌to the​ cabinet frames.
  • Replace the drawer fronts and reinsert the drawers.
  • Attach new or original knobs ​and pulls, ⁤ensuring they are tightened ⁣correctly but ‍without ⁤over-tightening,⁢ which may ⁢damage⁤ the ⁤paint.

Your cabinets are ‌not​ only rejuvenated but‌ are also now⁤ facing the rigors of ‍daily use. ⁢To preserve their‍ new-found​ beauty and extend the life of your⁤ hard ⁢work, a routine maintenance schedule ⁢is‍ non-negotiable. Wipe spills and splatters promptly with a soft, damp cloth, avoiding abrasive cleaners that ​can scratch or dull‍ the finish. For deeper ⁢cleans,​ use a​ gentle‌ soap diluted in water, and remember to ⁢touch dry with ⁤a soft cloth afterward.

Maintenance at a Glance:

Daily⁣ Care Weekly Inspection As-needed Basis
Wipe ​with damp ⁣cloth Check‌ for⁢ loose hardware Touch-up paint for chips ⁤or scratches
Avoid abrasive ⁣materials Clean‌ with mild soap Reapply ⁤protective topcoat⁣ every‌ few‍ years
Handle gently Look for ‍signs of ⁣wear Deep‌ clean for accumulated​ grime

By following these simple⁤ guidelines, your ⁣cabinets ‌will remain as ⁤fresh‌ and vibrant as the day you renewed them, becoming both ‌a functional‌ and dazzling feature ⁣of your​ home for⁤ years to⁤ come.⁤

Q & A

Why should‍ I consider ⁤spray painting my⁢ cabinets?

Spray⁣ painting your cabinets can ​breathe new life into ‌your kitchen ‌or bathroom, offering a⁢ smooth, professional finish that’s ⁣hard to‌ achieve with a brush​ or roller. ​It’s a cost-effective⁢ alternative to replacing cabinetry ⁢and can‌ significantly enhance the​ aesthetic ⁣appeal of your space. Plus,​ spray painting can be ⁣quite durable if done correctly.

What materials do I need to​ start spray painting⁢ my‌ cabinets?

To get started, you’ll ‍require the⁣ following​ items:

  • Spray Paint: Choose ‍a paint that’s meant for ⁢cabinetry ‍and suitable for the material of ⁢your cabinets.
  • Primer: ​ If needed,​ based ⁤on the⁣ type of paint and the color of ⁢your cabinets.
  • Safety Gear: ⁣ Including ⁢a respirator mask and safety ⁢glasses.
  • Drop‌ Cloths: ‌ To protect your floors and‌ countertops.
  • Painter’s Tape: For masking off any areas you⁣ don’t want⁢ to ‍paint.
  • Sandpaper: Or a ⁤sanding ⁤block to ​prep the cabinets.
  • Cleaning Supplies: Such ​as degreaser ⁣and tack⁢ cloths to ⁣clean your cabinets before‍ painting.

What are the steps to properly spray paint cabinets?

Please follow ⁤these⁤ essential steps:

  1. Remove hardware‌ and ⁢doors: Take off all knobs, pulls, and hinges,​ and remove cabinet ‌doors and drawers from ⁤the cabinet boxes.
  2. Clean⁤ thoroughly: Use a degreaser to remove any grease or dirt from the ⁣surfaces.
  3. Sand surfaces: Lightly sand all surfaces to‍ help the⁤ paint adhere better.
  4. Apply primer: If necessary, apply⁣ a coat​ of primer and let it dry according ​to ‍the manufacturer’s ⁣instructions.
  5. Spray paint: Apply the ‍spray paint in even, ​sweeping‌ motions, keeping the nozzle ​a consistent distance ‍from ​the surface.
  6. Let dry and ⁤reapply: Allow​ the paint to​ dry ​completely before applying additional coats if necessary.
  7. Reassemble‍ cabinets: Once the paint is dry, reattach‌ the hardware, doors, and drawers.

Are ​there any⁣ special techniques‌ to ⁣ensure a smooth finish ‍with‍ spray paint?

Yes, for a professional-grade finish, consider the following techniques:

  • Maintain an ⁢even‌ distance: ⁣ Keep⁤ the spray ‍nozzle 6 to 8 inches‌ away from the cabinet surfaces during application.
  • Use light‍ coats: Apply multiple thin coats rather than a single thick coat⁣ to ‍avoid drips and ⁤runs.
  • Keep the spray nozzle moving: ⁤Always ‌keep your hand moving⁣ to prevent the⁤ paint from concentrating in ​one spot and ‌causing drips.
  • Practice​ first: Try spray painting ‌on a ⁢scrap ⁤piece of wood to get‌ the hang of ​it ⁢before tackling your cabinets.

Any recommendations for ⁢choosing the‍ right spray ⁣paint?

When selecting spray paint, consider these key factors:

  • VOC Content: Aim for low VOC (volatile organic compound) paints for indoor use to reduce harmful‌ emissions and odors.
  • Finish: Decide ⁢between gloss, semi-gloss, or matte finishes ‌based⁣ on the desired look⁤ and ‌cleaning ease.
  • Compatibility: Ensure the paint is compatible​ with your⁢ cabinet material, whether​ it’s wood, laminate, or metal.
  • Quality: ​ Invest ⁤in ⁤high-quality ​paint for better ​coverage and durability.

Can I ‌really achieve professional ⁢results as a beginner?

Absolutely! With⁣ patience, the right tools, and a methodical approach, ⁣beginners can‍ achieve results that rival those of ⁣a professional. The key is to prepare ⁢properly and take your time with each ⁤step⁣ of the ‍process.

How can ⁢I minimize ‍the⁣ mess when spray painting⁣ cabinets?

Here are a few tips‍ to​ keep ​the ‌mess under control:

  • Use Drop Cloths: Lay them over all the areas you’d​ like to protect, ⁤including floors⁢ and countertops.
  • Masking: Use painter’s tape and plastic⁤ sheeting to ‍cover‍ walls and adjacent areas.
  • Ventilation: ​Work in ⁣a well-ventilated⁢ space or‌ use a spray ⁣booth if possible to minimize paint in ‍the⁢ air.
  • Clean as You ​Go: In case of overspray or ⁤drips, clean them up immediately before they dry.

Can I spray⁣ paint cabinets ‌without removing the‍ doors and ​drawers?

While it’s ⁤possible, removal​ is highly recommended for ⁢the best ⁣coverage and to avoid⁤ overspray on the⁢ cabinet interiors. If⁢ you decide‌ to paint with the doors and drawers in place,​ be sure to mask off all adjacent surfaces meticulously.

The ‌Conclusion

And ‌there⁢ you have ⁤it, the artful journey through the misty ⁢world of spray-painting cabinets. You’ve navigated ​the seas of ​preparation, danced with the delicate sprays⁣ of​ color, and​ now ⁢stand​ at the threshold ⁤of ⁢a⁤ kitchen ⁣reborn. Gone are the days of staring ⁣at bland or ⁢chipped ⁣cabinetry, for you’ve wielded the⁤ power of the spray ‍can with⁣ the finesse of a maestro, breathing life into wood‍ and transforming the ordinary into‌ the‍ extraordinary.

As you unmask​ your revitalized fixtures⁢ and step ⁤back to admire the​ handiwork, take pride in⁤ the⁢ fact that⁢ your beginner’s hands accomplished what ​seemed a daunting task.⁢ Remember, the beauty ⁤of ‍this craft lies ‌not just in ​the final panorama but in the myriad⁤ of tiny drops that converge to create it.

We ⁢trust ‌that our guide has illuminated your path, but the canvas of ‍learning​ remains vast—with each cabinet’s corner​ and crevice posing new challenges and opportunities. Should future ​projects beckon, may your confidence ‍grow​ with each press of the nozzle⁣ and your⁤ creativity ⁢flourish in unison with the vibrant hues.

Should questions still whisper or if uncertain shadows ⁣linger in hidden ⁢corners, fear​ not to explore‍ further or to revisit the steps we⁢ traversed together. ​For in the world⁣ of DIY and spray paint, each‍ endeavor is⁢ but a layer,⁣ and every layer‌ is a story of its discovery.

As we cap ⁤our cans and put‌ away ⁢our masks, we leave you with an⁢ invitation to continue crafting,⁤ creating,​ and customizing your space.⁤ For ⁢life, like ‌your newly painted cabinets, is ​a ⁢canvas awaiting the ‌touch⁢ of‌ your ⁤unique brush—or in this case, the spray of your ⁤can.

Thank you for joining us on ​this chromatic​ adventure. May your ‌cabinets shine ‌as a testament to your newfound skill, a​ gallery of effort​ and⁣ learning, and, above all, a ​home to‍ memories ​yet ‍to be crafted within their refreshed embrace.

Transform Your Kitchen: Top Benefits of Spray Painting Cabinets vs. Traditional Methods

In the‌ heart of every home beats the rhythm ‌of a bustling kitchen, a place where memories are sautéed and‍ conversations simmer ⁤on a back ​burner. The kitchen cabinets, stoic sentinels of spices and stories, stand tall,​ bearing ⁤the brunt of time and trends. As homeowners seek to rejuvenate their ⁤culinary sanctuaries, the question arises: How to infuse new life into these wooden ⁣guardians? ⁤Enter the world of kitchen ⁣cabinets spray painting – a ​modern alchemy⁤ turning‍ the ​drab into the dynamic with ‌a ‍mist of color and a swath​ of innovation.

This article will delve into the transformative magic of kitchen cabinets spray painting, exploring why it is becoming⁣ the ‌preferred choice for those⁤ aiming to revitalize their kitchen’s aesthetic without sacrificing quality or time. From the seamless finish it ‍promises to the assorted palette of ​possibilities it offers, spray painting stands as a testament to modernity’s embrace within the traditional realm of home improvement. Let us embark on a journey to understand the allure of this technique ‌and why it might just be the secret ingredient your kitchen has been craving.

Table of Contents


Transform Your Kitchen Cabinets with Spray Painting Precision

Opting for ​spray painting​ when updating your kitchen ⁣cabinets opens‍ the door to a‌ world⁤ of sleek ‍finishes and professional-grade ‌quality⁣ that traditional brush​ painting can seldom match. ⁤One of the most striking advantages is the uniformity of coverage that ⁣spray painting offers. ⁢Without ⁣the telltale brush strokes that often accompany traditional methods, your cabinets can achieve a smooth, factory-like finish that’s⁣ both⁣ durable and ‍visually appealing. It’s not just the aesthetic that gets a ‌boost; the spray method ensures ‌that every nook and cranny, ‌every​ intricate detail⁢ of your cabinet’s design, is coated evenly without any missed ​spots or accumulation of excess paint.

The ‍benefits of spray painting extend to the practicalities of application and longevity. The list is quite captivating:

  • Speed and efficiency: ⁣ Larger areas can be covered in a fraction of‌ the time it would take with a brush.
  • Versatility of finishes: ⁣Choose⁣ from matte, satin, ⁢semi-gloss, or high-gloss, depending on your‍ style preference and the mood you want⁣ to set⁣ in your kitchen.
  • Reduced drying time: Spray paint typically dries faster than its brush-on counterpart, ‍allowing for quicker reassembly and use of the kitchen space.
  • Resilience: The even surface is less prone to ⁣chipping and peeling, meaning⁤ your cabinets will stand the test of time and use.
Feature Spray Painting Traditional Painting
Finish Quality Smooth, even, professional Visible brush⁢ strokes, less uniform
Application Time Quick coverage, fast drying More‍ labor-intensive, slower drying
Durability High resistance to wear Prone to chips and peels with time
Design Precision Excellent for complex patterns Challenging for intricate designs

Embracing ⁢the innovation of spray painting not only revitalizes your kitchen but ‌also delivers a breathtaking ‌outcome that’s simultaneously resilient and ‍swift. Making this choice is not merely about an upgrade, it’s about redefining the heart of your home with unparalleled​ finesse.


Unveiling the Aesthetic​ Appeal of ⁢Spray-Painted Finishes

Envision the sleek, seamless surface of ‍your kitchen cabinets bathed in a lustrous sheen that beckons⁤ the eye. Spray painting is more⁢ than just a method; it’s an artisan approach to revitalize your culinary haven. Unlike traditional ⁤painting​ techniques prone to tell-tale brush strokes and the occasional bristle left behind, spray paints impart a smooth, uniform coverage. This ‌method ensures ​that every nook and cranny,‍ every subtle curve, and each fine detail is coated ⁢with⁣ precision. The outcome is a set of cabinets that‌ boast a flawless, factory-finish quality that is ​simply ‍unachievable with old-school brushes and rollers.

Aware of‍ the minutiae, professional spray painting translates into an expansive color palette and finishes, where‌ matte, satin, glossy, and even metallic effects‌ come to life. The difference is day and night⁤ when compared to conventional painting. The kitchen, a place of warmth ⁣and communal gathering,⁤ deserves nothing less than the most inviting aesthetics. To illustrate this transformation, let’s consider the following comparison:

Traditional Painting Spray Painting
Brush marks visible Impeccable, smooth finish
Limited to simpler finishes Diverse range of finishes (matte to glossy)
Time-consuming application Efficient and even application
  • The durability of a sprayed finish is enhanced, ⁣offering resistance to the scratches and dings that are part of​ everyday kitchen life.
  • Resale ⁣value sees a potential increase ​as the kitchen gains a modern, updated look that appeals universally to buyers.
  • Maintenance becomes a breeze, as smooth spray finishes allow for effortless cleaning without the worry of damaging paint texture or finish.

The Durability Advantage: Why Spray Paint Outlasts Brush Strokes

When you decide to breathe new life into your kitchen cabinets, you’re choosing to invest in the very heart of your‌ home. The method of paint application is ⁢pivotal, and spray painting offers a profound longevity that simply cannot ​be achieved with traditional brush⁣ methods. The basis‌ of this durability lies in the ⁣atomization ​of paint during the spraying process, resulting in a ​finer, more even coating that adheres comprehensively to every nook and cranny. This consistency pays off over time:

  • Thinner, Stronger Layers: Spray paint goes on in thinner layers than brush-applied paint, allowing for a quicker drying time and less⁢ risk of drips or texture imperfections. These thin layers bond to surfaces—and to ⁣each other—in a tenacious web​ of color that‍ resists the ⁢wear and tear of daily kitchen activities.
  • Uniform Coverage: With brushes come the inevitable streaks and ⁤brush marks, often leading to uneven wear and a ‍propensity for⁤ moisture ingress, especially around ‌handle ‍areas. Spray painting, on the other hand, leaves⁢ a smooth, uniform finish that’s more resilient to constant‌ handling and cleaning, ensuring ⁣your cabinets retain⁤ their pristine appearance for longer.
  • Moisture Resistance: ‌ The seamless finish ⁢of spray paint adds an ‌extra barrier to moisture, a common culprit for‌ warping and paint degradation. This is particularly important in⁢ the kitchen, where⁢ humidity levels fluctuate ‍with cooking and cleaning.

In addition to these benefits, advancements in paint formulations‍ mean ⁢that modern spray paints hold their color and gloss levels exceptionally well,‍ protecting against fading‌ and yellowing that often ​plagues brush-painted surfaces. To put it into perspective, consider this comparison table:

Feature Spray Painting Brush Painting
Durability Excellent Good
Fade Resistance High Moderate
Moisture Resistance Superior Adequate
Finish Quality Smooth⁣ & Uniform Variable
Application Time Fast Slower

The side-by-side comparison‍ shows that when it comes to creating a lasting finish‍ that holds ‍up to the bustling environment of a kitchen, spray painting is the champion. So, before you dip your brush into the pot, remember ⁣that your choice of application will profoundly⁢ affect not just ⁢the initial appeal, but the long-term viability and beauty of your ⁢kitchen cabinets.

Speed and Efficiency: ‌How Spray Painting Saves ⁣You Time

When it ​comes to revamping your kitchen cabinets, the difference between a weekend project ‌and a multi-week ordeal often comes down‍ to the method of application.‌ Traditional brush‌ painting is tedious and time-consuming, requiring meticulous attention‌ to detail and prolonged drying times. In contrast, spray painting breathes new life into your cabinets​ with remarkable swiftness and uniformity. The comprehensive coverage of⁤ a sprayer eliminates the‍ need for multiple coats that brushes might necessitate, ‍cutting down on both labor and drying time significantly. Additionally, ‍the sprayer’s ability to easily reach nooks, crannies, and⁢ intricate details ensures a consistently smooth finish across all surfaces.

Here’s a quick look at the time-saving advantages spray painting offers:

  • Instant Coverage: ‌ Spray guns distribute paint evenly and rapidly, covering large areas in a fraction of the time it takes with a brush or roller.
  • Reduced Labor: No more tedious brushwork – a steady hand guides the sprayer along surfaces with fluid motion, making the process less labor-intensive.
  • Swift Drying: The⁤ fine mist of spray paint ‍dries quicker than the thicker​ layers applied​ by traditional methods.
  • One and Done: Achieving the desired finish usually requires just one coat, thanks to the even application of spray techniques.
Method Time‍ to Complete​ Kitchen Cabinets Drying Time Between Coats
Traditional Brush Painting 3-7 ‍Days 12-24 Hours
Spray Painting 1-2 Days 1-2 Hours

With​ those figures in mind, it is no wonder that homeowners looking ⁤for ​a quick yet beautiful transformation of their kitchen space are turning to spray painting as the go-to choice. This efficient approach not only saves precious time but also spares you the inconvenience ⁢of a prolonged kitchen ⁣upheaval.

Cost Considerations: ​Economic ⁢Benefits of Choosing Spray Painting

Embarking ​on a kitchen cabinet makeover can unearth a plethora of cost-related queries, with budget constraints often‌ dircting the final decision. Among the methods at your disposal‌ is the innovative⁢ approach of spray⁣ painting—a choice that not only breathes new life into ⁢your cabinetry but also aligns ⁤favorably with your financial outlook. One of the most‍ compelling advantages of spray painting is the reduction in labor costs. The precision and swiftness of a ​spray gun mean that large areas can ⁣be covered quickly and efficiently, which translates into fewer‌ hours billed by your⁤ contractor.

In⁢ addition, the materials utilized in the spray painting process offer notable economic benefits.​ Consider the following list that highlights⁢ cost-efficient aspects of choosing spray over traditional brush painting methods:

  • Reduced ​Paint⁤ Usage: The atomized paint particles ensure a more uniform application, which can lead to less paint ​being used overall‌ compared to ⁤traditional methods.
  • Longevity: Spray painting⁢ often provides ⁤a more durable finish, meaning less frequent touch-ups and maintenance down the line.
  • Waste Minimization: With​ targeted application, spray painting minimizes the waste ‍typically associated with brushes and rollers, such as excess paint and cleaning​ solvents.

To crystallize⁣ these economical pluses, let’s glance at an illustrative breakdown in the form of a table, contrasting the ⁢costs⁣ associated with traditional brush painting versus spray painting kitchen cabinets:

Expense Traditional Brush‌ Painting Spray Painting
Material Costs Higher (more paint, brushes, rollers) Lower (less paint, no brushes/rollers)
Labor Costs Higher (due to slower application) Lower (quicker application)
Maintenance More frequent (paint may chip or require retouching) Less frequent (durable finish)

Conclusively, while the upfront cost of purchasing a spray paint system or hiring a professional may⁤ seem steep compared to traditional brushes ⁤and rollers, the⁣ long-term savings manifest in the⁤ reduced need for paint, labor, and ongoing maintenance solidify spray painting ‍as an economically savvy option.

Achieving an Even ‍Coat: The Technical Superiority of Spray Application

Crafting the immaculate⁢ finish on⁣ your kitchen cabinets can ​be tantamount to the work of an artisan. Enter spray application – the cutting-edge method that ensures ‌your kitchen cabinetry is enrobed in a silky-smooth ‍layer of paint, devoid of​ even the most unassuming brush mark. Unlike traditional brush or roller methods, which can leave a visible trail of their passage in the form of streaks ⁢and uneven textures, spray painting ‍delivers a layer of paint that is ​peerless in ⁢its uniformity. This is due to the atomization of paint into ⁣fine particles, allowing ⁣for a finer application over surfaces, including those pesky nooks‍ and ⁤crannies that brushes could never dream‌ to reach.

The technical prowess of spray systems is best illustrated by considering their efficiency in applying coatings. Here’s how they trump the old-school approach:

  • Higher Transfer Efficiency: Significantly less paint is wasted, as the majority ends ⁢up on the cabinet, not in the air or absorbed into ⁣a⁤ paintbrush or⁢ roller.
  • Rapid Application: Large areas are ​covered in a fraction of the time it would take with hand painting, making for ⁢quicker ​project completion.
  • Versatile Coating: Whether you’re aiming for a matte finish or a high-gloss sheen, spray systems can achieve a wide range of textures and appearances.
  • Consistent​ Coverage: The distribution of paint is even and regular, reducing the likelihood of needing‍ to retouch ‌or sand down imperfections.

When examining the ‌attributes of each approach, the following comparison table elucidates the ⁢stark differences:

Characteristic Traditional Painting Spray Painting
Finish Quality Variable, can‍ be uneven Uniform and smooth
Application Speed Slower, manual Quick ‌and efficient
Material Wastage Higher due to‌ over-brushing/rolling Minimized ​with targeted application
Accessibility Limited ‌reach in tight spots Excellent reach in‍ all areas

Ergo, the technical superiority of the spray application is⁣ unmistakably the⁣ clearest path to a⁣ pristine façade for your culinary haven. With every drop of paint ‍precisely accounted for and​ every⁢ inch seamlessly coated, spray painting emerges as the unrivaled champion in the realm‌ of kitchen cabinet refinishing.

Embracing Modernity: Health and Environmental Perks of Spray Painting Techniques

In the⁢ heart‍ of home ​elegance‍ and functionality, kitchen cabinets stand as foundational pillars that merge visual appeal with practical storage space. Enter ​spray painting—an innovative technique that elevates not just the‍ aesthetics of your​ cabinets but also promotes both health and environmental considerations.

Health Advantages

  • Reduced Chemical ⁤Exposure: Traditional brushes and rollers can leave behind trails ‍of Volatile Organic ‍Compounds (VOCs), risky⁤ to both the applicator and home dwellers. In ‍contrast, spray painting options now include‌ low or no-VOC formulas that limit ‌these harmful emissions.
  • Faster Drying Times: Quick-dry features ‍inherent in many spray paints mean less ‌waiting⁤ around for a kitchen facelift to ​complete, minimizing the time you’re subject to ⁣any paint scent.

Environmental Benefits

  • Efficiency: The infancy of traditional painting required layers of paint and solvent, often with‍ excess ending ‍up as ​waste. Modern spray techniques maximize paint distribution efficiency, leading to reduced waste.
  • Preservation of‍ Resources: Comprehensive coverage attained with spray techniques can extend the life of kitchen cabinets, curtailing the need for ⁣frequent refurbishing or replacement, thus conserving resources and energy.

When it comes down to the nitty-gritty comparison, consider this succinct table outlining the benefits of adopting ​spray painting for revitalizing your kitchen cabinets:

Aspect Spray Painting Traditional Painting
VOC ⁤Emissions Lower Higher
Drying Time Quicker Slower
Efficiency Higher Lower
Resource Conservation Better Less

Embracing the modern ⁤approach to kitchen cabinet renovation reflects not only a​ commitment to home improvement but also an ​investment in healthier living spaces and a greener planet. Spray painting serves as a bridge to a sustainable future—one lustrous coat at a time. ​

Q & A

What makes spray painting a preferable choice for kitchen cabinets over traditional painting methods?

Spray painting offers a range of benefits that traditional painting methods simply cannot⁢ match when it comes to cabinet‌ refurbishment.⁣ Here’s why many choose the sprayer over the brush or roller:

  • Flawless Finish: Spray painting ⁤creates an ultra-smooth and even finish that is ⁤free of brush marks, streaks, ​or paint‍ build-up found in traditional painting.
  • Time-Efficiency: The ‌spray painting process is typically faster, allowing for multiple coats to ‌be applied more quickly than with ⁢brushing or rolling.
  • Customization: There is an⁢ array of finish types with spray painting – from matte to high gloss – providing more options to suit ⁤your style.
  • Durability: ‍ Often, spray paints are​ more durable and‌ resistant ⁢to chipping, which ‌is critical⁤ for high traffic areas like kitchens.

Are there ‍any cost differences ⁣between spray and traditional painting when it comes​ to kitchen cabinets?

Yes, cost​ differences can be notable between these methods, and here’s how they ⁢generally break down:

Factor Spray Painting Traditional ⁤Painting
Material ​Cost Potentially higher due to specialized paint Lower, standard paints and brushes
Labor ⁣Cost Higher, requires ​skilled technician Lower, can be DIY
Longevity Longer-lasting, may offset initial cost over time May require touch-ups sooner
Finish Quality Superior, ⁢professional grade Variable, skill-dependent

Can you give some tips for⁣ those ‍considering spray painting their kitchen cabinets?

Whether you’re hiring an expert or daring to DIY, consider these‌ pointers:

  • Preparation is Key: Ensure cabinets are clean, sanded, and primed as needed for the best result.
  • Ventilation: Spray painting requires good ventilation; consider tenting off the area to avoid overspray in other parts.
  • Equipment: Invest in⁣ or rent a quality sprayer for a fine, factory-like finish.
  • Practice: ⁢ If you’re new to spray painting, practice on some scrap material before tackling your cabinets.
  • Safety First: Wear protective gear, including ⁢a mask and​ goggles.

What⁢ should ​someone ⁢look ⁤for when hiring an​ expert to‌ spray paint their kitchen⁢ cabinets?

To ensure you get the best professional for the job, consider the following:

  • Experience: Look for someone with a portfolio of spray paint projects, ⁤especially on cabinets.
  • Reviews and ‌References: Check online reviews or ask for‍ references to gauge customer satisfaction.
  • Quotation: Request a detailed quotation to understand costs, timelines, ‌and paint options.
  • Insurance: Confirm⁢ that they have the necessary insurance to cover any potential accidents during the job.

Selecting spray painting‍ as your method of choice for kitchen cabinet refurbishment is likely⁣ to provide a durable, high-quality finish that can rejuvenate the heart of your home. Weighing cost differences, preparation, and⁤ the need for expertise will help you make ‍an informed decision and achieve the best ‌possible result.

In Conclusion

As we’ve journeyed through the mist of aerosolized⁣ pigments and ⁤brushed aside the conventional strokes of traditional painting, it’s clear that spray painting kitchen cabinets opens the door to⁢ a world of sleek‌ finishes, vibrant longevity, and time-saving techniques. Whether you’re drawn to‍ the uniformity that a fine mist provides or enticed ⁤by ⁢the ‌efficiency that lets you fall⁣ back in love with your kitchen at‌ the speed of⁤ light, spray painting is a contender that⁤ deserves contemplation.

In the end, the choice between spray ⁢and traditional methods is more than a ​mere selection of tools—it’s an embrace⁣ of‌ modernity, a nod to practicality, and⁤ a ​testament‌ to personal taste. As with every stroke of design and home improvement, your kitchen cabinets serve as the canvas of your culinary abode. The ‌method you choose is your signature on that ‍canvas.

So as the ⁣scent‍ of fresh paint settles, may your decision bring‌ a revitalized vibrancy to the heart of‌ your home. Whether you’re now reaching for the spray gun ‌or still holding the paintbrush, may the transformation of your kitchen cabinets be a joyful reflection of ⁢your vision. And remember, in the⁣ vast palette‍ of home renovation, there are ​as ​many ⁣shades of choice as there are colors in the rainbow. Choose the hue—and the tool—that paints your world in the best light. ⁣

Understanding the Different Finishes Available for Spray-Painted Cabinets

Introduction:

In ⁤the heart of every⁣ home, the kitchen⁢ stands as a testament to the fusion of⁤ function and aesthetic appeal. At ​the⁢ very crux of this culinary sanctum are the⁣ kitchen cabinets, silent sentinels of⁣ storage and ⁤style that subtly command ⁣attention.⁣ And while their ‌primary‌ purpose​ is straightforward, the allure⁤ of the cabinets’ surfaces is​ a journey through a collage of textures and sheens. This medley of‌ finishes, ‍accessible‌ through the magic of kitchen cabinets spray painting, ‍offers a realm of‌ possibilities to those daring enough ‌to explore.

Yet, this choice is not to​ be made‌ lightly; it is the brushstroke that dictates the ambiance, turning​ the common ‌into the extraordinary. From the soft, whispery mattes that drink in light, to the gleaming glosses that reflect⁤ culinary ambition, every‍ finish narrates a different tale. There is a science and an art ⁢woven into the tapestry⁤ of spray-painting kitchen cabinets—a⁣ craft ​that demands‍ a ⁤discerning ‌eye and ⁣an appreciative ⁤soul.

As​ we ‌embark on this chromatic odyssey ⁢to understand the different finishes ‍available ‌for spray-painted cabinets,⁣ let ⁢us arm ourselves with curiosity. We’ll ⁤delve into a world where technique ‌meets creativity and discover how ⁣the right‌ finish can not ​only protect but also ‌perfect the heart of our homes. Whether you’re a homeowner on the⁤ verge of a‌ kitchen transformation, a‌ seasoned interior designer looking for inspiration, or⁢ simply ‌a curious onlooker ⁢smitten with the beauty​ of‍ well-crafted cabinetry, ⁢join us in unveiling the secrets behind ​the gleam and grit of ​spray-painted finishes.

Step through the threshold into a gallery of hues and textures, as we ⁢uncover the unique personality each finish imparts on kitchen cabinets through ⁢the lens of spray ​painting—a transformative breath of artistry beckoning innovation and elegance into your abode.

Table of Contents


The⁣ Allure ⁣of the​ Matte: Embracing⁣ Understated Elegance

Venturing into the​ realm of​ the⁤ understated, a matte finish captures the essence of sophistication with a modern twist. Cabinets adorned in ​this subtle ‌yet impactful style exude a quiet confidence, making a definitive statement ‍without the ‌need ‍for ⁣gloss or sheen. The appeal lies in‌ its⁢ ability to hide imperfections gracefully, ⁢as the​ non-reflective surface diffuses light, softening⁢ the ⁣appearance of smudges, fingerprints,⁣ and minor blemishes that are more ⁤evident on their glossy counterparts.

The appeal ⁤of matte finishes ⁣goes beyond mere aesthetics—it’s a ⁢love letter to ⁣simplicity and functionality. In the heart of your ​home, these ‍cabinets serve as the backdrop to life’s ⁤daily routines, proving that style need‌ not shout to be⁢ heard.⁣

  • Durability: Resilient‌ to​ the ebb and⁣ flow of kitchen activity, matte cabinets require less frequent⁣ cleaning, staying pristine amidst the⁢ flurry of culinary adventures.
  • Versatility: Whether anchoring a ⁢minimalist theme or softening an industrial space, the matte​ finish is a chameleon, adapting to various design sensibilities.
  • Color Depth: Muted finishes bring‌ out a rich ⁢depth in ‌color, lending a hand to an array of⁤ hues, from the most vibrant ⁤to the most subdued, without overpowering the ⁢senses.

To illustrate⁢ the charm ⁢of the matte finish,⁣ consider⁢ the following‌ comparison:

Finish Type Visual​ Appeal Maintenance Level Style Suitability
Matte Velvety &⁣ Sophisticated Low Modern & Understated
Glossy Shiny &⁤ Bold High Glamorous⁢ &⁢ Contemporary
Semi-Gloss Sleek & Practical Moderate Versatile & Transitional

This tactile finish⁤ doesn’t ​compete for attention but rather complements the elements around it, allowing textures and natural materials within your space ⁢to‌ stand forth. It’s a statement of confidence, a whisper that resonates⁣ more profoundly than the loudest shout.

High Gloss, High Impact: Making ⁢Your Cabinets Shine

Transforming your⁤ kitchen cabinets ‍with a sleek,‌ spray-painted finish can breathe new life into the heart ‌of ⁣your home. If you’re⁢ craving that showroom-quality sheen, ⁢a high-gloss⁣ finish is your go-to option. Not only does⁣ it reflect light beautifully, ⁤enhancing the sense of space, ⁢but​ its glass-like ⁤surface also takes durability to⁤ another level. Resistant to ⁢moisture ‌and easy ‍to clean, ⁤glossy cabinets ⁣make splatters and‍ fingerprints a less daunting challenge. ‍However,‌ achieving that mirror ⁣finish requires meticulous preparation, a dust-free⁢ environment, and‍ a⁢ masterful ⁤touch with the spray gun.

Beyond high gloss, other sheen options ‍cater to varying⁢ tastes and ​practical considerations. For a touch of‌ subtlety, ​a ‌ semi-gloss ⁣ finish offers a ⁤balance between sheen⁢ and ⁢subdued ⁣sophistication. It⁢ maintains great ‍washability while ⁢softening the intensity ⁢of​ the light reflection. ‌A satin ‌ finish, with its velvety sheen, leans⁢ more towards a matte appearance, cloaking cabinets ⁤in an ⁣elegant glow that hides⁢ imperfections better‌ than its glossier cousins. ​Lastly, a matte finish serves⁣ an ⁢ultra-chic​ and contemporary⁤ look ‍that‌ absorbs light,⁤ giving your‌ cabinets a smooth,‍ consistent texture without the⁢ glare.

Here’s‌ a‌ brief comparison to help you decide:

Finish Type Light Reflection Surface Feel Maintenance
High Gloss High Glass-like Easy ​to clean
Semi-Gloss Medium Smooth Relatively‌ easy
Satin Low Velvety Conceals⁣ imperfections
Matte None Flat More challenging to clean

Whether you’re looking ​for the durability and drama of⁤ high gloss ‍or the practical ​elegance of a‍ satin finish, consider the⁢ lighting,​ size of your ​space, and how much use your cabinets get. ⁢These considerations will guide you towards ​making a⁤ choice that not only looks stunning but ⁣also⁢ satisfies your​ lifestyle and maintenance ‍preferences.

Satin’s Subtle Sheen: Striking the Perfect Balance

When it comes to​ selecting‌ a finish for‌ your​ spray-painted ​cabinets, the difference between a room that dazzles and one ‌that ⁣merely ‘exists’ can hinge on the‌ sheen you choose. ⁣Recognizing this, many​ homeowners are turning to the ​understated elegance of⁤ satin ⁤finishes. What makes⁤ satin an increasingly popular choice is‍ its ideal middle-ground sheen, which provides just enough luster to enhance ‌the colors and contours of your ⁤cabinets,⁤ without ⁢the glare⁢ that can accompany glossier finishes.

Satin, with its velvety smooth‌ appearance, not only imparts⁣ a luxurious​ feel but also ‌offers ⁣practical benefits.⁣ It’s less​ reflective​ than semi-gloss ⁣or high-gloss finishes, which​ is⁤ perfect for camouflaging ‌minor imperfections ⁣such⁣ as⁢ fingerprints and smudges, making it optimal for areas that handle⁤ high traffic or‍ households with young⁢ children. ‍Below is an unnumbered list detailing the⁢ reasons⁣ to select a⁤ satin finish:

  • Visual Appeal:⁣ Produces⁤ a soft sheen ⁤that complements ‍various ​design⁤ aesthetics
  • Maintenance: ‌More ‌forgiving with everyday wear​ and tear
  • Durability: Offers​ a balance between⁢ matte and gloss for longevity

When evaluating finishes, it’s helpful ⁣to compare the⁤ characteristics side-by-side.​ Here’s a simple table outlining some key ⁣features:

Finish Type Sheen​ Level Practicality Style
Matte Low High Modern/Minimalist
Satin Medium Medium-High Versatile/Elegant
Semi-Gloss High Medium Vibrant/Dynamic
High-Gloss Very High Low Glamorous/Luxe

By considering the above ‍factors, one can ‍see why ‌many are drawn to the refined ambiance ​that satin ⁣finishes can bring to a‌ room, without sacrificing the practicality ‌required​ for a family-friendly‍ living space.

Chalk‍ Paint Finishes: ⁤Adding Character ⁤with a Vintage Touch

When it comes ‍to infusing your ​cabinets with a sense ⁣of history and charm, chalk paint is the go-to​ medium for creating a quaint,​ vintage look. This matte, velvety paint not only ‍adheres‌ well to surfaces without extensive priming but⁤ also delights with its pleasantly tactile finish.‍ For spray-painted ​cabinets, chalk paint can be applied to⁣ establish an ‌array of​ finishes that speak volumes about ⁣your ⁢personal style.

  • Distressed Finish: If it’s⁤ a ⁣time-worn, ‍shabby ‌chic⁤ aesthetic you’re aspiring to ensure, consider the distressed finish. Once ⁣your spray ‍chalk paint has dried, ⁢strategically⁣ sand ​edges and ​corners where natural wear would occur. The ‌raw wood peeks ⁤through, implying ‌a​ backstory of years⁢ of use and⁤ love.
  • Smooth​ Modern Finish: Contrary to popular belief, chalk paint can ‍also yield ⁤clean, contemporary results. A fine mist ‌from the spray gun and multiple thin coats​ will⁣ build ⁤a sleek ​layer. Finish it with⁢ a soft clear wax or a matte ⁤lacquer for​ a touch ⁣that’s ⁢modern yet soft.
  • Antiqued Finish: To​ add ⁢age ‍and gravitas to your cabinets, ‍go for⁤ an ‌antiqued finish. Apply a base color,⁤ then ​layer a ⁣darker glaze, wiping strategically to let the base color show in spots. The result is a rich, ⁣complex surface that suggests⁣ a⁤ storied past.

Moreover, the versatility of ‌chalk ‌paint⁢ allows‍ for combinations ⁣and layering to create tailored looks.‌ Below is a ‍simplified​ table showcasing potential combinations and​ the resulting ‍finishes​ you​ might achieve:

Base Coat Color Top ‍Coat/Sealant Expected ⁤Outcome
Creamy White Dark Wax Rustic‌ Elegance
Light Grey Clear‌ Wax Scandinavian Simplicity
French Blue Distressing & Dark Wax Country Cottage Charm
Ebony Matte Lacquer Bold​ & Modern Impact

Do not be afraid to⁢ experiment ​with ​different ‍chalk paint finishes,⁢ as they offer an ‌outstanding⁢ way to⁢ personalize your ⁤space and give your‍ cabinets character⁢ that is uniquely‌ yours. Whether‍ it’s an old-world ‌feel ‌or a cleaner‌ lined appearance you’re after, the possibilities are virtually endless.

Selecting ⁣the Ideal Finish ‍for Durability ‌and​ Maintenance

Embarking on the path to renovate ⁣your kitchen ‍often leads to the pivotal decision of ⁣choosing ​the ⁢right finish for your spray-painted cabinets.​ This choice isn’t just‍ a matter of‍ color​ and aesthetics; it’s ⁤about finding the equilibrium‍ between​ lasting ⁢durability and ease ⁤of⁣ maintenance. Various‍ finishes ⁣offer their unique benefits, ‌and below ⁢we dive​ into how to navigate through ⁢these⁤ glossy, matte, ‌and⁣ satin seas‍ to anchor at your ideal destination.

Let’s start⁤ by ⁢exploring the benefits each finish ‌brings to the table:

  • Glossy ⁣Finish: A lustrous sheen ⁤that reflects​ light, making spaces appear brighter and larger. ​It is highly ⁤durable⁢ and easy ⁢to‍ clean, ​ideal for high-traffic kitchens. However,⁢ keep in mind that it may show fingerprints and smudges more readily ⁣than⁢ its less shiny‌ counterparts.
  • Satin‍ Finish: This⁣ option strikes ⁣a harmonious balance with a soft‌ glow that brings warmth while concealing blemishes​ and‍ imperfections better than high gloss.​ It’s⁢ a resilient​ choice ⁤that ​withstands cleaning without losing its subtle ⁤elegance.
  • Matte Finish: ‍For⁢ those ‍seeking sophistication‍ and contemporary charm, matte finishes are the ​go-to. They hide scratches and dirt well,⁢ but can require a ⁢bit more ⁤diligence⁣ during cleaning to prevent smearing and to maintain ⁢an even ​look.

Consider the following table ‌as ⁣a quick⁤ glance at how these finishes compare⁢ in terms of durability and maintenance:

Finish Type Durability Maintenance Ease
Glossy High Moderate
Satin Medium-High High
Matte Medium Low-Moderate

When making ‍your⁢ selection, ⁣factor in your kitchen’s activity level, ⁤your ⁣commitment to upkeep, and the ambiance ​you wish to create. The perfect finish is one that not only looks splendid but also serves you⁢ splendidly ‌over the ⁤years of​ slicing, dicing, and delightful gatherings.

Q & A

What ⁣are the most ​popular finishes for‌ spray-painted ‍cabinets?

When it comes⁤ to refreshing your kitchen cabinets, the ‌finish you‌ choose can significantly impact the room’s ​ambiance⁤ and durability. The popular finishes include:
‌ ⁣

  • Gloss Finish: It offers a shiny, reflective surface that ​can⁢ make your ​kitchen⁤ appear brighter and more‌ spacious.
  • Satin Finish: This option provides a velvety, soft sheen ‌that’s ‍less reflective than gloss, making it‍ great for hiding imperfections.
  • Matte Finish: This non-reflective finish is ‍perfect for a⁤ modern look and is adept at concealing ⁢smudges and fingerprints.

How ‍does sheen ‌level ⁢affect the appearance of cabinets?

Sheen level‍ plays a pivotal role​ in ⁣both ⁢the‍ aesthetics and ‍maintenance of your cabinets. Here’s how different levels can ​impact appearance:

  • High‌ Gloss: ​ They create a dramatic ‌look but can‍ highlight imperfections and require ​more cleaning.
  • Semi-Gloss: ⁢ Semi-gloss is less reflective but still vibrant, offering a balance between sheen and maintenance.
  • Low-Sheen Finishes: Such⁢ as satin or‌ matte, provide ⁢a more subtle effect⁤ and do a better job of masking dirt and⁣ imperfections.

Are there any ​eco-friendly⁤ options for spray-painted finishes?

Absolutely! The​ demand for eco-friendly options has grown, and there are several low-VOC (volatile organic⁢ compounds) and ​no-VOC finishes available.⁣ These alternatives provide a durable, ​beautiful finish while also being⁤ better for‌ the environment​ and ⁣your health.

Can I mix different​ finishes in my kitchen, and ​if so,​ how?

​​ Mixing finishes can add depth⁤ and ⁣interest​ to⁣ your kitchen. ⁣Here’s a little inspiration ⁣on combining finishes:

  • Upper and Lower Cabinets: Try a gloss finish ‍on upper cabinets‍ with a matte finish on lower cabinets to balance sheen and practicality.
  • Islands as ⁣Focal Points: Apply a ‌different‍ finish ⁣to your kitchen island to ⁢make it stand‌ out.
  • Accent Pieces: ‌Finish decorative‌ accents with a contrasting sheen to add ‌layers to‌ your kitchen’s narrative.

What‍ factors ⁣should ​I consider before selecting a cabinet finish?

⁢ ⁣⁤ Before‍ deciding on a finish for your⁣ cabinets, consider these factors:

  • Kitchen Usage: ⁤High traffic‍ kitchens ⁣may benefit from a ⁤more durable satin or semi-gloss finish.
  • Lighting: Gloss finishes reflect light and can ⁢enhance the brightness of your kitchen.
  • Personal Style: Your style should guide ‍whether you choose a trendy⁤ matte or a classic‌ gloss ‍finish.
  • Cleaning Tolerance: If ⁣you prefer⁢ low-maintenance, matte or satin​ finishes are more forgiving with smudges and stains.

Is there a ‍major‌ price difference between the different finishes?

​ ‌The cost can⁣ vary ⁤slightly⁣ between different finishes, but generally, the price differences are marginal. However, keep‍ in mind‌ that ‍higher-gloss finishes might require ⁢more prep work, potentially affecting ‌the cost.‍ When consulting with a professional, ask for a​ detailed quote that includes the cost of ⁣the finish you desire.

Finish Comparison Table

Finish Type Sheen​ Level Durability Maintenance
Gloss High High High
Satin Medium Medium-High Medium
Matte Low Medium Low

Closing Remarks

In a world ⁢where the‌ cabinets around us whisper stories of homes⁢ and ‍histories, where each finish is a‍ fingerprint, ‌and​ every shade ​a secret, it’s time ​to draw the curtain ⁣on our colorful ‍journey ‌through the realm of spray-painted finishes.⁢ Our exploration may ⁣have meandered through the ⁣velvety embrace of ⁢matte,⁤ the gentle luster of ‍satin, the ⁢vibrant sheen of gloss, ‌and ⁢the rugged ⁢whisper‌ of textured finishes—yet it feels as if we’ve⁤ only skimmed the surface of ​a deep‌ ocean of possibilities.

Whether you ‌find ​yourself captivated by the sophisticated allure of an eggshell finish ‍or you are tempted ‍by the durability of ‍a high-gloss sheen in your daydreams of renovation, ​remember that your‍ choice paints more ​than‌ just your ​cabinets—it reflects your personality upon the ‌canvas ​of your ⁢space. As you ⁢stand in the⁤ threshold of decision, brush⁢ in hand, consider not only ‍the visual symphony ‌but‍ also the practical melody of wear and maintenance that each finish⁢ sings.

We part ⁣with a palette of knowledge‍ and a brushstroke of insight, knowing ‍that the heart of your home beats ​in rhythm‌ with the charm of​ its cabinetry. May⁤ your ⁤choices resonate with the ​very essence of your abode ⁣and may the ⁣cabinets‌ you’ve lovingly adorned stand as epicenters of⁣ conviviality and style. Until we⁤ cross​ paths in ‌another ​expedition through the ⁣vast landscape of ⁢home improvement, ‍carry this knowledge with you and let it ⁢guide your hand in crafting a ‌space ​that is ⁤truly and uniquely⁤ yours.

In the quiet afterglow of our dialogue, let the spectrum of finishes ⁢continue to ‌inspire, ​turning the mundane⁣ task of selection​ into an⁣ act⁣ of creation—a homage to your ‌haven. ‍Paint well,‌ choose wisely, and⁤ let the cabinets you touch hold the​ echo of our conversation, long⁤ after the last droplet ⁤dries.‌

Why House Painting in Dublin is Crucial for Maintaining Your Home’s Value

Why House Painting in Dublin is Crucial for Maintaining Your Home's Value

“Preserve Your Home’s Worth: Experience the Impact of Dublin House Painting”

Introduction

House painting in Dublin is a crucial aspect of maintaining your home’s value, as it not only enhances the aesthetic appeal but also provides essential protection against the elements. With the city’s damp climate and ever-changing weather conditions, a well-maintained paint job can prevent moisture damage, mold growth, and other structural issues that can negatively impact your property’s worth. Furthermore, a fresh coat of paint can significantly improve the overall appearance of your home, making it more attractive to potential buyers and increasing its market value. In this article, we will explore the importance of house painting in Dublin and how it contributes to preserving and enhancing your home’s value.

Protecting Your Investment: The Importance of House Painting in Dublin

House painting in Dublin is not just about giving your home a fresh and attractive appearance; it is also a crucial aspect of maintaining your property’s value. As a homeowner, you have made a significant investment in your property, and it is essential to protect that investment by ensuring that your home remains in excellent condition. One of the most effective ways to achieve this is by regularly painting your house, both inside and out. In this article, we will explore the reasons why house painting in Dublin is so important for maintaining your home’s value and protecting your investment.

Firstly, house painting in Dublin is essential for protecting your home from the harsh Irish weather. The climate in Dublin can be quite unpredictable, with frequent rain, wind, and even occasional snow. These weather conditions can take a toll on your home’s exterior, causing paint to peel, crack, and fade over time. By regularly painting your house, you can ensure that your home’s exterior remains in good condition and is protected from the elements. This not only helps to maintain your home’s value but also prevents more significant issues, such as water damage and rot, which can be costly to repair.

In addition to protecting your home from the elements, house painting in Dublin can also help to prevent pests from infesting your property. Pests such as termites and wood-boring insects can cause significant damage to your home’s structure, which can be expensive to repair and may even affect your home’s value. By painting your house regularly, you can create a barrier that helps to keep these pests at bay, ensuring that your home remains structurally sound and free from infestations.

Another reason why house painting in Dublin is crucial for maintaining your home’s value is that it helps to improve your property’s curb appeal. A well-maintained and freshly painted home is more attractive to potential buyers, which can increase the value of your property. In contrast, a home with peeling, cracked, or faded paint may be seen as less desirable, which can negatively impact your home’s value. By investing in regular house painting, you can ensure that your home remains visually appealing and retains its value in the competitive Dublin property market.

House painting in Dublin is also essential for maintaining the interior of your home. Over time, paint can become discoloured, stained, or damaged, which can make your home appear dated and unattractive. By repainting your home’s interior, you can refresh its appearance and create a more pleasant living environment for you and your family. This not only helps to maintain your home’s value but also makes it more enjoyable to live in.

Finally, house painting in Dublin is an excellent opportunity to update your home’s style and colour scheme. Trends in interior design and colour preferences change over time, and a fresh coat of paint can help to modernise your home and keep it looking current. This can be particularly important if you are planning to sell your property, as a stylish and up-to-date home is more likely to attract potential buyers and command a higher price.

In conclusion, house painting in Dublin is a crucial aspect of maintaining your home’s value and protecting your investment. By regularly painting your house, both inside and out, you can ensure that your property remains in excellent condition, is protected from the elements and pests, and retains its curb appeal and interior attractiveness. With the competitive nature of the Dublin property market, it is essential to take every step possible to maintain and enhance your home’s value, and house painting is a vital part of this process.

Boosting Curb Appeal: How House Painting in Dublin Enhances Home Value

Why House Painting in Dublin is Crucial for Maintaining Your Home's Value
House painting in Dublin is a crucial aspect of maintaining your home’s value, as it not only enhances the aesthetic appeal of your property but also serves as a protective barrier against the elements. In a city known for its vibrant culture and rich history, it is essential for homeowners to invest in regular maintenance and upkeep to ensure their homes remain in top condition. This article will discuss the importance of house painting in Dublin and how it can significantly boost your home’s curb appeal and overall value.

First and foremost, a fresh coat of paint can dramatically improve the appearance of your home. Over time, paint can fade, chip, and peel due to exposure to sunlight, rain, and other environmental factors. This can leave your home looking worn and outdated, which can negatively impact its value. By investing in professional house painting services, you can revitalize your home’s exterior and create a more welcoming and attractive appearance. This is particularly important if you are considering selling your property, as potential buyers are more likely to be drawn to a well-maintained and visually appealing home.

In addition to enhancing your home’s aesthetic appeal, house painting in Dublin also serves a practical purpose by protecting your property from the elements. The city’s coastal location means that homes are often exposed to harsh weather conditions, including strong winds, heavy rainfall, and high levels of humidity. Over time, these factors can cause significant damage to your home’s exterior, leading to issues such as rot, mold, and mildew. A high-quality paint job can help to seal and protect your home’s exterior surfaces, preventing moisture from penetrating and causing costly damage.

Furthermore, house painting in Dublin can also help to improve your home’s energy efficiency. By choosing the right type of paint and color, you can effectively reflect sunlight and reduce the amount of heat absorbed by your home’s exterior. This can help to keep your home cooler during the summer months, reducing the need for air conditioning and lowering your energy bills. Additionally, a well-maintained exterior can also help to insulate your home during the colder months, preventing heat from escaping and keeping your home warmer and more comfortable.

Another important aspect of house painting in Dublin is the opportunity to address any underlying issues that may be affecting your home’s exterior. Before applying a fresh coat of paint, professional painters will thoroughly inspect your property for signs of damage, such as cracks, holes, or areas of rot. By identifying and addressing these issues early on, you can prevent further deterioration and maintain the structural integrity of your home.

In conclusion, house painting in Dublin is a crucial investment for homeowners looking to maintain and enhance their property’s value. A fresh coat of paint can significantly improve your home’s appearance, making it more attractive to potential buyers and increasing its curb appeal. Additionally, house painting serves as a protective barrier against the elements, helping to prevent costly damage and improve your home’s energy efficiency. By investing in professional house painting services, you can ensure your home remains in top condition and retains its value for years to come.

Preventing Damage: The Role of House Painting in Dublin’s Home Maintenance

House painting in Dublin is not just about giving your home a fresh and attractive appearance; it plays a crucial role in maintaining and even enhancing the value of your property. In a city known for its rich history, beautiful architecture, and vibrant culture, homeowners in Dublin need to ensure that their homes are well-maintained and protected from the elements. One of the most effective ways to achieve this is through regular house painting. This article will discuss the importance of house painting in Dublin and how it can help prevent damage and maintain your home’s value.

Firstly, house painting serves as a protective barrier for your home’s exterior surfaces. Dublin’s climate, characterized by frequent rainfall and damp conditions, can take a toll on your home’s exterior. Moisture can seep into the walls, leading to the growth of mold and mildew, which can cause structural damage and pose health risks to the occupants. By applying a fresh coat of paint, you create a barrier that prevents moisture from penetrating the walls, thus protecting your home from potential damage.

Moreover, house painting can help prevent the damage caused by exposure to ultraviolet (UV) rays. Over time, the sun’s UV rays can cause the paint on your home’s exterior to fade, crack, and peel. This not only detracts from your home’s appearance but also exposes the underlying materials to the elements, making them more susceptible to damage. A fresh coat of high-quality paint can provide protection against UV rays, ensuring that your home’s exterior remains in good condition for a longer period.

In addition to protecting your home from moisture and UV damage, house painting can also help prevent insect infestations. Insects, such as termites and carpenter ants, can cause significant damage to your home’s structure if left unchecked. By sealing any cracks or gaps in your home’s exterior with a fresh coat of paint, you can effectively deter these pests from entering your home and causing damage.

Furthermore, house painting can help you identify and address any existing damage to your home’s exterior. Before applying a new coat of paint, it is essential to thoroughly inspect and prepare the surface. This process often involves identifying and repairing any damaged areas, such as cracks, holes, or rotting wood. By addressing these issues before painting, you can prevent further damage and maintain the structural integrity of your home.

Another reason why house painting in Dublin is crucial for maintaining your home’s value is that it significantly improves its curb appeal. A well-maintained and freshly painted home is more attractive to potential buyers, which can translate into a higher resale value. In a competitive real estate market, a home with a fresh coat of paint can stand out from the rest and attract more interest from potential buyers.

Lastly, house painting can also contribute to energy efficiency. Light-colored exterior paint can reflect sunlight, helping to keep your home cooler during the summer months. This can result in lower energy bills and a more comfortable living environment for you and your family.

In conclusion, house painting in Dublin is an essential aspect of home maintenance that should not be overlooked. By protecting your home from moisture, UV damage, insect infestations, and other potential issues, you can maintain its structural integrity and preserve its value. Additionally, a fresh coat of paint can significantly improve your home’s curb appeal and contribute to energy efficiency. So, if you want to ensure that your home remains in excellent condition and retains its value, investing in regular house painting is a wise decision.

Color Trends and Home Value: The Impact of House Painting in Dublin

House painting in Dublin is a crucial aspect of maintaining your home’s value, as it not only enhances the aesthetic appeal of your property but also serves as a protective barrier against the elements. In a city known for its vibrant culture and rich history, it is essential for homeowners to keep up with the latest color trends and invest in regular house painting to ensure their homes remain attractive and well-maintained. This article will explore the impact of house painting in Dublin on home value and discuss the importance of staying up-to-date with color trends.

One of the primary reasons why house painting in Dublin is essential for maintaining your home’s value is the city’s climate. Dublin experiences a maritime climate with mild winters, cool summers, and frequent rainfall. This type of weather can take a toll on your home’s exterior, causing paint to fade, chip, and peel over time. Regular house painting not only refreshes the appearance of your home but also provides a protective layer against moisture, preventing damage to the underlying materials. By investing in professional house painting services, you can ensure that your home remains in excellent condition and retains its value in the long run.

Another factor that makes house painting in Dublin crucial for maintaining your home’s value is the impact of color trends on buyer preferences. Just as fashion trends change over time, so do popular color schemes for homes. Staying up-to-date with the latest color trends can significantly influence the perceived value of your property, as potential buyers are more likely to be attracted to homes that reflect current styles. A fresh coat of paint in a trendy color can instantly modernize your home’s appearance and increase its appeal to prospective buyers.

In addition to following color trends, it is essential to consider the specific colors that are most likely to boost your home’s value. Research has shown that certain colors can have a significant impact on the selling price of a property. For example, homes with light blue or soft gray exteriors tend to sell for more than those with white or beige exteriors. Similarly, interior colors such as light gray, pale blue, and soft green have been found to increase the perceived value of a home. By choosing colors that are both trendy and proven to enhance home value, you can maximize the return on your investment in house painting.

Furthermore, house painting in Dublin can also contribute to the overall curb appeal of your property. A well-maintained exterior with a fresh coat of paint can create a positive first impression on potential buyers, increasing the likelihood of a successful sale. In contrast, a home with peeling or faded paint may deter buyers, as it can give the impression that the property has not been well cared for. By investing in regular house painting, you can ensure that your home remains attractive and inviting, ultimately contributing to its value.

In conclusion, house painting in Dublin is a crucial aspect of maintaining your home’s value due to the city’s climate, the impact of color trends on buyer preferences, and the importance of curb appeal. By staying up-to-date with the latest color trends and investing in regular house painting, you can ensure that your home remains attractive, well-maintained, and protected against the elements. Ultimately, this will help to preserve and enhance your property’s value, making it a wise investment for any homeowner in Dublin.

Q&A

1. Question: Why is house painting in Dublin important for maintaining a home’s value?

Answer: House painting in Dublin is crucial for maintaining a home’s value because it protects the property from harsh weather conditions, prevents damage from moisture and dampness, and enhances the overall aesthetic appeal, making it more attractive to potential buyers.

2. Question: How does regular house painting in Dublin help in preventing damage to the property?

Answer: Regular house painting in Dublin helps prevent damage by providing a protective barrier against moisture, dampness, and UV rays, which can cause wood rot, mold growth, and fading of exterior surfaces. This helps maintain the structural integrity and appearance of the property, preserving its value.

3. Question: How does house painting in Dublin contribute to a home’s curb appeal?

Answer: House painting in Dublin contributes to a home’s curb appeal by giving it a fresh, clean, and well-maintained appearance. A well-painted house stands out in the neighborhood and creates a positive impression on potential buyers, increasing the likelihood of a successful sale at a higher price.

4. Question: What factors should be considered when choosing a house painting service in Dublin to maintain a home’s value?

Answer: When choosing a house painting service in Dublin, consider factors such as the company’s reputation, experience, quality of materials used, and attention to detail. A professional and reliable painting service will ensure that the job is done correctly and efficiently, helping to maintain and even increase your home’s value.

Conclusion

In conclusion, house painting in Dublin is crucial for maintaining your home’s value as it protects the property from weather damage, enhances curb appeal, prevents structural issues, and keeps the home looking fresh and updated. Regularly investing in professional painting services ensures the longevity and attractiveness of your property, ultimately preserving and potentially increasing its market value.

how to paint a room like a pro

how to paint a room like a pro

“Master the Art of Room Painting: Transform Your Space Like a Pro!”

Introduction

Painting a room like a pro requires careful planning, preparation, and execution to achieve a flawless finish. This guide will walk you through the essential steps and techniques to transform your space with a professional touch, including selecting the right tools and materials, preparing the room, applying primer and paint, and adding the finishing touches. By following these expert tips, you’ll be well on your way to creating a beautifully painted room that reflects your personal style and enhances the overall aesthetic of your home.

Top Painters’ Secrets: Achieve Professional Results in Your Home

Painting a room can be a daunting task, especially for those who have never done it before. However, with the right tools, techniques, and a little patience, anyone can achieve professional results in their home. In this article, we will reveal some of the top painters‘ secrets to help you paint a room like a pro.

First and foremost, preparation is key. Before you even think about picking up a paintbrush, it’s essential to properly prepare the room. This includes removing all furniture and fixtures, covering the floor with drop cloths, and cleaning the walls to remove any dirt, dust, or grease. If there are any holes or cracks in the walls, be sure to fill them with a suitable filler and sand them smooth. This will ensure that the paint adheres properly and that the finished result is smooth and even.

Next, it’s time to choose the right tools for the job. While it may be tempting to save money by using cheap brushes and rollers, investing in high-quality tools will make a significant difference in the final result. Look for brushes with synthetic bristles, as they are less likely to leave brush marks and are easier to clean. When it comes to rollers, choose a medium nap roller for most surfaces, as this will provide the best coverage and minimize the risk of roller marks.

Once you have your tools and the room is prepared, it’s time to start painting. Begin by cutting in the edges of the room with a brush. This involves painting a narrow strip along the edges of the walls, ceiling, and any other areas that a roller cannot reach. Be sure to use a steady hand and maintain a wet edge to avoid creating visible lines where the brushwork meets the roller work.

When it comes to rolling the walls, many people make the mistake of applying too much pressure or not using enough paint. To achieve a professional finish, it’s important to load the roller with enough paint so that it covers the surface evenly without dripping. Start by rolling the paint onto the wall in a “W” or “M” pattern, then fill in the gaps with horizontal strokes. This technique helps to distribute the paint evenly and reduces the risk of roller marks.

Another important aspect of painting a room like a pro is knowing when to apply a second coat. While it may be tempting to rush through the process, allowing the first coat to dry completely is crucial for achieving a smooth, even finish. Once the first coat is dry, inspect the walls for any areas that may need additional coverage and apply a second coat as needed.

Finally, don’t forget about the importance of proper cleanup and maintenance. Be sure to clean your brushes and rollers thoroughly after each use, as this will prolong their lifespan and ensure that they continue to provide a high-quality finish. Additionally, take the time to properly store any leftover paint, as this can be used for touch-ups in the future.

In conclusion, achieving professional results when painting a room is not as difficult as it may seem. By following these top painters’ secrets, you can transform your home with a fresh coat of paint and a flawless finish. Remember, preparation is key, and investing in high-quality tools will make all the difference. With a little patience and attention to detail, you’ll be well on your way to painting a room like a pro.

Painters Dublin Reveal Expert Techniques for Flawless Room Painting

how to paint a room like a pro
Painting a room can be a daunting task, especially for those who have never attempted it before. However, with the right tools, techniques, and guidance, anyone can achieve professional-looking results. Painters Dublin, a team of experienced professionals, have revealed their expert techniques for flawless room painting, which can be easily followed by anyone looking to give their room a fresh new look.

The first step in painting a room like a pro is to prepare the space. This involves removing all furniture and fixtures, or at least moving them to the center of the room and covering them with drop cloths or plastic sheeting. Next, remove any wall hangings, outlet covers, and switch plates. It is also essential to clean the walls thoroughly, as dirt and dust can cause the paint to adhere poorly. A simple solution of water and mild detergent should suffice, followed by a thorough rinse with clean water. Once the walls are clean and dry, it is time to repair any cracks or holes with a suitable filler, such as spackling compound or joint compound. After the filler has dried, sand the area smooth and wipe away any dust with a damp cloth.

Before beginning the painting process, it is crucial to choose the right paint and tools for the job. High-quality paint will provide better coverage and a more durable finish, while the appropriate brushes and rollers will ensure a smooth and even application. Painters Dublin recommends using a 2-inch angled brush for cutting in around edges and a 9-inch roller with a 3/8-inch nap for the main wall areas. It is also helpful to have a paint tray, roller extension pole, and a small step ladder on hand.

Once the room is prepared and the necessary tools are gathered, it is time to begin painting. Start by applying a coat of primer to the walls, especially if the existing color is dark or the wall surface is porous. Primer not only provides a uniform base for the paint but also improves adhesion and coverage. Allow the primer to dry completely before moving on to the paint.

When applying the paint, it is essential to use the proper technique to achieve a professional-looking finish. Begin by cutting in around the edges of the room with the angled brush, carefully painting a 2-3 inch wide strip along the ceiling, baseboards, and corners. This will create a clean border for the roller to meet when painting the main wall areas. When using the roller, dip it into the paint tray and roll it back and forth to evenly distribute the paint. Apply the paint to the wall in a “W” or “M” pattern, working in small sections and maintaining a wet edge to avoid lap marks. After completing a section, lightly roll over the entire area in a vertical motion to smooth out any roller marks and ensure an even finish.

Allow the first coat of paint to dry completely before assessing whether a second coat is necessary. If the coverage is not satisfactory, apply a second coat using the same technique as before. Once the final coat is dry, carefully remove any painter’s tape and replace outlet covers and switch plates.

By following these expert techniques from Painters Dublin, anyone can achieve a flawless room painting that rivals the work of a professional. With patience, attention to detail, and the right tools, a beautifully painted room is within reach for even the most inexperienced painter.

Mastering the Art of Room Painting: Tips from Professional Painters

Painting a room can be a daunting task, especially for those who have never attempted it before. However, with the right tools, techniques, and guidance, anyone can learn how to paint a room like a pro. In this article, we will explore some tips and tricks from professional painters that will help you master the art of room painting.

Before you begin, it is essential to prepare the room for painting. This includes removing all furniture, covering the floor with drop cloths, and cleaning the walls to remove any dirt, dust, or grease. If there are any holes or cracks in the walls, be sure to fill them with a suitable filler and sand the surface smooth. This will ensure that the paint adheres properly and provides a smooth, even finish.

One of the most important aspects of painting a room is choosing the right paint. High-quality paint will not only provide better coverage and durability but will also be easier to work with. When selecting a paint, consider factors such as the type of surface you are painting, the desired finish, and the room’s lighting conditions. For example, a satin or semi-gloss finish is ideal for high-traffic areas, while a flat or matte finish is better suited for low-traffic spaces.

Once you have chosen your paint, it is time to gather the necessary tools and materials. These include a paint roller, paintbrushes, a paint tray, painter’s tape, a ladder, and a paint stirrer. When selecting a paint roller, opt for one with a synthetic cover, as this will provide a smoother finish and minimize the risk of lint being left behind on the walls. For paintbrushes, choose a high-quality brush with synthetic bristles, as these will provide better coverage and minimize brush marks.

Before you begin painting, it is crucial to properly mix the paint. This can be done by stirring the paint thoroughly with a paint stirrer, ensuring that any settled pigment is evenly distributed throughout the paint. If you are using multiple cans of the same color, it is a good idea to mix them together in a larger container to ensure color consistency.

When it comes to applying the paint, professional painters recommend using a technique called “cutting in.” This involves painting the edges and corners of the room first, using a paintbrush to create a clean, straight line where the wall meets the ceiling, floor, or adjacent walls. This will provide a neat, professional-looking finish and make it easier to paint the rest of the room using a roller.

When using a paint roller, be sure to load it with enough paint to cover the entire surface evenly. Start by rolling the paint onto the wall in a “W” or “M” pattern, then fill in the gaps with horizontal and vertical strokes. This will help to distribute the paint evenly and minimize the risk of roller marks. Be sure to overlap each stroke slightly to ensure a smooth, even finish.

Once the first coat of paint has been applied, allow it to dry completely before applying a second coat. This will ensure proper coverage and a more durable finish. After the final coat has dried, carefully remove the painter’s tape and clean up any drips or spills.

In conclusion, mastering the art of room painting requires careful preparation, the right tools and materials, and a steady hand. By following these tips from professional painters, you can transform any room in your home with a fresh, professional-looking coat of paint.

Conclusion

In conclusion, to paint a room like a pro, one must carefully prepare the space, choose the right tools and paint, apply proper painting techniques, and pay attention to detail. By following these steps, a professional-looking finish can be achieved, transforming the room’s appearance and enhancing its overall aesthetic.

Call Now Button